
Introduction: Why a Clean Engine Bay Matters More Than You Think

Pop the hood of most cars, and you’ll find a grimy, dusty mess lurking under that shiny paint. But here’s the thing: a clean engine bay isn’t just about aesthetics—it’s about performance, longevity, and protecting your investment.
Many DIYers avoid engine cleaning out of fear. “What if I damage the electronics?” “Won’t water ruin something?” These concerns are valid, but with the right technique, cleaning your engine bay is safer than you think and far more rewarding than leaving years of grime to build up.
A professionally detailed engine can cost anywhere from $50 to $150+, but with the step-by-step method in this guide, you can achieve pro-level results for a fraction of that cost—often for less than $30 in supplies. Plus, you’ll gain confidence in maintaining one of your vehicle’s most neglected areas.
In this comprehensive guide, we’ll walk you through exactly how to clean your engine bay safely, what tools you need, which components to protect, and the common mistakes that can turn a simple cleaning into a headache.
What Is Engine Bay Cleaning? (And Why It Actually Matters)

Defining Engine Bay Detailing vs. Basic Cleaning
Let’s clarify the terminology. Engine cleaning focuses on removing dirt, oil, and grime from visible surfaces. Engine bay detailing, on the other hand, is a deeper process that includes degreasing, protecting sensitive components, and applying a finishing dressing for a showroom shine.
Key Benefits of a Clean Engine Bay
1. Prevents Corrosion and Component Damage
Road salt, oil leaks, and environmental debris can accelerate rust and deterioration. A clean engine allows you to spot potential issues—like cracked hoses or leaking gaskets—before they become expensive repairs.
2. Improves Cooling Efficiency
Believe it or not, heavy grime acts as insulation, trapping heat around engine components. Removing this buildup can improve heat dissipation and help your engine run cooler.
3. Boosts Resale Value
A clean engine bay signals that a vehicle has been well-maintained. Prospective buyers often equate a detailed engine compartment with overall care and reliability.
4. Enhances Pride of Ownership
There’s something deeply satisfying about lifting your hood to reveal a spotless, well-maintained engine bay. It’s a statement of automotive pride.
Myth-Busting: “You Shouldn’t Use Water on Your Engine”
This is one of the most persistent myths in car care. The truth? You absolutely can use water—when done correctly. Modern engines are designed to handle rain, humidity, and road spray. The key is using low-pressure water, covering sensitive electronics, and ensuring the engine is cool before you start.
Is It Safe to Clean Your Engine?

Modern Engines vs. Older Engines
Today’s vehicles feature extensive plastic engine covers, sealed electrical connectors, and water-resistant components. This makes them more forgiving to clean than older vehicles with exposed distributors and carburetors. That said, both can be cleaned safely with proper precautions.
Components That Need Protection
Before you spray anything, identify and cover these critical areas:
- Alternator: Water intrusion can cause electrical shorts
- Battery Terminals: Moisture can promote corrosion
- Air Intake: Water in the intake can lead to hydrolock (catastrophic engine damage)
- Fuse Box: Usually weather-resistant, but better safe than sorry
- Exposed Electrical Connectors: Especially on older vehicles
When NOT to Clean Your Engine
Avoid engine cleaning if:
- The engine is hot (wait at least 30 minutes after driving)
- You notice cracked hoses or exposed wiring
- There are active leaks that should be repaired first
- Temperatures are below freezing (water can freeze in crevices)
Tools & Supplies You’ll Need
This is your primary monetization opportunity. Group products logically and offer budget, mid-tier, and premium options.
Essential Supplies
Engine-Safe Degreaser
[Meguiar’s Super Degreaser] — Budget-friendly, biodegradable, and safe for all under-hood surfaces.
[Chemical Guys Signature Series Orange Degreaser] — Premium citrus-based formula with excellent grease-cutting power.
Microfiber Towels (Pack of 6+)
[Amazon Basics Microfiber Cleaning Cloths] — Affordable and highly absorbent.
Soft-Bristle Detailing Brushes
[Detail Factory Ultra-Soft Brush Set] — Includes various sizes for tight spaces and delicate components.
Plastic Bags & Painter’s Tape
Standard kitchen bags and blue painter’s tape work perfectly for covering sensitive electronics.
Optional but Recommended
Garden Hose with Adjustable Nozzle OR Pressure Washer (Low Setting)
[Sun Joe SPX3000 Pressure Washer] — Adjustable pressure settings make it safe for engine bays when used correctly.
Compressed Air or Leaf Blower
[WORX 20V Cordless Leaf Blower] — Perfect for drying hard-to-reach areas.
Engine Bay Dressing
[303 Aerospace Protectant] — Non-greasy UV protectant that won’t attract dust.
[Meguiar’s Ultimate Black Plastic Restorer] — Restores faded plastic and rubber trim.
Quick Comparison: Best Degreaser Options
| Product | Type | Best For | Price Range |
|---|---|---|---|
| [Simple Green] | All-Purpose | Budget-conscious DIYers | $ |
| [Meguiar’s Super Degreaser] | Concentrated | Versatility & dilution control | $$ |
| [P&S Terminator] | Heavy-Duty | Extremely dirty or neglected engines | $$$ |
Step-by-Step Guide to Cleaning Your Engine Bay

Step 1: Let the Engine Cool
Why it matters: Spraying cold water on a hot engine can cause thermal shock, potentially cracking metal components or warping plastic covers.
Best practice: Wait at least 30-45 minutes after driving. Touch the hood—if it’s still warm to the touch, give it more time.
Step 2: Disconnect the Battery (Recommended)
Safety explanation: Disconnecting the negative battery terminal eliminates any risk of electrical shorts during cleaning.
Quick how-to:
- Locate the negative terminal (marked with a “–” symbol)
- Use a 10mm wrench to loosen the nut
- Lift the cable away and secure it so it doesn’t touch the terminal
Step 3: Cover Sensitive Components
What to cover:
- Alternator
- Air intake (especially important—use a plastic bag secured with tape)
- Battery terminals
- Fuse box
- Exposed electrical connectors
Pro tip: Use plastic shopping bags and painter’s tape. Avoid duct tape, which can leave sticky residue.
Step 4: Remove Loose Dirt & Debris
Before applying any liquid, use:
- A soft-bristle brush to sweep away leaves and loose dirt
- Compressed air to blow out crevices around the firewall and battery tray
This prep step prevents dirt from turning into muddy sludge when wet.
Step 5: Apply Degreaser
How to apply:

- Spray degreaser liberally on greasy areas (valve covers, oil cap, hoses)
- Avoid saturating electrical components, even if covered
- Let it dwell for 3-5 minutes (check product instructions—some need longer)
Dwell time is critical. This is when the degreaser breaks down oil and grime chemically, reducing the need for aggressive scrubbing.
Step 6: Agitate with Brushes
Use different brushes for different surfaces:
- Soft boar’s hair brush: Painted surfaces and plastic covers
- Medium-stiff brush: Metal components and rubber hoses
- Small detailing brush: Tight crevices and around fasteners
Avoid: Wire brushes or abrasive pads, which can scratch aluminum and plastic.
Step 7: Rinse Carefully
The golden rule: Low pressure, controlled direction.
Garden hose method (safest):
Use a gentle spray nozzle and rinse from top to bottom, allowing water to flow naturally downward—not directly into connectors or openings.
Pressure washer method (advanced):
- Keep the nozzle at least 2 feet away from the engine
- Use a wide fan pattern, never a direct jet
- Stay under 1200 PSI
What NOT to do: Blast water directly at the alternator, air intake, or battery.
Step 8: Dry the Engine Bay
Why it matters: Standing water can promote corrosion and attract dirt.
Drying methods:
- Microfiber towels: Wipe down accessible surfaces
- Compressed air or leaf blower: Blow out water from crevices, around connectors, and under covers
- Air dry: Leave the hood open for 15-20 minutes in a well-ventilated area
[Recommended Tool: WORX Leaf Blower]
Step 9: Apply Engine Dressing (Optional)
Benefits:
- Restores color to faded plastic and rubber
- Provides UV protection
- Adds a subtle, professional shine
How to apply:
- Spray dressing onto a microfiber applicator pad (NOT directly on components)
- Wipe evenly onto plastic covers, hoses, and trim
- Avoid over-application—excess attracts dust
Pro tip: Use a non-greasy formula like 303 Aerospace Protectant to avoid the “wet look” that collects dirt.
Common Mistakes to Avoid
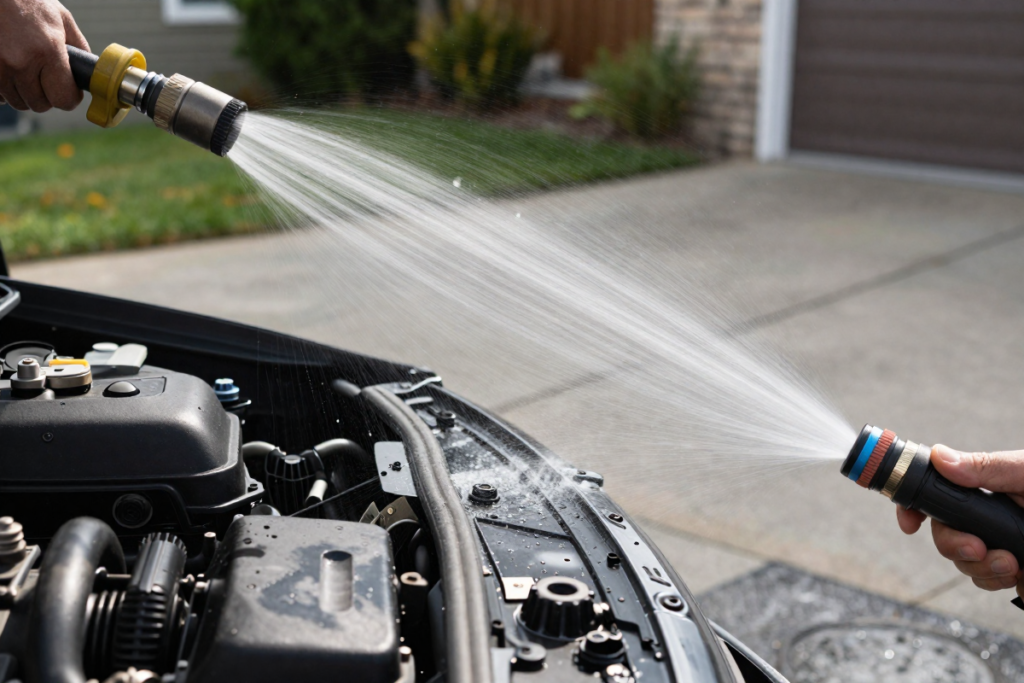
1. Using High-Pressure Water Too Close
Risk: Forcing water into sealed connectors, causing electrical gremlins.
Solution: Stay 2+ feet away and use a wide spray pattern.
2. Skipping Component Protection
Risk: Water intrusion into the alternator or air intake.
Solution: Always cover sensitive areas—it takes 2 minutes and prevents costly damage.
3. Cleaning a Hot Engine
Risk: Thermal shock, cracked components, and steam burns.
Solution: Wait until the engine is cool to the touch.
4. Using Harsh Household Chemicals
Risk: Dish soap contains salt (sodium chloride) that promotes corrosion. Bleach can damage rubber and plastic.
Solution: Use a pH-balanced, engine-safe degreaser.
5. Over-Applying Dressing
Risk: Greasy residue that attracts dust and dirt.
Solution: Less is more. Apply to an applicator, not directly to surfaces.
How Often Should You Clean Your Engine Bay?
Recommended Frequency
- Daily drivers in normal conditions: Every 3-6 months
- Show cars or enthusiast vehicles: Every 1-2 months
- Vehicles in harsh climates (snow/salt or dusty areas): Every 2-3 months
Environmental Factors to Consider
- Winter road salt: Accelerates corrosion—clean more frequently in spring
- Dusty or rural areas: Debris buildup can clog drain holes
- Coastal regions: Salt air increases rust risk
Pro Tips for a Like-New Finish
- Use a spray bottle with diluted degreaser for spot cleaning between full washes
- Work in sections (left side, right side, top) to avoid missing areas
- Add task lighting (LED work light) to spot missed grime in shadows
- Combine with full car detailing for a cohesive, professional result
- Take “before and after” photos—you’ll be amazed at the transformation
DIY vs. Professional Engine Cleaning
Cost Comparison
| Method | Cost | Time | Result Quality |
|---|---|---|---|
| DIY | $20-$40 (supplies) | 1-2 hours | Excellent (with practice) |
| Professional | $50-$150+ | 30-60 min | Excellent |
When to Choose Professional Service
- Extremely neglected engine bays (years of buildup)
- You lack tools (pressure washer, air compressor)
- Time constraints—you’d rather pay for convenience
- Warranty concerns—some owners prefer professional documentation
When DIY Makes Sense
- You enjoy hands-on maintenance
- You want to learn your vehicle’s layout
- You’re preparing for a sale and want to save money
- You take pride in doing it yourself
Frequently Asked Questions (FAQ)

Can you pressure wash an engine?
Yes, but with caution. Use low pressure (under 1200 PSI), keep the nozzle 2+ feet away, and use a wide spray pattern. Always cover sensitive electronics first.
Is engine degreaser safe for all cars?
Most modern degreasers are safe for all vehicles when used as directed. Avoid products with harsh solvents or high alkalinity. Always check the label for compatibility with aluminum, plastic, and rubber.
Will cleaning your engine cause damage?
Not if done correctly. The key is using low pressure, covering electronics, and ensuring the engine is cool. Modern engines are designed to handle moisture.
Do you need to disconnect the battery?
It’s not mandatory for most modern vehicles, but it’s a smart precaution that eliminates any risk of electrical shorts, especially on older cars.
What’s the best engine cleaner?
It depends on your needs:
- Budget: [Simple Green All-Purpose Cleaner]
- Best Overall: [Meguiar’s Super Degreaser]
- Heavy-Duty: [P&S Terminator Degreaser]
Can I clean my engine bay if I have a hybrid or EV?
Yes, but exercise extra caution around high-voltage components (usually marked with orange cables). Consult your owner’s manual and avoid spraying directly on battery packs or inverters. When in doubt, use waterless detailing products.
How do I dry my engine after washing it?
Use a combination of microfiber towels, compressed air, and natural air drying with the hood open. A leaf blower works great for hard-to-reach areas.
Will cleaning my engine help it run cooler?
Yes. Removing heavy grime improves airflow and heat dissipation, especially around the radiator and cooling fans.
What should I do if my car won’t start after an engine wash?
Check for moisture in spark plug wells or around the distributor (older cars). Use compressed air to dry these areas, and wait 30 minutes before attempting to start again. If problems persist, consult a mechanic.
How often should engine detailing be performed?
Every 3-6 months for daily drivers, more frequently for show cars or vehicles in harsh climates (salt, dust, humidity).
Conclusion: Take Control of Your Engine Bay

Cleaning your engine bay isn’t just about making your car look good—it’s about taking ownership of your vehicle’s health. By following this step-by-step guide, you’ve learned how to safely remove years of grime, protect sensitive components, and restore your engine compartment to like-new condition.
The benefits are clear:
- Improved cooling and performance
- Easier leak detection
- Increased resale value
- Pride in a job well done
And the best part? You’ve done it yourself, saved money, and gained valuable knowledge about how your vehicle works.
Ready to Get Started?
Grab the cleaning products & tools mentioned in this article, set aside a weekend afternoon, and tackle your engine bay like a pro. Save this guide for your next detailing session, and don’t forget to take before-and-after photos—you’ll be amazed at the transformation.
Have questions or tips of your own? Share your engine cleaning results in the comments below. Happy detailing!
Disclaimer: This article contains affiliate links. If you purchase an item through the link I will earn a small commission at no extra cost to you.