Your car’s wheels are more than just functional components—they’re the crowning jewels that complete its look. Yet, they’re also the first to betray the wear and tear of daily driving. Brake dust, road grime, and stubborn dirt can dull their shine, leaving your entire vehicle looking tired and neglected. Imagine pulling into a parking lot, and instead of gleaming rims, you’re met with lackluster, dirty wheels. Not a great first impression, right? But with the right techniques and tools, you can transform those dingy wheels into head-turning, showroom-ready stunners. Whether you’re prepping for a car show or just want to drive with pride, knowing how to clean your wheels properly is an essential skill. Let’s dive into the secrets of achieving that dazzling, just-off-the-lot look that will make your car the envy of the road.
Introduction: The Importance of Clean Wheels
Why Clean Wheels Matter: First Impressions and Maintenance
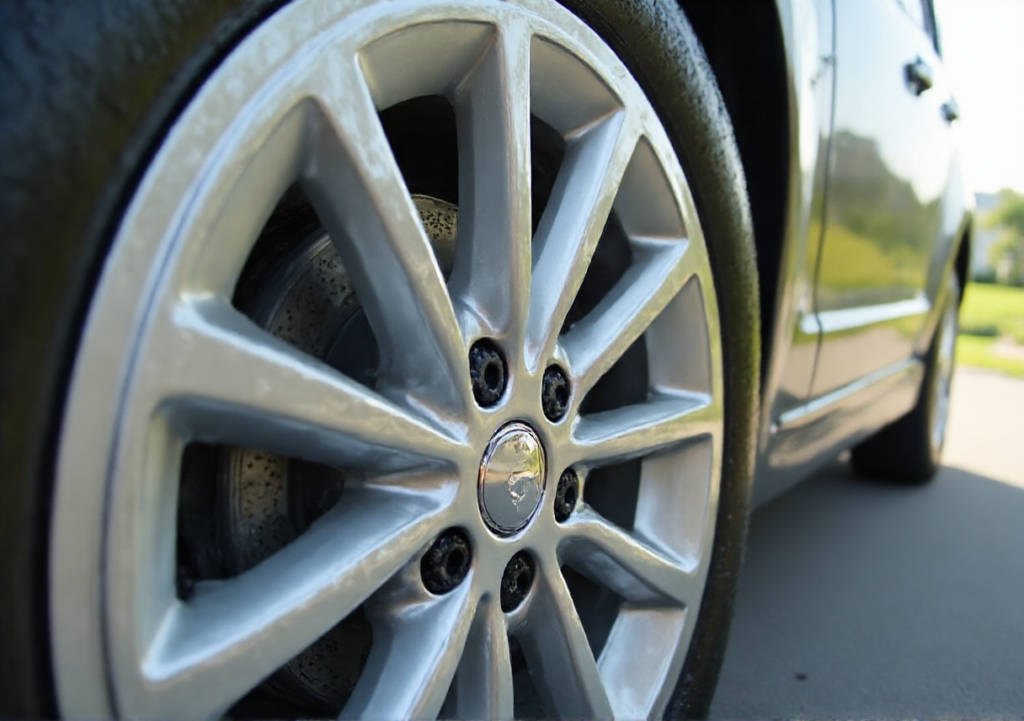
When it comes to making a statement on the road, nothing speaks louder than a set of impeccably clean wheels. They’re the unsung heroes of your car’s appearance, often overlooked yet crucial in creating that polished, head-turning look. Picture this: you’ve just spent hours waxing and polishing your car’s body, but if the wheels are dull, covered in brake dust, and grime, the overall effect falls flat. Clean wheels aren’t just about aesthetics—they’re a vital part of regular vehicle maintenance. Over time, brake dust, road salt, and other contaminants can cause irreversible damage if left unchecked. By regularly cleaning your wheels, you’re not only keeping them looking pristine but also extending their lifespan, preventing corrosion, and saving yourself from costly repairs down the line.
The Role of Wheel Care in Your Car’s Overall Appearance
Your car’s wheels are like the shoes that complete an outfit—they might not be the first thing people notice, but they’re certainly the detail that makes or breaks the look. Imagine rolling up to an event with your car sparkling clean, the paint gleaming under the sun, but your wheels are caked with dirt and dust. It doesn’t matter how shiny the rest of your car is; those dirty wheels will steal the spotlight for all the wrong reasons. Clean wheels add that extra level of sophistication and care to your vehicle. They reflect the pride you take in your car, showcasing that you don’t just care about how it drives, but also how it’s perceived. Whether you’re a car enthusiast or someone who simply enjoys the satisfaction of a clean vehicle, taking the time to properly care for your wheels is an investment in your car’s overall aesthetic appeal.
Common Mistakes to Avoid When Cleaning Wheels
Cleaning your wheels might seem straightforward, but it’s easy to fall into common traps that can do more harm than good. One of the biggest mistakes is using the wrong cleaning products. Harsh chemicals can strip the finish from your wheels, leaving them vulnerable to corrosion. Always opt for cleaners specifically designed for your wheel type, like Meguiar’s Ultimate All Wheel Cleaner, which is formulated to be tough on grime but gentle on your wheels. Another frequent error is neglecting to rinse thoroughly. Leaving cleaner residue on your wheels can cause streaks and even damage the finish over time. It’s essential to rinse well and dry with a microfiber towel to avoid water spots. Lastly, skipping regular maintenance is a surefire way to allow dirt and grime to build up, making the cleaning process much more difficult. By incorporating wheel cleaning into your regular car care routine, you can avoid these pitfalls and keep your wheels looking their best year-round.
Properly maintained wheels aren’t just about looks—they’re a testament to your vehicle’s overall health and your attention to detail as an owner. Taking the time to care for your wheels will not only enhance your car’s appearance but also preserve the integrity of one of its most crucial components. So, the next time you wash your car, don’t forget to give your wheels the attention they deserve. They’re not just the finishing touch; they’re the foundation of your car’s good looks.
Essential Tools and Supplies for Cleaning Wheels
Must-Have Cleaning Products for a Professional Finish
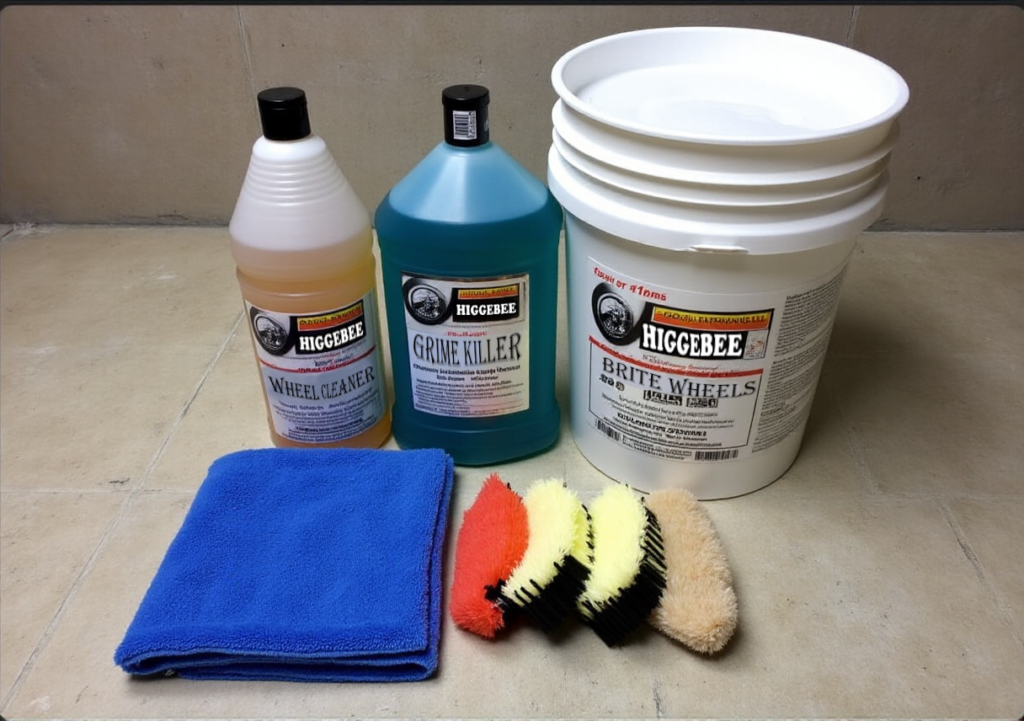
Achieving that showroom-ready look isn’t just about elbow grease—it’s about using the right products that do the job without damaging your wheels. A professional finish begins with the essentials: a high-quality wheel cleaner, a protective polish, and a sealant to lock in that shine. For most car enthusiasts, these three items form the holy trinity of wheel care. But not all products are created equal. Your cleaner should be tough on dirt but gentle on your wheels’ finish. A reliable polish will remove any residual grime and enhance the shine, while a durable sealant will protect against future damage. Choosing the right products can make all the difference in how your wheels look after a good cleaning session.
Why Meguiar’s Products Are Top Choice for Wheel Care
When it comes to wheel care, Meguiar’s is a name that stands out in the crowd. Known for their high-performance formulas, Meguiar’s products have been trusted by car enthusiasts and professionals alike for decades. Their Ultimate All Wheel Cleaner, for instance, is a game-changer—designed to dissolve stubborn brake dust and road grime with minimal effort. The best part? It’s safe for all wheel finishes, so you can use it with confidence whether you’re cleaning alloy, chrome, or painted wheels. Meguiar’s Hot Rims Metal Polish is another favorite, leaving your wheels with a mirror-like shine that’s hard to beat. And for that extra layer of protection, their Wheel Sealant offers long-lasting defense against the elements, ensuring your wheels stay clean and shiny for longer.
Alternative Quality Brands for Wheel Cleaning Supplies
While Meguiar’s is a go-to for many, there are other quality brands out there that deliver excellent results. For those who like to explore alternatives, consider brands like Chemical Guys and Griot’s Garage. Chemical Guys Wheel Cleaner is a formidable contender, offering a powerful formula that cuts through grime while being environmentally friendly. Griot’s Garage also offers a range of wheel care products, including their Heavy Duty Wheel Cleaner, which is perfect for tackling the toughest dirt. Each brand brings something unique to the table, so don’t be afraid to experiment and find what works best for your specific needs.
The Right Brushes, Cloths, and Towels for the Job
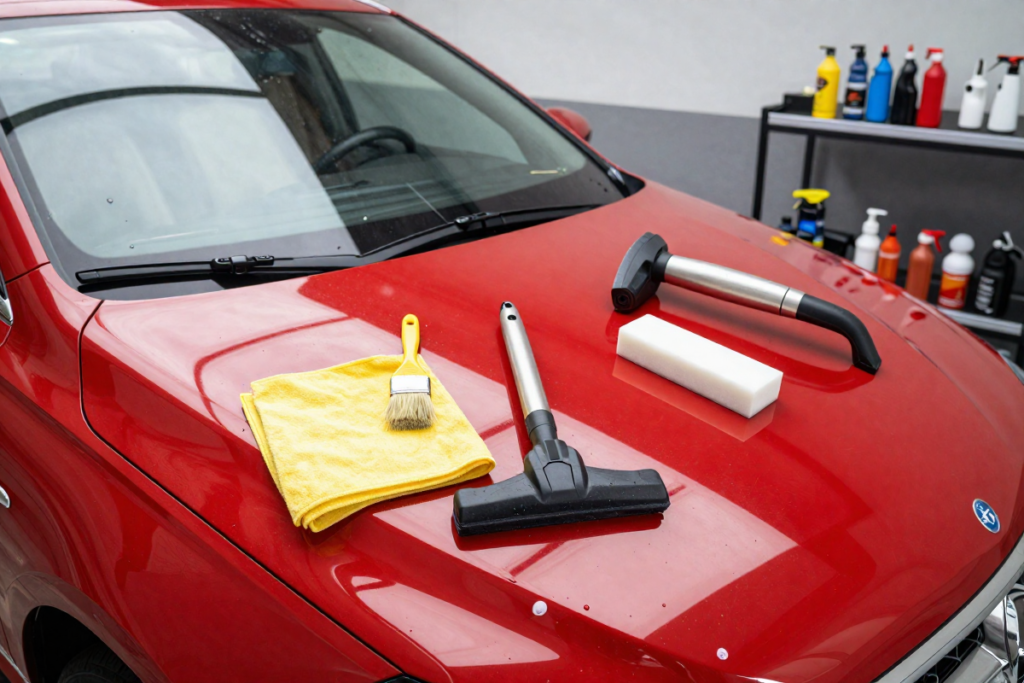
Having the right tools on hand is just as important as the products you use. A high-quality wheel brush is a must for getting into those hard-to-reach areas, like the lug nuts and the inside of the rim. Look for brushes with soft, synthetic bristles that won’t scratch your wheels. Microfiber cloths are another essential—they’re perfect for wiping down your wheels after rinsing and applying polish without leaving behind lint or streaks. And don’t forget about a dedicated drying towel. A large, absorbent microfiber towel will make quick work of drying your wheels, preventing water spots and streaks from forming. Investing in the right tools will not only make the cleaning process easier but will also help you achieve a professional-level finish every time.
With the right products and tools, cleaning your wheels can be a satisfying part of your car care routine, delivering results that make your car look like it just rolled off the showroom floor. Whether you stick with the tried-and-true Meguiar’s products or explore other high-quality brands, the key is consistency and care. With a little effort and the right supplies, your wheels will stay looking their best, mile after mile.
Pre-Cleaning Prep: Getting Ready to Shine
How to Safely Jack Up Your Car for Easy Access
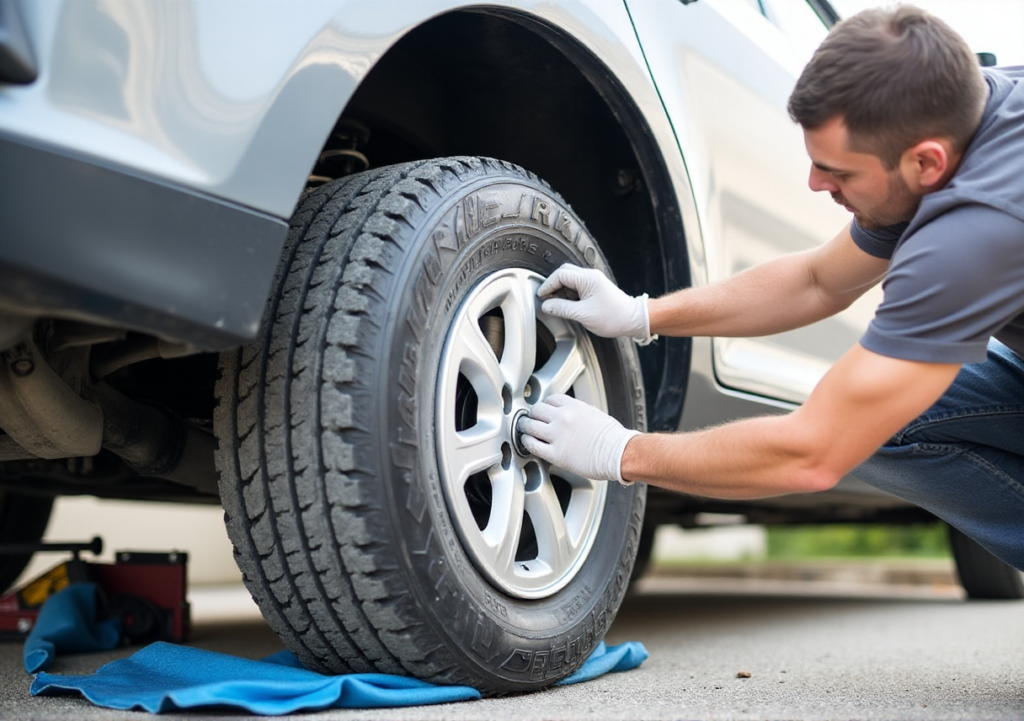
Before you start your wheel cleaning routine, it’s essential to ensure your wheels are easily accessible and safe to work on. Jacking up your car might sound daunting, but with the right approach, it’s a straightforward process. First, make sure you’re on a level surface—this is non-negotiable for safety. Engage the parking brake, and place wheel chocks behind the tires that won’t be lifted. Locate your car’s jacking points, usually outlined in the owner’s manual, and position the jack securely under these points. Slowly lift the car until the wheels are off the ground and secure the vehicle with jack stands. This step not only gives you better access to the wheels but also allows you to clean the entire surface area, including those hidden spots on your car rims you can’t reach when the car is on the ground.
Protecting Your Tires and Surrounding Area
Now that your car is lifted and stable, it’s time to prep the area around your wheels. Start by covering your tires with a protective cloth or plastic sheet. This prevents any cleaning solutions for wheels from accidentally splashing onto the rubber, which can cause discoloration or damage if they’re not specifically designed for tire and wheel care. Next, consider placing a tarp or old towels under the car to catch any drips or runoff from the cleaning process. This not only keeps your driveway clean but also ensures that you don’t leave a mess behind when you’re done. It’s all about working smart—protecting the surrounding area means you can focus entirely on getting those wheels to shine without worrying about unintended consequences.
Spotting Trouble Areas: Dirt, Brake Dust, and Grime Buildup
Before diving into the cleaning process, take a moment to inspect each wheel closely. This step is crucial because it helps you identify the trouble spots that need extra attention. Look for areas with heavy brake dust removal needed, which often accumulates in the crevices around the spokes and lug nuts. Dirt and grime tend to settle in the tight spaces where the wheel meets the brake caliper, and these areas can be stubborn to clean if not addressed properly. If you notice any spots with caked-on dirt or grime, make a mental note to give these areas a little extra elbow grease during the cleaning process. Identifying these trouble spots early ensures that you can tackle them effectively, leaving no part of the wheel untouched and guaranteeing a spotless finish.
Getting your wheels ready to shine starts with proper preparation. By safely lifting your car, protecting your tires and surrounding area, and identifying the dirtiest spots, you’re setting yourself up for success. This pre-cleaning routine might seem like extra work, but it’s what separates an average wheel cleaning from a truly professional detailing job. When you take the time to prepare, you’re not just cleaning your wheels—you’re ensuring they’ll look their absolute best once you’re done. So, roll up your sleeves and get ready to transform those wheels from dull to dazzling, one step at a time.
Step-by-Step Guide to Cleaning Wheels on Car
Rinse First: Removing Loose Dirt and Debris
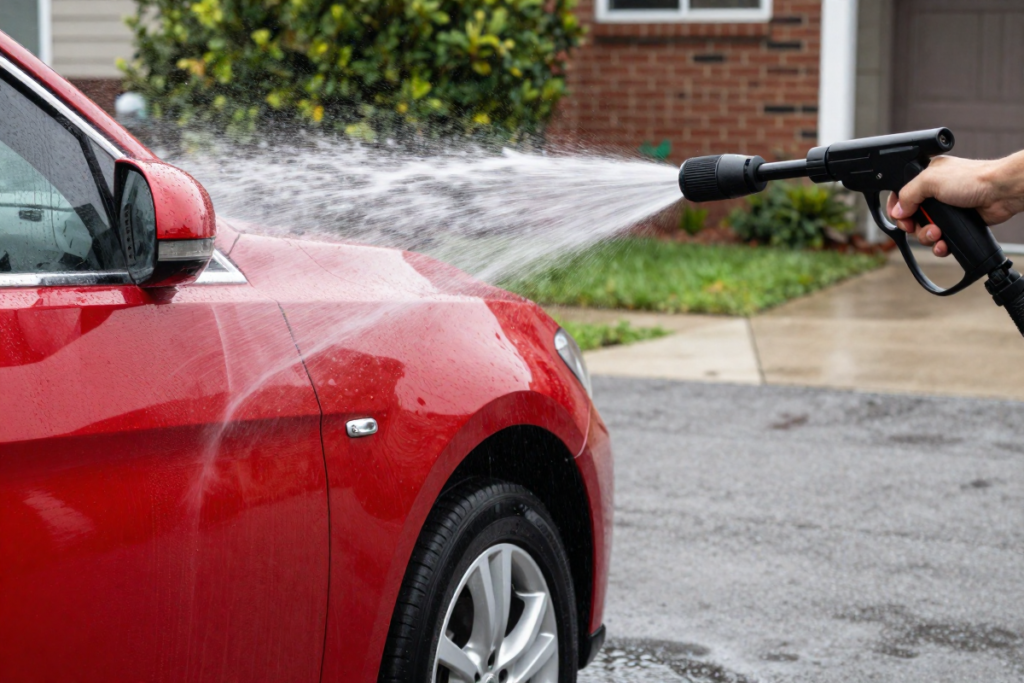
The first step in transforming your wheels from drab to dazzling is a thorough rinse. Begin by using a hose or pressure washer to remove loose dirt, dust, and debris. This step is crucial because it washes away the surface grime, making the cleaning process much easier and more effective. Start at the top of each wheel and work your way down, ensuring that every part is rinsed. By doing this, you prevent scratching the surface with particles that could be lingering on your wheels. A proper rinse sets the stage for deeper cleaning and ensures that your wheel cleaner can work its magic without interference.
Applying Wheel Cleaner: Why Meguiar’s Wheel Cleaner Stands Out
With the initial rinse complete, it’s time to bring out the big guns—your wheel cleaner. Meguiar’s Ultimate All Wheel Cleaner is a top choice for a reason. Its powerful formula is designed to break down even the toughest brake dust and road grime, all while being gentle on your wheels’ finish. Whether you’re dealing with alloy wheels, chrome wheels, or high-performance wheels, this cleaner can handle it all. Spray the cleaner generously onto the wheel, making sure to cover all areas, including the spokes, lug nuts, and the inner barrel of the wheel. Allow the cleaner to sit for a few minutes, but don’t let it dry. This dwell time is when the cleaner starts working on the grime, lifting it away from the surface. Meguiar’s cleaner stands out because it changes color as it works, giving you a visual cue that it’s breaking down the dirt. This feature not only adds a bit of satisfaction but also ensures you know when it’s time to move on to the next step.
Scrubbing Technique: Getting into the Nooks and Crannies
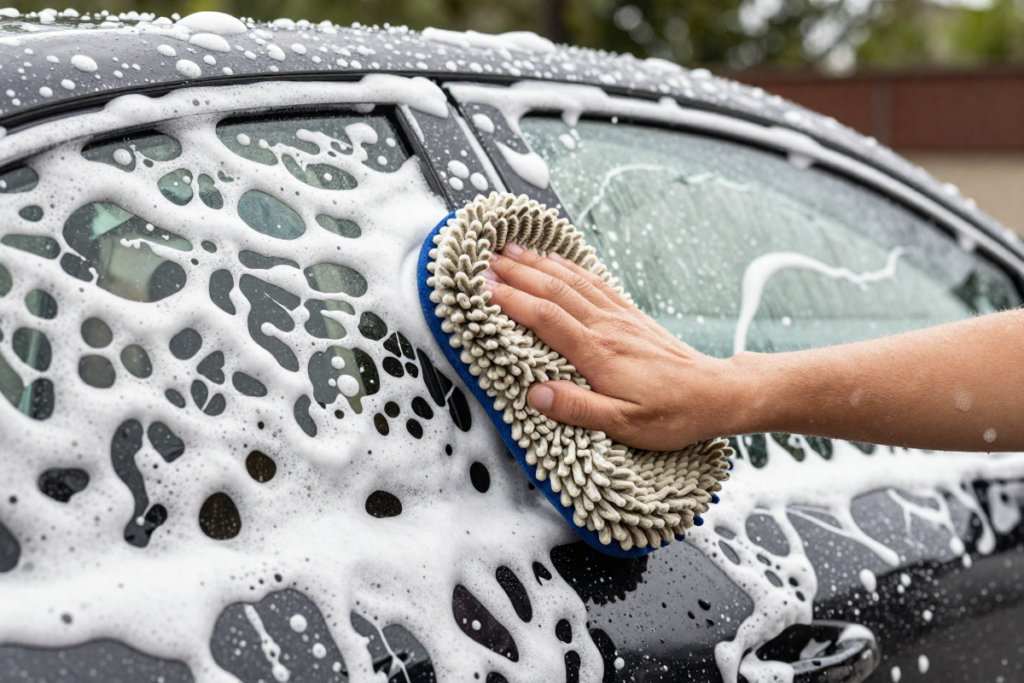
Now comes the part that requires a bit of elbow grease—scrubbing. Armed with a good wheel brush, preferably one with soft, non-scratch bristles, start scrubbing the wheel, focusing on those tricky spots like around the lug nuts and in between the spokes. Use a back-and-forth motion, applying steady pressure to dislodge any stubborn grime. Don’t forget to clean the inner barrel of the wheel, as this area often accumulates the most dirt. For tight spaces, a smaller detailing brush can be incredibly helpful. Take your time here; meticulous scrubbing ensures that no part of the wheel is left untouched. The goal is to reach every nook and cranny, ensuring a thorough clean that will leave your wheels sparkling.
Rinsing Off: The Right Way to Avoid Streaks
After you’ve scrubbed each wheel to your satisfaction, it’s time for another rinse. But this one is just as important as the first. Use a hose or pressure washer to thoroughly rinse away all traces of the wheel cleaner and loosened dirt. Start from the top and work your way down, ensuring that all the cleaner is washed away. Any residue left behind can cause streaking or water spots, so take your time and be thorough. If possible, use filtered water to avoid mineral deposits that can leave spots on your freshly cleaned wheels. Finally, dry your wheels with a microfiber towel to prevent water spots and give your wheels a brilliant, streak-free finish. This final step locks in all your hard work, leaving your wheels looking their absolute best.
By following these steps, you’ll be able to achieve a professional-level clean that not only enhances the appearance of your car but also protects your wheels from the wear and tear of daily driving. Incorporating products like Meguiar’s into your car care routine will ensure your vehicle’s appearance stays top-notch. Whether you’re a seasoned car enthusiast or just someone who takes pride in a clean ride, this step-by-step guide will help you get those wheels showroom-ready in no time.
Dealing with Stubborn Stains and Brake Dust
How to Tackle Caked-On Dirt with Meguiar’s Ultimate All Wheel Cleaner
Stubborn stains and caked-on dirt can be the bane of wheel cleaning, but Meguiar’s Ultimate All Wheel Cleaner is up to the challenge. This powerful formula is designed to handle the most obstinate grime, breaking it down efficiently without harming your alloy wheels or chrome wheels. For particularly tough spots, apply the cleaner liberally and let it dwell a bit longer than usual. This extended contact time allows the cleaner to penetrate deeper into the dirt and brake dust, loosening it for easier removal. After applying, use a wheel brush to agitate the cleaner, focusing on the areas with the most buildup. Meguiar’s cleaner will change color as it works, providing a visual confirmation that it’s breaking down the stubborn stains. Rinse thoroughly to ensure that all the cleaner and loosened dirt are washed away, leaving your wheels looking fresh and spotless.
Alternative Methods for Removing Tough Stains
Sometimes, even the best cleaners need a bit of extra help. If you’re dealing with particularly persistent stains or brake dust that won’t budge, there are alternative methods worth trying. One effective approach is using a clay bar treatment, which can lift contaminants embedded in the wheel’s surface that regular cleaners can’t reach. Simply lubricate the area with a clay lubricant and gently rub the clay bar over the stains. Another option is to use a specialized wheel cleaning gel or paste, which can cling to the dirt and brake dust, providing a more intense cleaning action. Apply the gel or paste according to the manufacturer’s instructions, allowing it to sit for a few minutes before scrubbing and rinsing. These alternative methods can be a game-changer for wheels that require a little extra attention to achieve a pristine finish.
When to Consider a Second Application
In some cases, one application of cleaner just isn’t enough to tackle all the grime. If after your initial cleaning, you find that some stains or brake dust are still lingering, don’t hesitate to apply a second round of Meguiar’s Ultimate All Wheel Cleaner or your chosen product. Reapply the cleaner in the same manner, ensuring it covers the troublesome areas thoroughly. Allow it to dwell once more, then scrub and rinse as before. A second application can be particularly effective if you’re dealing with extremely dirty wheels or if you’ve left the buildup untreated for a while. This extra step ensures that you’re not just masking the dirt but removing it completely, leading to a truly spotless finish that will keep your wheels looking their best.
Dealing with stubborn stains and brake dust removal doesn’t have to be a headache. With the right products and techniques, you can conquer even the most challenging grime. Meguiar’s Ultimate All Wheel Cleaner, along with alternative methods and a second application when needed, will ensure your wheels stay pristine, enhancing the overall vehicle appearance. Embrace these strategies and enjoy the satisfaction of wheels that shine with a showroom-quality gleam, every time you drive.
Polishing and Protecting Your Wheels
The Benefits of Wheel Polish: Adding Extra Shine
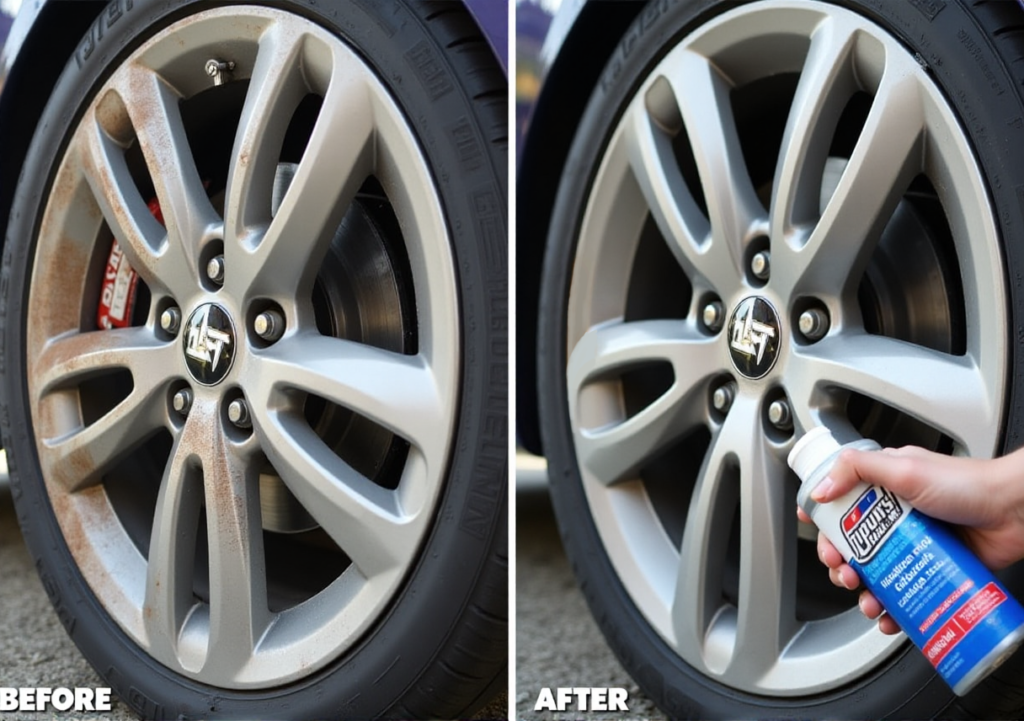
Once you’ve cleaned your wheels to perfection, the next step is to elevate their appearance with a good wheel polish. Wheel polish not only adds a dazzling wheel shine but also helps to smooth out any micro-scratches or imperfections that may remain after rim cleaning. It’s like giving your wheels a luxurious spa treatment that enhances their luster and brings out a deeper, richer finish. The polish fills in minor blemishes, giving your wheels that glossy, mirror-like quality that catches the eye. Applying polish is especially beneficial if you want your wheels to look their absolute best, reflecting light and showcasing your car’s overall detail.
Using Meguiar’s Hot Rims Metal Polish for a Mirror Finish
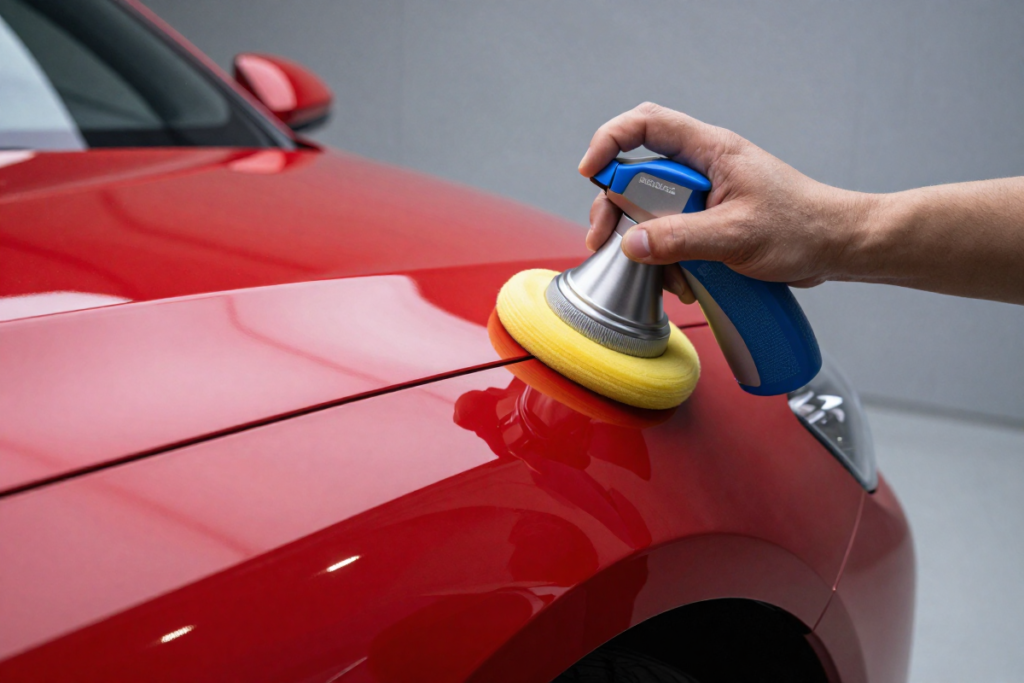
When it comes to achieving a mirror-like finish, Meguiar’s Hot Rims Metal Polish stands out as an exceptional choice. This high-performance polish is designed to restore and enhance the shine of chrome wheels and alloy wheels, including aluminum surfaces. To use, apply a small amount of the polish onto a clean microfiber towel and gently rub it into the wheel using circular motions. The formula works to remove oxidation and grime while imparting a brilliant, reflective finish. For best results, apply the polish in a well-ventilated area and avoid over-applying, as a thin layer is often sufficient to achieve that striking mirror effect. Meguiar’s Hot Rims Metal Polish ensures your wheels will dazzle and shine, adding a touch of elegance to your vehicle.
Sealing the Deal: Applying a Protective Coating
After polishing, it’s crucial to seal the deal with a protective coating. This final step not only locks in the shine but also provides a barrier against future grime and contaminants. A good wheel sealant forms a protective layer over the polished surface, making it easier to clean and less susceptible to damage from brake dust, road salt, and other environmental factors. Apply the sealant according to the manufacturer’s instructions, usually by applying a thin layer and allowing it to cure before buffing off any excess. This protective sealant will help maintain the pristine condition of your wheels and ensure they continue to look their best for longer periods.
Comparing Top Wheel Sealants for Long-Lasting Protection
Choosing the right wheel sealant is essential for long-lasting protection. There are several top-rated options available, each offering different benefits. Meguiar’s Ultimate Wheel Cleaner is known for its advanced formula that provides excellent protection against brake dust and road grime. Another popular choice is Chemical Guys Wheel Guard, which offers durable protection and repels water effectively. For those seeking a high-tech solution, Griot’s Garage Wheel Sealant uses polymer technology to create a tough, long-lasting shield. Compare these options based on your needs and preferences to find the best products for wheels. Each product provides robust protection, so selecting one depends on your desired level of durability and ease of application.
By polishing and protecting your wheels, you’re not just enhancing their appearance but also investing in their longevity. The shine from a quality polish and the protective barrier from a top-notch sealant ensure that your wheels remain pristine and eye-catching, mile after mile. With these steps, your wheels will not only look great but also withstand the rigors of daily driving with ease.
Caring for Different Wheel Types
Cleaning Alloy vs. Chrome vs. Steel Wheels: What You Need to Know
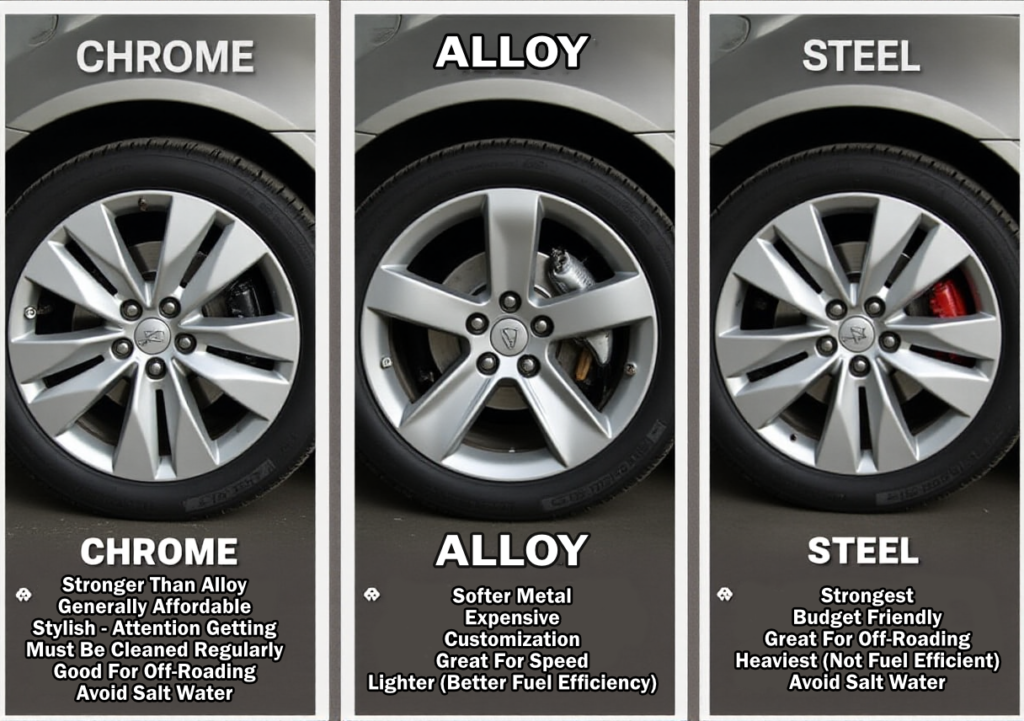
When it comes to car wheel care, understanding the different types of wheels and their specific care requirements is crucial. Alloy wheels, known for their lightweight and stylish appearance, generally require regular wheel cleaning with pH-balanced cleaning solutions for wheels. These automotive cleaning supplies are designed to lift brake dust and grime without damaging the alloy finish. Chrome wheels, on the other hand, demand a bit more attention. They can be prone to tarnishing and require a non-abrasive metal polish that restores shine and prevents surface corrosion. Steel wheels, often found on more utilitarian vehicles, are more robust but can still rust if not properly cared for. Use a degreaser for wheels and a sturdy brush to scrub away dirt and grime, followed by a protective sealant to prevent rusting. Each type of wheel has its unique wheel maintenance needs, so tailoring your approach ensures they all stay in top shape.
Special Tips for Maintaining Painted and Powder-Coated Wheels
Painted and powder-coated wheels offer a unique look but come with their own set of car care routine maintenance requirements. Painted wheels need gentle cleaning agents to avoid damaging the finish. Opt for safe cleaning products like a mild, pH-balanced wheel cleaner and avoid harsh chemicals or abrasive detailing brushes that can scratch the paint. For powder-coated wheels, which have a more durable finish, you can use slightly stronger cleaners but still avoid anything too abrasive. Regular wheel cleaning and applying a protective coating can help preserve the finish and prevent fading or chipping. Both types benefit from periodic inspections to catch and address any minor issues before they become major problems, ensuring your vehicle’s appearance remains impeccable.
Avoiding Damage: Products to Use and Products to Avoid
Selecting the right products for car detailing is essential to avoid causing damage to your wheels. Avoid using general-purpose household cleaners or strong acids, as these can damage the finish or strip away protective coatings. Instead, use wheel-specific cleaning methods for wheels that are formulated for the type of finish you’re working with. For example, avoid using an all-purpose cleaner on chrome wheels; instead, choose a cleaner designed for chrome. Similarly, steer clear of abrasive pads or brushes, which can scratch delicate finishes. Opt for soft, microfiber towels and non-abrasive wheel scrubbers to safely clean all wheel types. Paying attention to the products you use—and avoiding those that can cause harm—ensures your wheels remain in excellent condition and continue to enhance your vehicle’s overall appearance.
Understanding how to care for different wheel types helps maintain their shine and longevity. Whether dealing with alloy, chrome, steel, painted, or powder-coated wheels, using the right cleaning methods and techniques ensures that your wheels stay pristine and perform well over time. With proper care, your wheels will not only look great but also continue to complement your vehicle’s overall style and high-performance.
DIY vs. Professional Wheel Cleaning
When to Clean Your Wheels at Home vs. Hiring a Professional
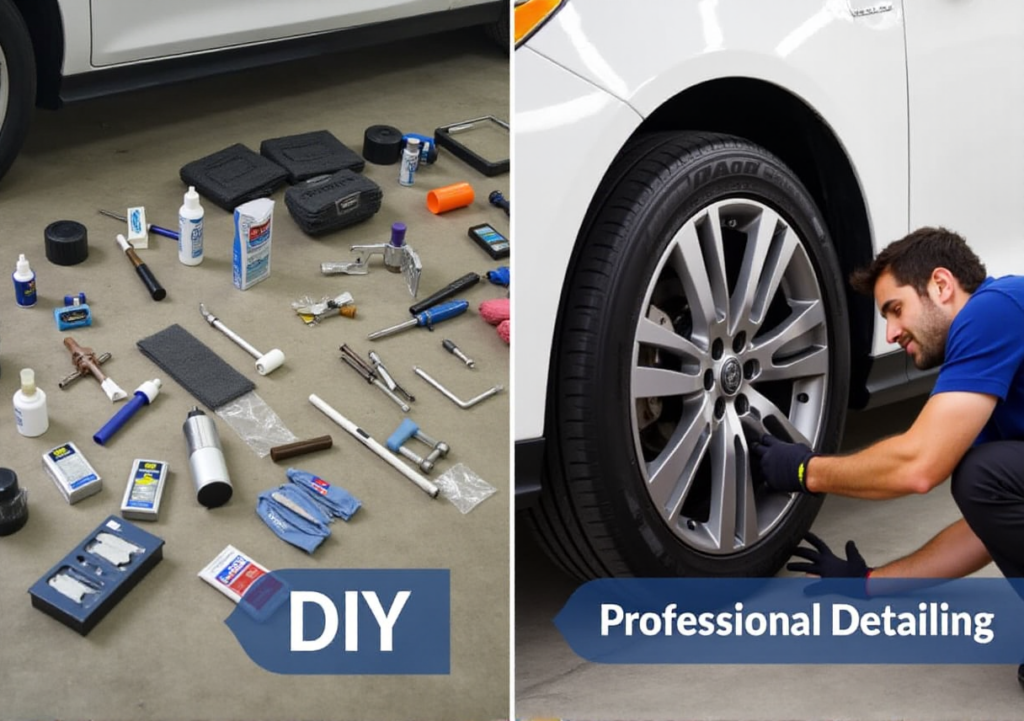
Deciding whether to tackle DIY wheel cleaning yourself or hire a professional often depends on a few key factors. If your wheels are in decent shape and you’re comfortable with basic car washing techniques, DIY cleaning can be a rewarding and cost-effective option. Cleaning wheels at home allows for a personalized approach, with control over the products and techniques used, such as using detailing brushes and tire protectant for a thorough job. However, if your wheels are heavily soiled, have significant brake dust removal needs, or are in need of specialized treatment, professional detailing might be the better route. Professionals have access to advanced tools, such as heavy-duty wheel cleaner and high-grade protective sealants, that can effectively address tougher grime and restore your wheels to their original brilliance. Ultimately, the choice between DIY and professional cleaning should consider both the condition of your wheels and your confidence in handling the cleaning process.
Cost Comparison: DIY Supplies vs. Professional Services
When evaluating the cost of wheel cleaning, comparing DIY supplies to professional services is crucial. DIY cleaning typically involves purchasing various products, such as wheel cleaners, car polish, wheel brushes, and sealants, often from brands like Meguiar’s products. While the upfront investment in high-quality supplies may seem steep, these products can be used multiple times, offering long-term value. On the other hand, professional cleaning services usually come with a one-time fee, which can vary based on the extent of the service and the condition of your wheels. Although professional services might appear more expensive initially, they often include thorough cleaning, tire sidewall cleaning, polishing, and rust prevention protection that can justify the cost. Weighing these factors helps you determine whether the investment in professional cleaning or the cost of DIY supplies aligns better with your needs and budget.
Pros and Cons of Professional Detailing Services
Professional auto detailing services offer a range of benefits, but they also come with some trade-offs. On the plus side, professionals bring expertise, specialized equipment, and best products for wheels that can achieve superior results. They can tackle severe grime, surface contaminants, stubborn stains, and delicate finishes with precision, ensuring that your wheels are cleaned and protected to the highest standard. Additionally, using a professional service saves you time and effort, allowing you to enjoy a pristine finish without the hassle of doing it yourself.
However, there are downsides to consider. Professional services can be pricey, especially if you opt for high-end detailing packages that include surface preparation, wheel coating, and UV protection for wheels. Additionally, the frequency of professional cleanings might be less than what you can achieve with regular DIY maintenance. Some services may also have limited availability or scheduling constraints. Weighing these pros and cons helps you decide if the benefits of professional detailing align with your expectations and budget, or if DIY cleaning provides sufficient value and satisfaction.
Whether you choose to clean your wheels at home or enlist the help of a professional, understanding the differences and making an informed decision ensures your wheels stay in top condition. Both approaches have their merits, and the right choice depends on your specific needs, preferences, and budget. By keeping your wheels well-maintained, you contribute to the overall vehicle detailing and enhance your car’s longevity and aesthetic appeal.
Maintaining Clean Wheels: Regular Care Tips
How Often Should You Clean Your Car’s Wheels?
Maintaining pristine wheels is about consistency. Ideally, you should perform regular wheel cleaning every 2 to 4 weeks. Frequent cleaning helps prevent the buildup of brake dust, road grime, and other contaminants that can dull the finish and cause long-term damage. If you drive in harsh conditions—such as frequent rain, snow, or on gritty roads—consider cleaning your wheels more often to counteract the effects of these elements. Incorporating wheel maintenance into your car care routine is essential. For those who prefer a less frequent schedule, a monthly car wash that includes thorough tire cleaning and rim cleaning should suffice. However, always be attentive to any visible grime, dirt, and grime, or brake dust that may accumulate between sessions. Regular care keeps your wheels looking sharp and protects your investment in both time and automotive cleaning supplies.
Quick Maintenance Tips for Keeping Wheels Looking New
Keeping your wheels looking brand new doesn’t have to be a time-consuming task. Start by rinsing off loose dirt and brake dust every time you wash your car. This simple step prevents buildup and reduces the need for heavy-duty wheel scrubbers or a heavy-duty wheel cleaner. Use a gentle, pH-balanced wheel cleaner regularly to maintain the finish without risking damage, especially on alloy wheels and chrome wheels. A quick wipe down with a microfiber towel after washing can also help remove any remaining water spots and keep the wheels gleaming. Additionally, applying a protective sealant or tire protectant every few months enhances the wheels’ resistance to grime and makes future cleaning easier. Small, consistent efforts can make a big difference in preserving the wheel shine and extending the life of your wheels.
Seasonal Wheel Care: Adapting to Weather Conditions
Adapting your wheel care routine to seasonal weather conditions ensures optimal maintenance throughout the year. In the winter, road salt and grime can quickly accumulate and cause rust or surface corrosion. To combat this, clean your wheels more frequently and consider applying a winter-specific wheel coating or a protective sealant designed to repel salt and prevent rust. During the summer, the heat can exacerbate the effects of brake dust, making regular cleaning crucial. Use a high-quality wheel cleaner to tackle the buildup and apply a protective coating to shield against UV protection for wheels. In fall and spring, falling leaves and pollen can also impact your wheels, so regular rinsing and gentle cleaning methods for wheels can help remove these elements and prevent any lasting damage. Adjusting your maintenance routine based on the weather conditions helps preserve the appearance and integrity of your wheels year-round.
By following these regular care tips, you’ll keep your wheels in top condition, ensuring they remain a standout feature of your vehicle. Consistent cleaning, quick maintenance, and seasonal adjustments all contribute to maintaining that showroom-ready look, allowing you to enjoy the full benefits of your vehicle’s appearance and performance.
Troubleshooting Common Wheel Cleaning Problems
What to Do When Wheel Cleaner Isn’t Working
Sometimes, despite your best efforts, wheel cleaner might not deliver the results you expect. If your cleaner isn’t effectively removing grime or brake dust, start by ensuring you’re using the right cleaning agents for your wheel type and condition. Check the product label to confirm it’s suitable for your specific wheels and that you’re following the recommended application instructions. If the cleaner isn’t performing as expected, it could be due to a buildup of surface contaminants that require a more robust solution. Consider trying a different cleaner formulated for tougher grime or brake dust removal. Additionally, allowing the cleaner to sit for a few minutes before scrubbing can give it time to break down stubborn residues. For extreme cases, a multi-step cleaning process or a clay bar treatment might be necessary to remove embedded contaminants before applying a new cleaner.
How to Fix Scratches and Scuffs on Wheels
Scratches and scuffs on wheels can detract from their overall appearance, but addressing these issues can restore their look. For minor scratches, start by using a wheel-specific polish or metal polish designed to smooth out imperfections. Apply the polish with a soft microfiber cloth, following the product’s instructions to blend the scratch with the surrounding surface. For deeper scratches, consider using a touch-up paint kit matched to your wheel’s color. Carefully apply the paint using a fine brush and allow it to dry thoroughly before polishing the area to blend it seamlessly with the rest of the wheel. If the damage is extensive or if you’re unsure about the repair process, seeking professional detailing help can ensure a more precise and lasting fix.
Addressing Rust and Corrosion Issues
Rust and corrosion can be particularly challenging, especially on steel wheels or wheels with damaged coatings. Begin by assessing the extent of the rust. For light surface rust, use a rust remover or a mild abrasive to gently scrub away the corrosion. Follow up with a thorough cleaning to remove any residue. For more severe rust, you may need to sand down the affected area to the bare metal before applying a rust-inhibiting primer and a fresh coat of paint. If the corrosion is extensive or affects the structural integrity of the wheel, replacement might be the safest option. Applying a protective sealant regularly can help prevent rust and corrosion from recurring, keeping your wheels looking their best and extending their lifespan.
By addressing these common wheel cleaning problems with the proper wheel cleaning technique, you can ensure your wheels remain in excellent condition. Whether dealing with ineffective cleaners, scratches, rust, or wheel nut care, taking prompt and appropriate action will help maintain the appearance and durability of your wheels, preserving their showroom-ready look for years to come.
FAQs About Cleaning Wheels on Car

Can You Use Household Cleaners on Car Wheels?
While it might be tempting to reach for a household cleaner, it’s important to choose products specifically designed for car wheels. Household cleaners often contain harsh chemicals that can damage the finish or cause discoloration on your alloy wheels or chrome wheels. These cleaners may also not be effective against the unique types of dirt and grime and brake dust that accumulate on wheels. Opt instead for cleaning solutions for wheels that are pH-balanced and formulated to tackle brake dust removal and road grime without harming your wheels. These specialized automotive cleaning supplies not only ensure a safer cleaning process but also enhance the longevity and appearance of your wheels. If you’re in a pinch, look for a cleaner that explicitly states it’s safe for car detailing and automotive use, but always test in a small area first to ensure it won’t affect the car rims or other components.
Is It Safe to Pressure Wash Car Wheels?
Pressure washing can be a powerful tool for DIY wheel cleaning, but it must be used with caution. A pressure washer’s force can dislodge stubborn grime and brake dust effectively, but using too high a pressure or getting too close to the wheels can risk damaging the finish or even the wheel itself. It’s essential to use a moderate pressure setting and maintain a safe distance to avoid causing any harm, especially to sensitive areas like the wheel arches and wheel wells. Additionally, ensure that the nozzle is set to a wide spray pattern to distribute the water evenly. For best results, use the pressure washer in combination with a wheel cleaner and detailing brushes. This method allows for effective cleaning while minimizing the risk of damage. Always remember, proper wheel cleaning technique is key to preserving the integrity and appearance of your wheels.
What’s the Best Way to Clean Wheel Nuts and Bolts?
Cleaning wheel nuts and bolts requires a delicate approach to ensure they’re free of grime without risking damage. Start by using a mild wheel cleaner and a soft brush to gently scrub around the nuts and bolts. Avoid using abrasive materials that could scratch the surface. For stubborn dirt, a detailing brush with a narrow head can help reach into tight spaces without causing damage. After cleaning, rinse thoroughly to remove any residue from the cleaner. If your wheel nuts and bolts are particularly dirty or corroded, a specialized metal polish can be used to restore their shine. For added protection, consider applying a protective sealant after cleaning. Always ensure that the nuts and bolts are completely dry before driving to avoid rust prevention issues and surface corrosion. Regular cleaning of these components helps maintain their functionality and appearance, contributing to the overall look of your high-performance wheels.
By addressing these frequently asked questions, you’ll have a clearer understanding of how to effectively clean and maintain your wheels. Using the right cleaning agents, applying techniques with care, and focusing on specific components like wheel nuts and bolts will help you achieve a pristine finish while preserving the integrity of your wheels.
Conclusion: Achieving the Perfect Showroom-Ready Look
Recap of Essential Steps for Sparkling Clean Wheels
Achieving that showroom-ready gleam for your wheels requires a well-executed cleaning routine. Start by gathering the right tools and products, including a quality wheel cleaner, wheel brushes, and microfiber towels. Begin your wheel care by rinsing off loose dirt and debris to prevent scratching during the main cleaning process. Apply your chosen wheel cleaner, allowing it to break down grime and brake dust before scrubbing thoroughly. For stubborn stains and brake dust removal, don’t hesitate to use more intensive methods or repeat the cleaning if necessary. After cleaning, polish your wheels to enhance their wheel shine and apply a protective coating or tire dressing to safeguard against future dirt and damage. Regular maintenance, including quick cleanings and seasonal adjustments, will help you maintain that perfect finish and prolong the life of your wheels.
Final Thoughts on Using Meguiar’s Products for Best Results
When it comes to achieving exceptional results, Meguiar’s products stand out for their effectiveness and reliability. Their wheel cleaners, such as the Meguiar’s Ultimate All Wheel Cleaner, are formulated to tackle tough grime without damaging your alloy wheels or chrome wheels. Meguiar’s Hot Rims Metal Polish delivers a brilliant mirror-like finish, adding an extra layer of shine that makes your wheels pop. Their protective sealants offer long-lasting protection, helping to keep your wheels looking pristine despite environmental challenges like dirt and grime. For those who seek top-tier performance and a hassle-free cleaning experience, Meguiar’s products are a trusted choice in both DIY wheel cleaning and professional detailing. By incorporating these high-quality products into your car care routine, you ensure the best possible results and a finish that rivals even the most meticulously maintained show cars.
Encouragement to Keep Your Wheels Looking Their Best Year-Round
Maintaining clean, shiny wheels is more than just an aesthetic choice—it’s a commitment to preserving your vehicle’s overall appearance and value. Regular cleaning and care not only keep your wheels looking their best but also protect them from long-term damage caused by surface contaminants. Embrace a routine that fits your lifestyle and vehicle needs, and don’t be afraid to invest in quality products like car polish, tire protectant, and UV protection for wheels that make the process easier and more effective. Remember, the effort you put into keeping your wheels immaculate pays off in the form of a vehicle that consistently turns heads and performs at its peak. Make wheel care a priority, and your car will always have that showroom-ready look, regardless of the season.
Call to Action: Upgrade Your Wheel Care Routine Today
Recommended Products for Superior Wheel Care
Elevate your wheel cleaning routine with top-tier products that deliver exceptional results. Begin by integrating Meguiar’s Ultimate All Wheel Cleaner into your car wheel care arsenal. This powerful formula tackles the toughest grime and brake dust removal while being gentle on your alloy wheels or chrome wheels. For a brilliant wheel shine, Meguiar’s Hot Rims Metal Polish is your go-to, providing a mirror-like finish that enhances the overall look of your vehicle. Seal the deal with a protective sealant or coating, such as Meguiar’s Ultimate Liquid Wax, to shield your wheels from dirt and grime, surface contaminants, and damage. If you’re exploring alternatives, consider other high-quality brands like Sonax, which offers innovative wheel cleaning solutions for DIY wheel cleaning, or Chemical Guys for their comprehensive range of automotive cleaning supplies and detailing products. Investing in these superior products ensures your wheels receive the best car detailing care and wheel protection, maintaining that flawless appearance you’ve worked so hard to achieve.
Where to Buy Meguiar’s and Other Top Wheel Cleaning Brands
Securing these exceptional products for your car care routine is easier than ever. Meguiar’s products are available at major retailers such as AutoZone, Advance Auto Parts, and Walmart. You can also find them online through Amazon or the Meguiar’s official website, offering the convenience of home delivery. For alternative brands like Sonax or Chemical Guys, check out specialized auto detailing stores or their respective online shops. Websites like Detail King and Car Care Products provide a wide selection of vehicle detailing kits and supplies, often including exclusive offers and detailed product information on cleaning agents, wheel scrubbers, wheel brushes, and microfiber towels. By purchasing from reputable sources, you ensure you’re getting authentic products that deliver the performance and results you expect, whether it’s for rim cleaning, brake caliper cleaning, tire sidewall cleaning, or rust prevention.
Share Your Wheel Cleaning Success Stories and Tips
Your journey to sparkling clean wheels can inspire others in their wheel maintenance efforts. Share your experiences and the car maintenance tips you’ve learned along the way. Did a specific product like a heavy-duty wheel cleaner make a significant difference in your routine? Perhaps you discovered a proper wheel cleaning technique that saved time and effort. Join online forums, social media groups, or community blogs to exchange insights with fellow car enthusiasts. Your success stories not only contribute to a shared knowledge base but also foster a community of car care aficionados focused on tire and wheel combo care. Engaging with others helps you stay updated on the latest car washing techniques, detailing brushes, and tire protectant products, and your feedback might just help someone else achieve their dream wheel finish, complete with UV protection for wheels and surface corrosion prevention.
Enhance your wheel care routine today by selecting the right cleaning methods for wheels, purchasing from reliable sources, and sharing your achievements. With a commitment to superior care and seasonal maintenance, your wheels will continue to shine and impress, reflecting the attention and effort you put into maintaining your vehicle’s appearance and overall vehicle detailing.
Products Checklist
Meguiar’s Ultimate All Wheel Cleaner
Meguiar’s Hot Rims Metal Polish
Meguiar’s Marine/Wheel Sealant
Griot’s Heavy Duty Wheel Cleaner
Chemical Guys Clay Bar Lubricant
Affiliate Disclaimer: If you choose to purchase a product through these links I will earn a small commission at no cost to you.