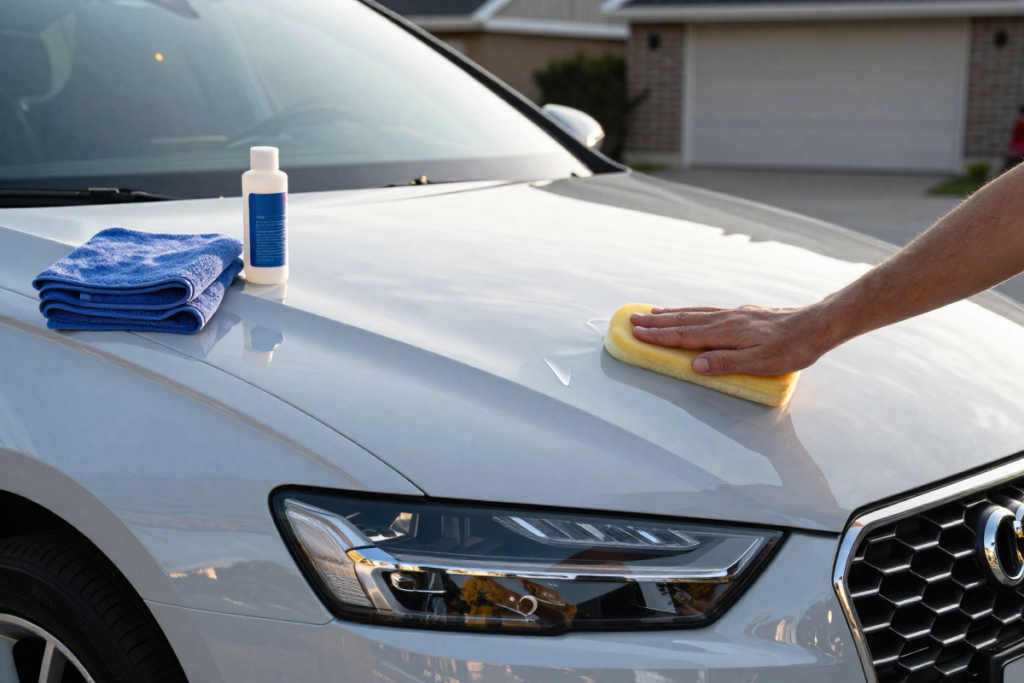
How to Wax a Car by Hand: Step-by-Step Guide for a Showroom Shine

Introduction

There’s something deeply satisfying about stepping back and seeing your car gleam like it just rolled off the showroom floor and you did it yourself. While dual-action polishers and detailing machines have their place, hand waxing your car remains one of the most rewarding, beginner-friendly, and cost-effective ways to protect your vehicle’s paint and bring out a deep, glossy shine.

Whether you’re a first-timer looking to learn the basics or a weekend warrior wanting to sharpen your technique, this comprehensive guide walks you through everything you need to know about how to wax a car by hand, from choosing the right products to buffing off the last trace of haze for a mirror-like finish.

In this guide, you’ll learn:

  • Why hand waxing is still the preferred method for many car enthusiasts
  • Exactly which tools and products you need (with buying tips)
  • A complete step-by-step waxing process with pro techniques
  • How to avoid the most common hand waxing mistakes
  • Our top product recommendations for every budget and paint type

Why Waxing Your Car Matters
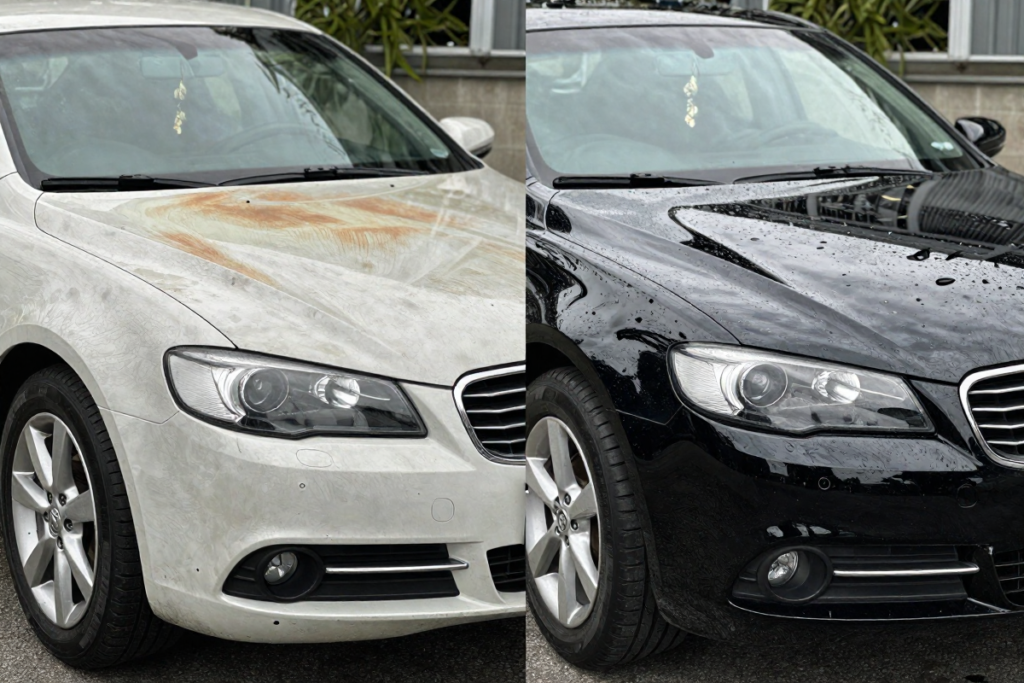
Before diving into the how-to, it’s worth understanding why regular waxing is one of the most valuable habits you can build as a car owner.

Protection from the elements: UV rays are one of the biggest threats to your car’s paint. Over time, prolonged sun exposure causes paint to fade, oxidize, and develop that dull, chalky appearance. A good coat of wax creates a sacrificial barrier between your paint and the sun, dramatically slowing this process.

Defense against contaminants: Bird droppings, tree sap, road tar, and industrial fallout are mildly acidic and can etch into unprotected paint if left too long. Wax forms a protective layer that makes it far easier to remove these contaminants before they cause lasting damage.

Enhanced shine and depth: Wax fills in micro-scratches and surface imperfections, producing the glossy, “wet-look” finish that makes paint appear richer and more vibrant.

Maintained resale value: A well-maintained exterior communicates to buyers that the vehicle has been cared for. Regular waxing helps preserve that like-new appearance that commands a better price.

Quick note on waxing vs. polishing: Many beginners confuse these two processes. Polishing is a corrective step that removes surface defects (scratches, oxidation) using mild abrasives. Waxing is a protective step that seals and shines the paint. Ideally, you polish first and wax second but if your paint is in good condition, waxing alone is perfectly fine.

Hand Waxing vs. Machine Waxing

Both methods can produce excellent results, but each has its ideal use case.

Advantages of hand waxing:

  • No equipment investment — foam applicator pads cost just a few dollars
  • Greater control on curves, edges, and trim-adjacent areas
  • Far gentler — virtually eliminates the risk of burning through thin clear coat
  • Perfect for light maintenance coats between full details
  • Easy to do in a garage, driveway, or parking garage

Downsides of hand waxing:

  • More time-consuming than machine application
  • More physical effort, especially on larger vehicles

Bottom line: If you have a machine polisher and the experience to use it safely, it can speed up the process. But for most car owners, especially beginners, those with dark or delicate paint, or anyone without a DA polisher, hand waxing a car is the smarter, safer choice.

Tools and Materials You’ll Need
Gathering the right supplies before you start will make the entire process smoother. Here’s what you need and what to look for when buying:

Car Wax (Paste, Liquid, or Spray)

This is the most important purchase. Each form has trade-offs:

  • Paste wax: Thicker, lasts longer, produces the deepest shine. Ideal for dark paint and show cars. Slightly more effort to apply and remove.
  • Liquid wax: Easier to spread and buff off. Great for beginners and large vehicles. Still offers solid protection.
  • Spray wax: Fastest to apply, least durable (2–4 weeks). Best used as a maintenance coat between full waxes, not as a primary application.

👉 [Our Pick: Best Car Wax for Hand Application]

Foam Applicator Pads

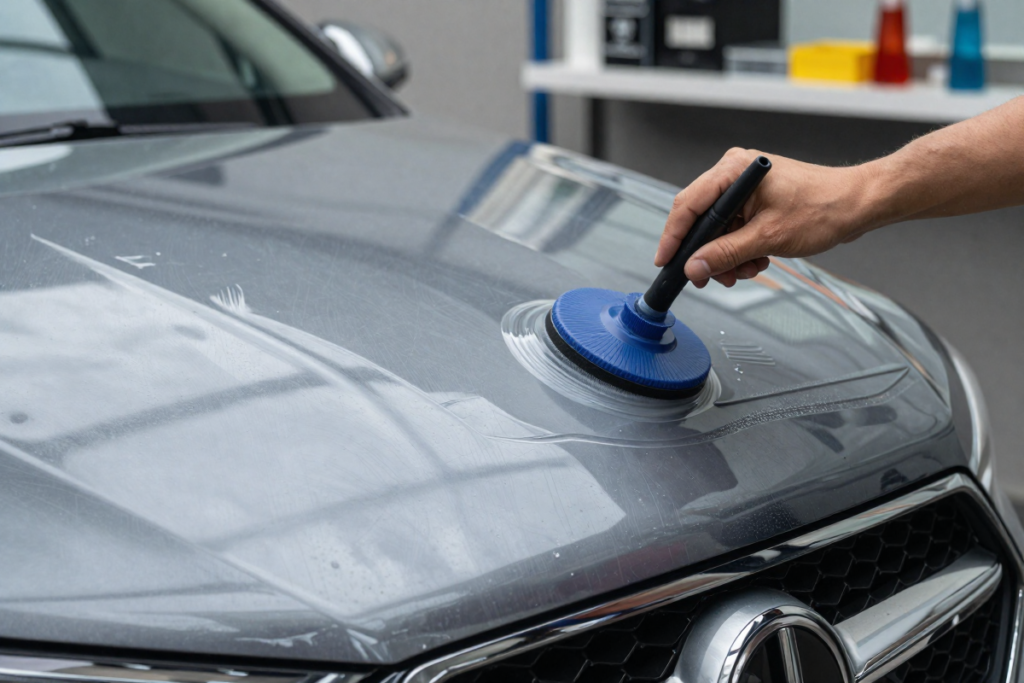
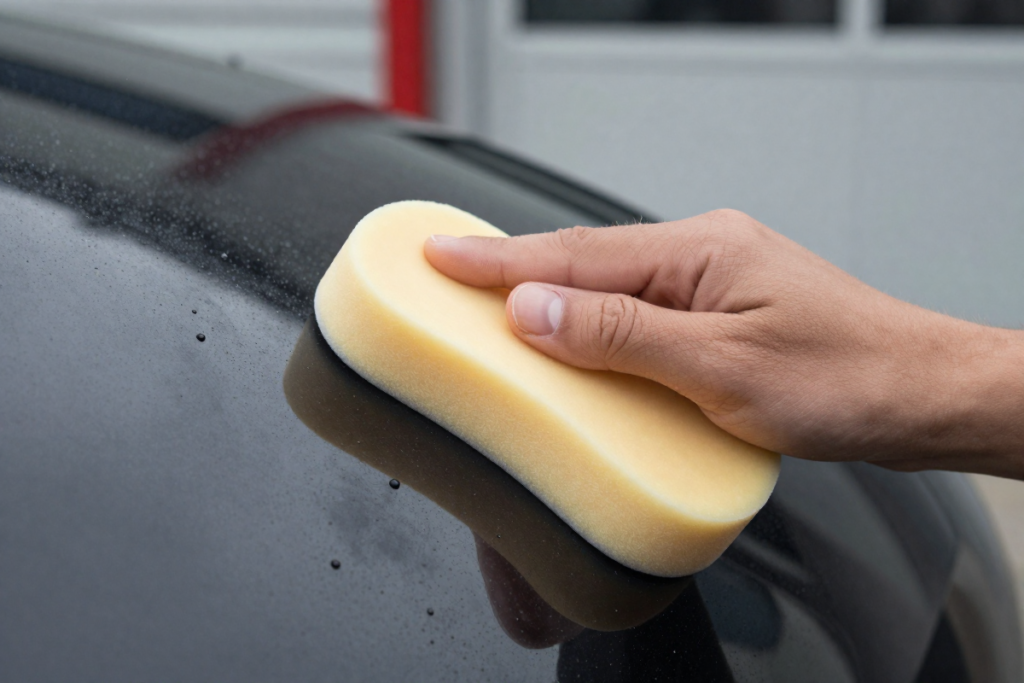
Foam pads distribute wax evenly without scratching. Look for dense, smooth-faced foam pads rather than open-cell sponges. Keep a few on hand so you can swap out when one becomes saturated.

👉 [PRODUCT: Foam Applicator Pads]

Microfiber Towels

The most important tool for buffing. Use plush, high-GSM (grams per square meter) microfiber cloths; aim for 300–400 GSM minimum. Low-quality towels can cause micro-scratches. Have at least 4–6 clean towels available before you start.

👉 [BEST QUALITY: Microfiber Buffing Towels]

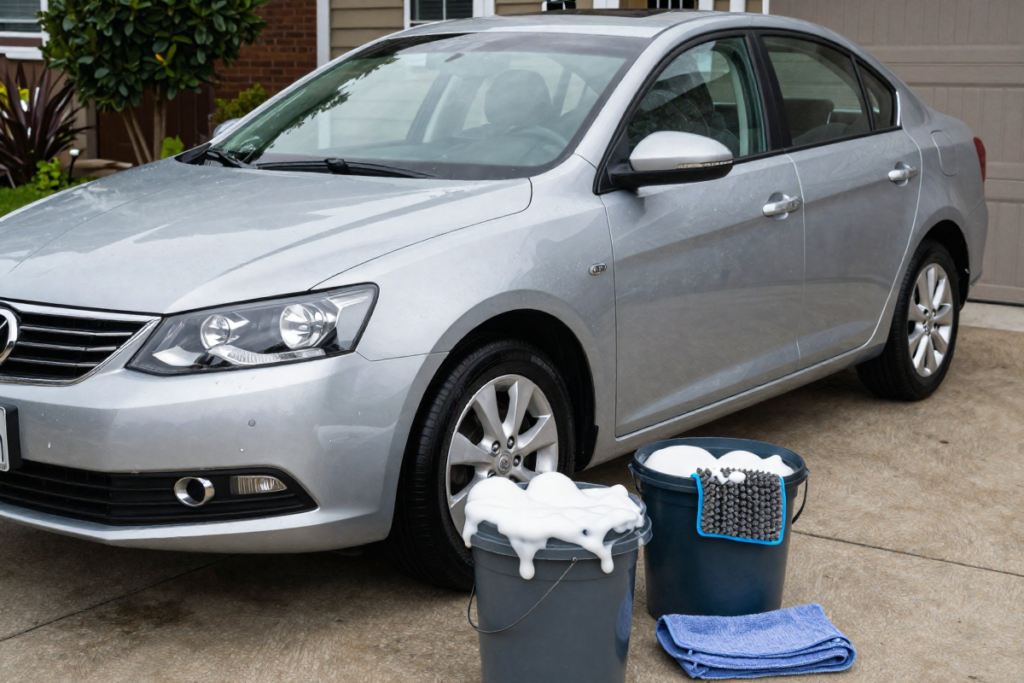
Car Wash Soap + Two-Bucket System

Use a dedicated car wash shampoo; never dish soap, which strips protective coatings. The two-bucket method (one for soapy water, one for rinsing your mitt) dramatically reduces swirl marks during the wash stage.

👉 [pH-Neutral: Car Wash Soap]

👉 [GREAT SET: Grit Guard + Bucket Set]

Clay Bar Kit (Optional but Recommended)

Before waxing, a clay bar removes bonded contaminants like tree sap, brake dust, and industrial fallout that washing can’t remove. Run your hand over the paint after washing and if it feels rough or gritty, claying is worth the extra 20 minutes.

👉 [GET IT HERE: Clay Bar Kit]

Preparing Your Car for Waxing
Wax applied to a dirty, wet, or contaminated surface simply won’t bond properly — and you risk trapping dirt particles under the wax, which can cause scratches during buffing. Prep is the step most beginners skip, and it’s the step that makes the biggest difference.

Step 1: Wash the Car Thoroughly

Use your two-bucket system and a quality microfiber wash mitt to remove all surface dirt, dust, and grime. Rinse from top to bottom, and don’t forget the wheel wells, lower rocker panels, and door jambs. A clean car is the only good canvas for wax.

Step 2: Dry Completely

Water left on the paint will prevent the wax from bonding. Use a clean, plush drying towel or chamois to dry the entire car. A quick detailer spray as a drying aid can help you achieve a streak-free result.

Step 3: Decontaminate with a Clay Bar (If Needed)

Fold your clay bar flat, spritz the panel with clay lubricant, and glide the clay in straight back-and-forth passes. You’ll feel (and hear) the clay picking up contaminants. Wipe the panel clean and move on. The paint should feel smooth like glass when you’re done.

Step 4: Work in the Right Environment

Shade is non-negotiable. Waxing in direct sunlight causes the product to dry too fast, making it nearly impossible to buff off cleanly and potentially leaving white residue baked into the paint. Aim for a cool, overcast day or work in your garage. Ideal temperatures are between 55°F and 85°F (13°C–29°C).

Step-by-Step Guide: How to Wax a Car by Hand
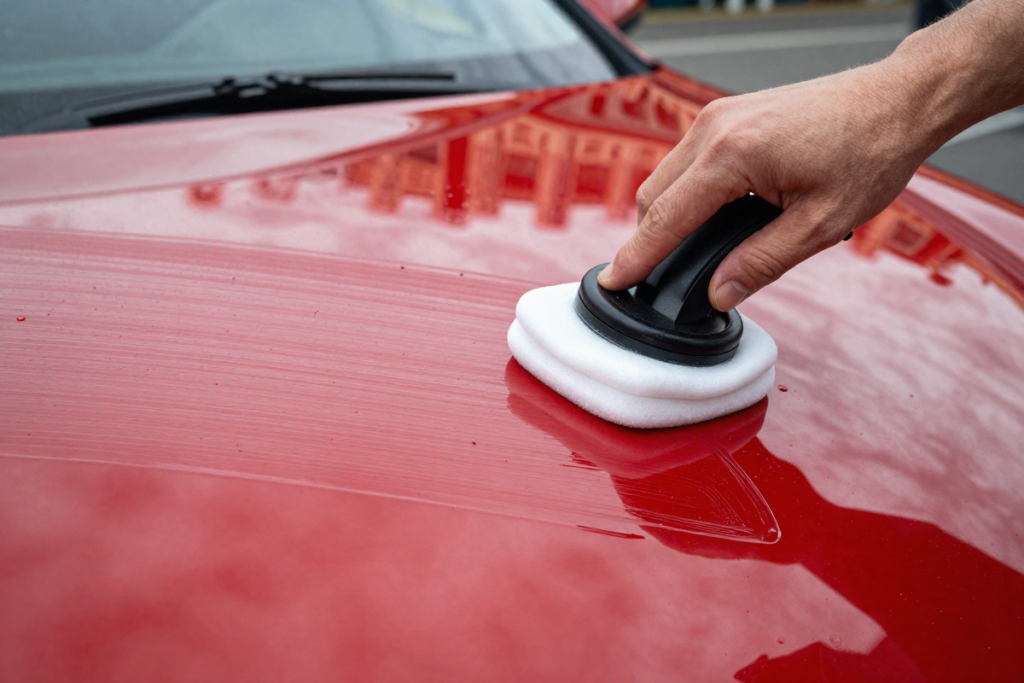
With your car clean, dry, and prepped, it’s time for the main event. Work one panel (hood, trunk lid, door, fender) at a time for the best results.

Step 1: Apply Wax to Your Applicator Pad

Dispense a small amount of wax — about the size of a quarter for paste wax, or a thin ribbon for liquid — directly onto your foam applicator. Less is more. Over-applying wastes product and makes buffing significantly harder.

💡 Pro Tip: Don’t apply wax directly to the paint. Always apply to the pad first for even distribution.

Step 2: Apply Wax to the Paint

Using light to medium pressure, spread the wax across the panel in overlapping, straight-line passes (back and forth, not circular). Work in small 2×2 foot sections for even coverage. Some detailers prefer circular motions — either method works as long as passes overlap and coverage is consistent. Avoid getting wax on rubber trim, plastic bumpers, or textured surfaces, as it can leave a white residue that’s hard to remove.

Step 3: Let the Wax Haze

Once you’ve covered a panel, let the wax sit and cure. You’ll notice it transitions from a wet sheen to a dull, hazy film — this is what you want. Depending on the product, ambient temperature, and humidity, this typically takes 2–5 minutes. Check the product’s directions, as some synthetic waxes can be removed immediately after application.

💡 Pro Tip: Do a ‘finger swipe’ test: drag a fingertip across the wax. If it comes away cleanly with no smearing, the wax is ready to buff.

Step 4: Buff Off the Wax

Fold a clean microfiber towel into quarters for a thick, even buffing surface. Using light pressure and straight-line strokes, buff away the haze. Flip your towel frequently — a saturated towel will push wax around rather than lift it. Use a second clean towel for a final light pass to eliminate any remaining haze or streaks.

💡 Pro Tip: Use ‘two-towel buffing’: one towel to lift the bulk of the wax, a second fresh towel to refine and reveal the final shine.

Step 5: Inspect and Apply a Second Coat (Optional)

Step back and inspect the panel in direct light or at a low angle. Look for any missed spots, uneven coverage, or swirl marks left by a dirty towel. For extra protection and depth — especially on dark-colored or show cars — apply a second thin coat after the first has fully cured (typically 20–30 minutes).

Common Mistakes to Avoid

Even experienced detailers occasionally fall into these traps. Being aware of them now will save you a lot of frustration:

  • Applying too much wax: Thick coats don’t provide more protection — they just create more work during buffing. Multiple thin coats are always better than one thick one.
  • Waxing in direct sunlight: This is the single most common mistake. Wax dries almost instantly in strong sunlight, making it nearly impossible to buff off without leaving residue.
  • Skipping surface prep: Waxing over a dirty or contaminated surface traps contaminants under the wax and can scratch the paint during buffing.
  • Using dirty or low-quality towels: Old cotton rags or cheap microfiber can scratch your clear coat. Invest in quality towels and keep them clean.
  • Not letting the wax haze properly: Buffing too early when the wax is still wet creates a smeared, streaky mess. Wait for that characteristic dull haze before buffing.
  • Getting wax on rubber or plastic trim: Wax can stain and discolor unpainted trim. If you do get wax on trim, remove it quickly with a dedicated trim cleaner.

Pro Tips for a Showroom Shine

Ready to take your results to the next level? These are the habits that separate a good wax job from a truly jaw-dropping one:

  • Layer for depth: Apply two or three thin coats, allowing each to cure before applying the next. Each additional layer adds depth and increases protection.
  • Use a detailing spray as a final step: A quick spritz of detail spray after your final buff adds an extra layer of gloss and helps remove any remaining haze.
  • Match your wax to your paint color: Carnauba-based waxes produce the warmest, deepest glow — ideal for black, dark red, and dark blue paint. Synthetic polymer waxes deliver a crisper, brighter shine well-suited to white and silver vehicles.
  • Maintain between full waxes: Use a spray wax or quick detailer every 2–3 weeks to extend the life of your wax coat and keep the paint looking fresh between full applications.
  • Work in a cross-hatch pattern: Apply wax in one direction (left to right), then buff in the perpendicular direction (top to bottom) for the most even coverage.

How Long Does Car Wax Last?
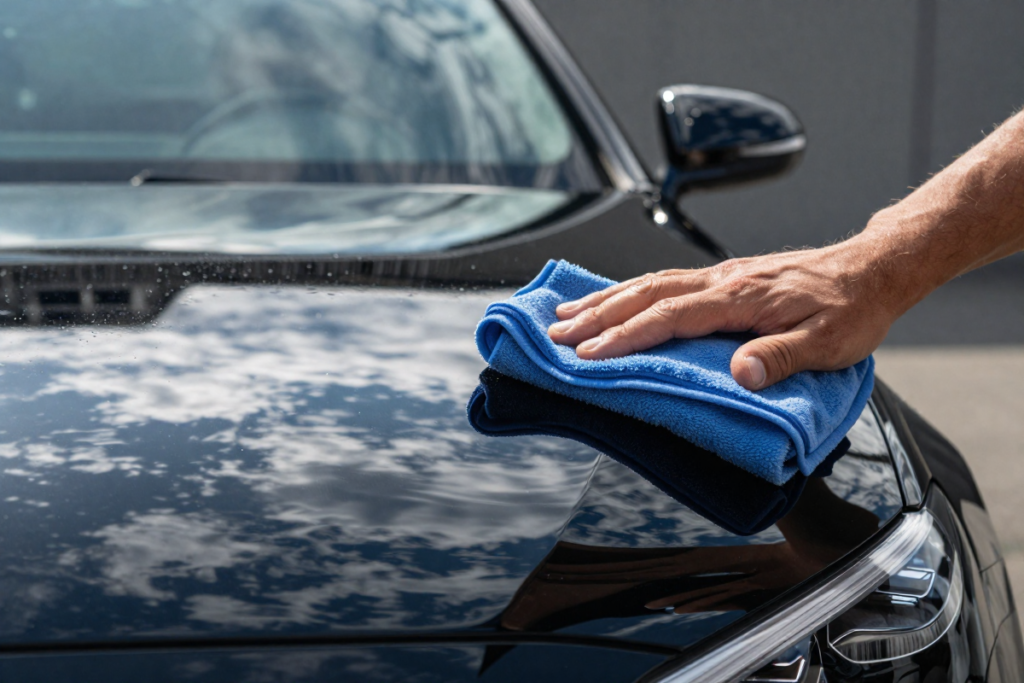
Wax durability depends on several factors working together. Understanding these helps you plan your maintenance schedule:

Wax type: Natural carnauba waxes typically last 4–6 weeks. Synthetic polymer waxes last longer — often 6–12 weeks. Hybrid ceramic waxes can last 3–6 months.

Exposure: Vehicles parked outdoors in hot, sunny climates will see wax break down significantly faster than garage-kept cars.

Washing frequency: Frequent washing — especially with harsh soaps or automated car washes with bristle brushes — accelerates wax wear.

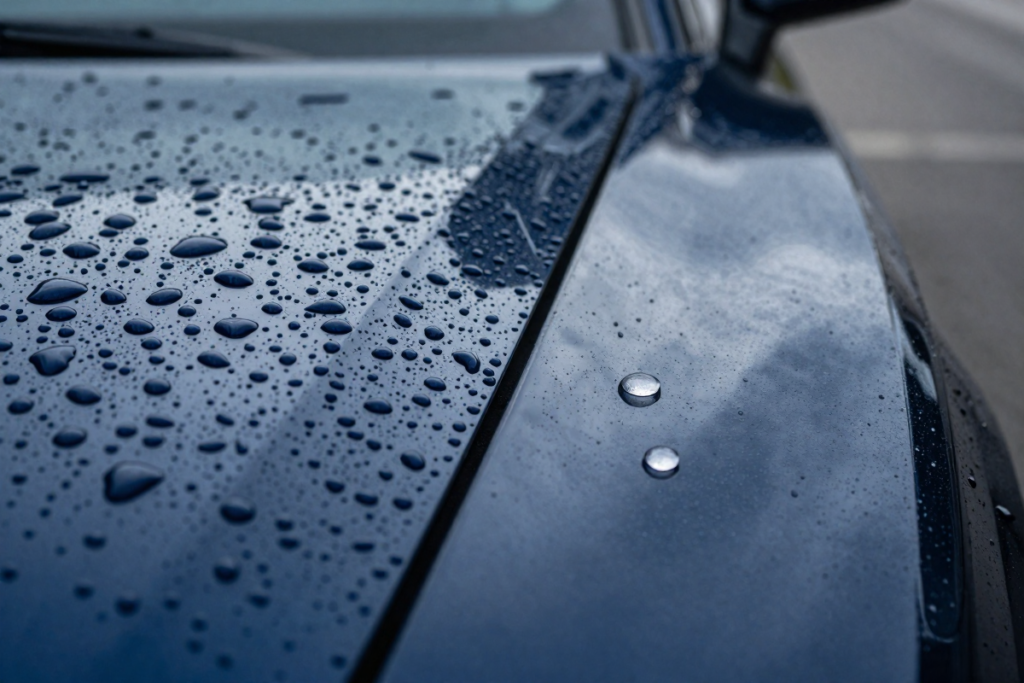
Signs it’s time to re-wax: Water no longer beads up and sheets off the paint (it sits flat instead). The paint looks dull even after washing. You can feel microscopic texture when running your hand over clean paint.

💡 Pro Tip: The water bead test is the simplest way to know when your car needs waxing: splash a little water on the paint. If it beads up into tight droplets, you’re still protected. If it spreads flat, it’s time to wax.

Best Car Waxes for Hand Application (Top Picks)

Based on performance, ease of use, and value, here are five waxes we recommend for hand application. Whether you’re a first-timer or a seasoned detailer, there’s an option for you.

ProductTypeBest ForDurabilityDifficulty
Meguiar’s Gold ClassPasteBeginners & daily drivers4–6 weeksEasy
Chemical Guys Butter Wet WaxLiquidShowroom shine seekers6–8 weeksEasy
Collinite 845 Insulator WaxLiquidLongevity + protection6–12 weeksModerate
P21S Concours CarnaubaPastePremium/dark paint finish4–8 weeksModerate
Turtle Wax ICE LiquidLiquidBudget-conscious beginners4–6 weeksEasy

1. Meguiar’s Gold Class Carnauba Plus

An excellent all-rounder and the top choice for beginners. It spreads easily, hazes quickly, and buffs off with minimal effort. The result is a warm, glossy shine with solid UV protection. Ideal for daily drivers on any paint color.

👉 [PRODUCT OPTION 1 : Meguiar’s Gold Class Carnauba Plus]

2. Chemical Guys Butter Wet Wax

If showroom shine is the goal, Chemical Guys delivers. This liquid wax spreads like butter (hence the name) and produces a deep, wet-look gloss that’s especially stunning on dark paint. Easy enough for beginners, impressive enough for enthusiasts.

👉 [PRODUCT OPTION 2: Chemical Guys Butter Wet Wax]

3. Collinite 845 Insulator Wax

The go-to wax for longevity. Collinite 845 is beloved by detailing enthusiasts for its exceptional durability — many report it outlasting other waxes by weeks in harsh weather. It requires a little more elbow grease to remove, but the results are well worth it.

👉 [PRODUCT OPTION 3: Collinite 845 Insulator Wax]

4. P21S Concours Carnauba Wax

The premium option for those who want the absolute best carnauba shine. P21S is a favorite among show car enthusiasts and owners of dark, high-gloss paint. It produces an almost liquid-mirror depth that synthetic waxes struggle to match. Pricier, but worth it for special vehicles.

👉 [PRODUCT OPTION 4: P21S Concours Carnauba Wax]

5. Turtle Wax ICE Liquid Wax

The best budget pick. Turtle Wax ICE is widely available, affordable, and performs well above its price point. Great for first-timers who want to learn the process without committing to a premium product. A solid choice for older vehicles or daily commuters.

👉 [PRODUCT OPTION 5: Turtle Wax ICE Liquid Wax]

Frequently Asked Questions

How often should I wax my car?

For most drivers, waxing every 6–8 weeks strikes the right balance between protection and effort. If you park outdoors in a hot or harsh climate, aim for every 4–6 weeks. For garage-kept show cars, every 8–12 weeks is typically sufficient.

Can I wax over old wax?

Yes, in most cases. If the existing wax coat is still intact and relatively fresh, you can apply a new coat directly on top. However, if the old wax has broken down unevenly or you notice contamination buildup, it’s worth removing the old wax first with a pre-wax cleaner or clay bar for the best bond.

Is hand waxing better than spray wax?

Hand waxing with a paste or liquid wax provides significantly more protection and a deeper, more durable shine than spray wax. Spray wax is best used as a quick maintenance coat between full hand wax applications — think of it as a top-up, not a replacement.

Can I wax a dirty car?

No. Waxing over dirt and grime traps abrasive particles under the wax, which get dragged across the paint during buffing and cause scratches. Always wash, dry, and — ideally — clay bar the paint before waxing.

How long does the hand waxing process take?

For an average-sized sedan, plan on 1.5 to 2.5 hours for a single-coat application (including wash and prep). Larger vehicles or second coats will add time. As you develop your technique, the process becomes noticeably faster.

Does waxing protect against scratches?

Wax provides a modest buffer against very light surface abrasions (like fine swirl marks from improper washing), but it won’t protect against key scratches or parking lot door dings. For serious scratch protection, consider a paint protection film (PPF) or ceramic coating in addition to regular waxing.

Conclusion

Hand waxing your car is one of those rare DIY skills that pays dividends every time you do it. With the right preparation, quality products, and a bit of patience, you can achieve a level of shine and protection that rivals a professional detail — at a fraction of the cost.

Remember the essentials: always start with a clean, dry car; work in the shade; apply thin, even coats; and buff with clean, quality microfiber towels. Repeat the process every 6–8 weeks (or when water stops beading), and your paint will stay vibrant, protected, and showroom-ready for years to come.

Ready to get started? Browse our top-rated hand wax picks above, grab your foam applicator and microfiber towels, and give your car the care it deserves. Your future self — and anyone who sees your car gleaming in the driveway — will thank you.

PRODUCT CHECKLIST (Everything Featured In Article)

Best Car Wax for Hand Application
Foam Applicator Pads
Microfiber Buffing Towels
Car Wash Soap
Grit Guard + Bucket Set
Clay Bar Kit
Meguiar’s Gold Class Carnauba Plus
Chemical Guys Butter Wet Wax
Collinite 845 Insulator Wax
P21S Concours Carnauba Wax
Turtle Wax ICE Liquid Wax

Disclaimer: Links in this post contain affiliate links. If you purchase through these links I will earn a commission from the sale at no extra cost to you.
How Do I Deep Clean My Tires at Home? Expert Tips

You just finished washing your car, stepped back to admire your work — and there they are. Brown, faded, grimy tires dragging down an otherwise spotless vehicle. Sound familiar?

It’s one of the most frustrating parts of car care. No matter how many times you run through the automatic car wash or splash some soapy water on your tires, that dull, brownish residue just keeps coming back. The truth is, standard car washes simply aren’t designed to deep clean tire sidewalls — and without the right approach, you’re really just moving dirt around.

The good news? Learning how to deep clean your tires at home is easier than you think, and the results are dramatic. In this guide, you’ll learn exactly what causes tire browning, which tools and products professionals swear by, a simple step-by-step cleaning process, and expert tips to keep your tires looking deep black and protected for weeks at a time.

Let’s get into it.


Why Deep Cleaning Your Tires Actually Matters

Before we dive into the how-to, it helps to understand why tires get so dirty in the first place — and why a surface rinse just doesn’t cut it.

Tire Cleaning vs. Wheel Cleaning: Know the Difference

These two tasks are often lumped together, but they require completely different products and techniques. Wheel cleaning targets brake dust, road grime, and metal contamination on your rims. Tire cleaning focuses on the rubber sidewalls — and rubber is a porous material that traps contaminants deep in its surface.

What’s Actually Causing That Brown Color?

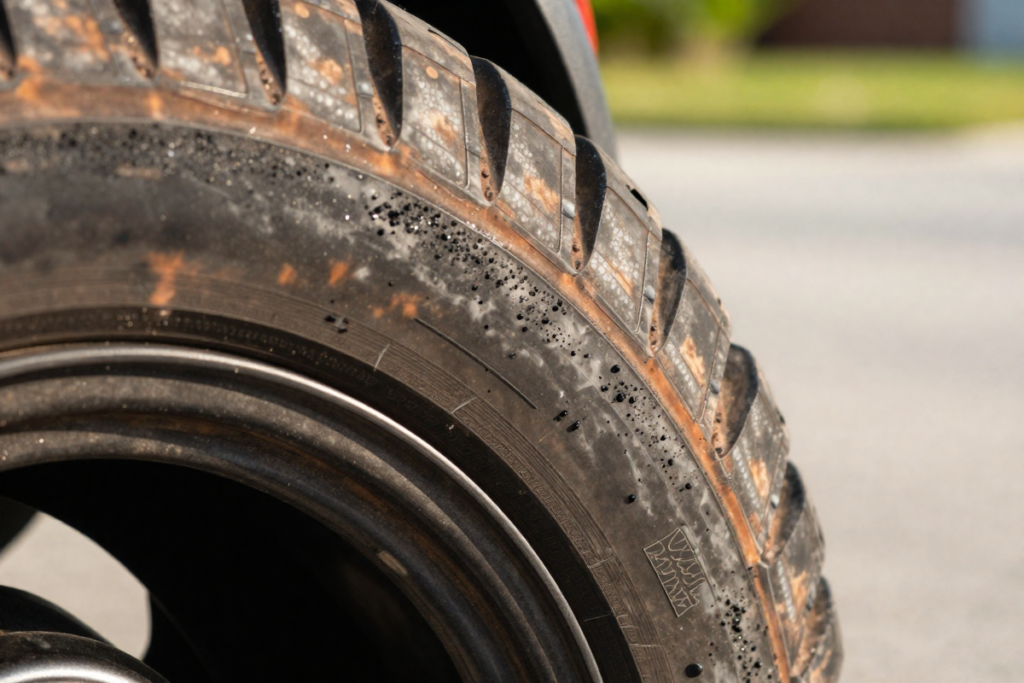
That ugly brown tint isn’t just dirt. It’s the result of a chemical process called tire blooming — a phenomenon caused by antiozonant migration. Tire manufacturers embed antiozonants into rubber compounds to prevent ozone cracking and dry rot. Over time, these chemicals naturally rise to the surface of the tire, where they oxidize and turn brown when exposed to air, UV rays, and road grime.

Add in brake dust, road tar, and general road grime, and you’ve got a multi-layered contamination problem that a garden hose alone will never fully solve.

Benefits of Regular Deep Cleaning

  • ✅ Dramatically improves curb appeal
  • ✅ Prevents premature cracking and dry rot
  • ✅ Removes antiozonant buildup that causes browning
  • ✅ Allows tire dressings to bond properly for longer-lasting results
  • ✅ Extends the overall life of your tires

Expert recommendation: Deep clean your tires every 2 to 4 weeks for daily drivers, or after any exposure to road salt, mud, or heavy rain.


What You’ll Need: Tools & Products for Deep Cleaning Tires

Having the right supplies makes all the difference. Here’s everything you need to do this job properly.

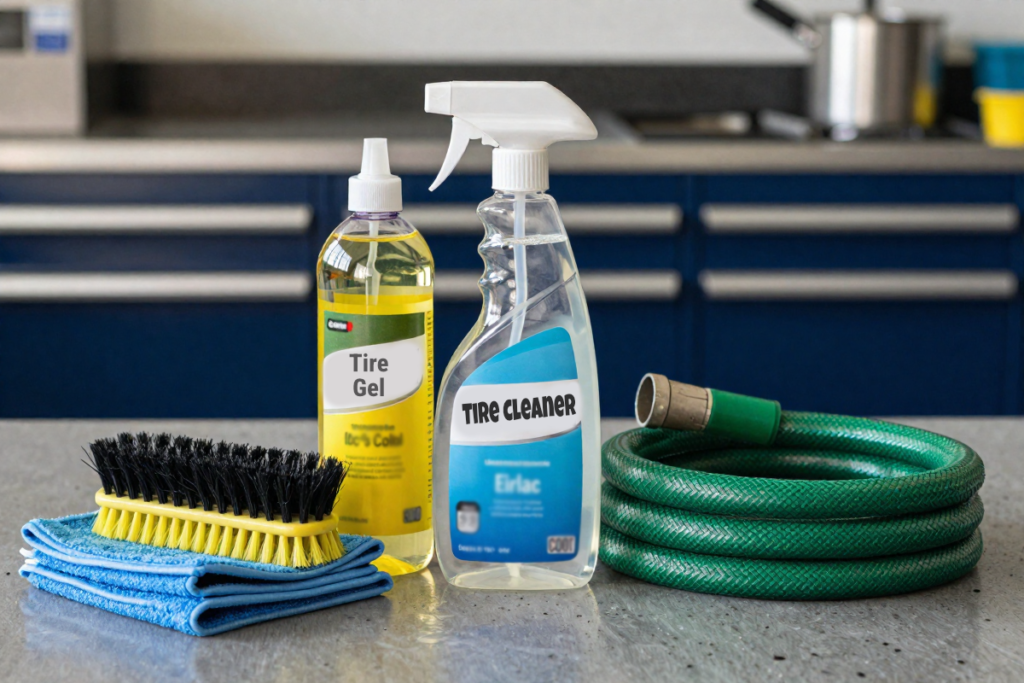
Essential Supplies


🛒 Product Comparison Table

ProductTypeBest ForPrice RangePRODUCT Link
[BUDGET TIRE CLEANER ]SprayEveryday maintenance cleaning$[Check Price]
[PREMIUM TIRE CLEANER]Foam/GelHeavily oxidized or browned tires$$[Check Price]
[BEST TIRE BRUSH]Stiff-bristle brushAggressive sidewall scrubbing$[Check Price]
[PRESSURE WASHER]EquipmentFaster pre-rinse & rinse cycles$$$[Check Price]
[FOAM CANNON]AttachmentApplying cleaner evenly at volume$$[Check Price]

Pro Tip: Always use a dedicated tire cleaner rather than an all-purpose cleaner. Formulas designed specifically for rubber are pH-balanced to clean effectively without drying out or degrading the sidewall compounds.


Step-by-Step Guide: How to Deep Clean Tires at Home

This is the core process used by professional detailers — simplified for home use. Work on one tire at a time, and try to work in a shaded area to prevent products from drying prematurely.

Step 1: Pre-Rinse the Tires Thoroughly

Start by hitting each tire with a strong stream of water from your garden hose or pressure washer. This removes loose surface dirt, mud, and debris before any product touches the rubber.

Why this matters: Scrubbing over dry, loose grit can cause micro-abrasions on the sidewall surface. A good pre-rinse also opens up the pores of the rubber slightly, allowing your tire cleaner to penetrate more effectively.

If you have a pressure washer, use it here — it cuts pre-rinse time significantly. 👉 [Recommended: PRESSURE WASHER]

Step 2: Apply Tire Cleaner Generously

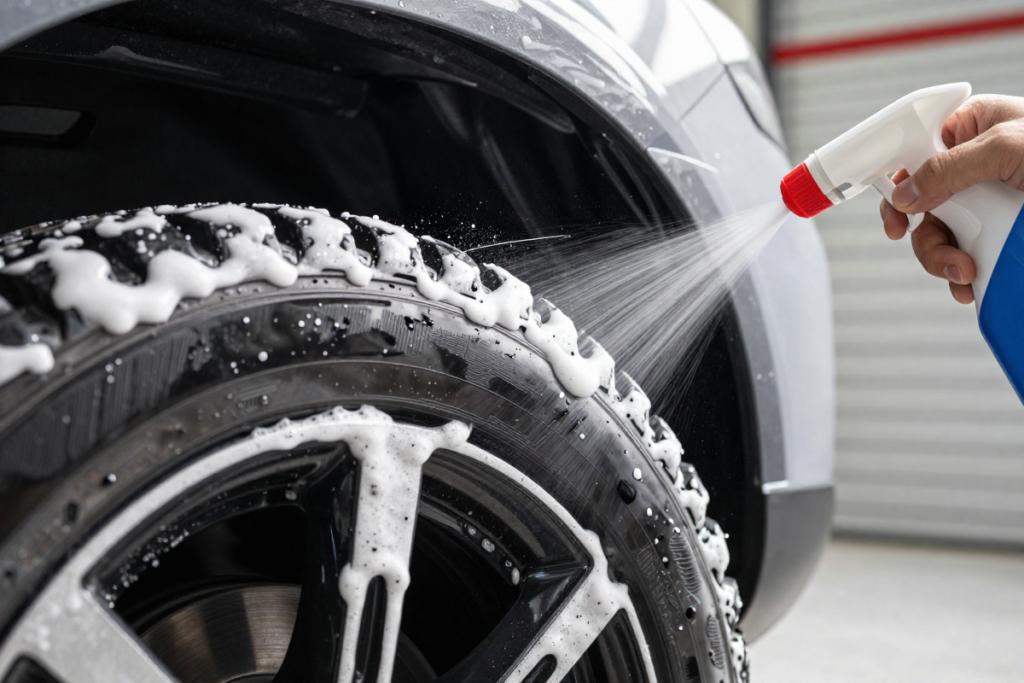
Spray or apply your chosen tire cleaner liberally across the entire sidewall surface. Make sure to coat the full face of the tire, from the tread edge down to the rim edge.

Dwell time is key: Allow the product to sit and work for 30 to 60 seconds. This gives the formula time to break down oxidized antiozonants, brake dust, and embedded road grime at the chemical level — doing much of the heavy lifting before you even pick up a brush.

⚠️ Don’t let it dry. If you’re working in direct sunlight or heat, work faster and mist the tire with water if needed to keep the cleaner active.

👉 [PREMIUM TIRE CLEANER – AFFILIATE PLACEHOLDER]

Step 3: Scrub the Tire Sidewalls

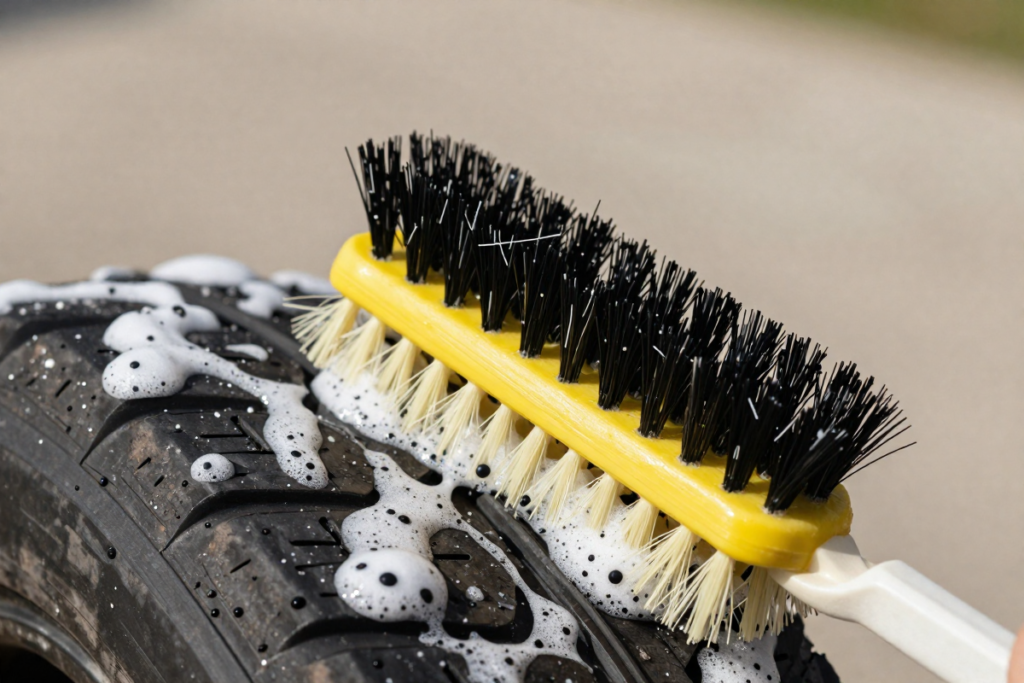
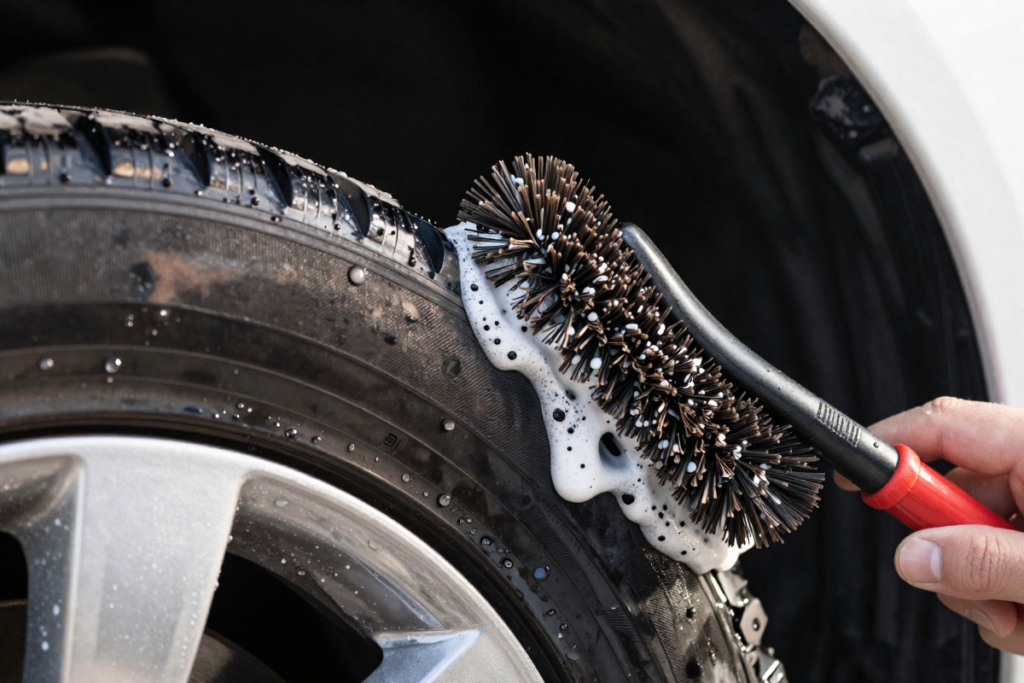
Now grab your stiff-bristle tire brush and get to work. Use firm, circular scrubbing motions across the entire sidewall surface. Pay extra attention to areas with visible brown oxidation or heavy buildup.

What to look for: As you scrub, the foam should turn darker — that’s the dirt, oxidation, and antiozonant buildup being lifted from the rubber. Keep scrubbing until the foam begins to turn white or light gray, which signals that the surface is clean.

For severely browned tires, you may need to repeat the application and scrubbing process two or even three times before you’re satisfied with the result.

👉 [BEST TIRE BRUSH – AFFILIATE PLACEHOLDER]

Step 4: Rinse Thoroughly and Inspect

Rinse the tire completely with clean water, washing all product and lifted grime away from the rubber and off the wheel. Inspect the sidewall carefully in good lighting.

Still seeing brown patches? Apply a second round of cleaner, let it dwell, and scrub again. Heavily oxidized tires — especially those that haven’t been properly cleaned in months — may require multiple passes to fully restore.

Step 5: Dry the Tires Before Applying Dressing

Use a clean microfiber towel to blot and dry the sidewall surface. This step prevents water spots and — critically — prepares the rubber for tire dressing application.

Applying dressing over a wet or damp tire leads to poor adhesion, uneven coverage, and faster product breakdown. A properly dried tire allows dressing to bond directly to the rubber for a longer-lasting, more uniform finish.


Pro Tips for a Deeper, Longer-Lasting Clean

These are the details that separate a great DIY tire detail from a truly professional result:

  • Clean your tires first, before washing the rest of the car. Tire cleaner and scrubbing can splash onto painted panels and glass. Start at the bottom and work your way up.
  • Never use dish soap or household bleach on tires. Dish soap strips protective compounds from rubber, accelerating dry rot. Bleach is even more aggressive and can cause irreversible damage to the sidewall.
  • Keep your tire brush separate from your wheel brush. Cross-contaminating brushes can scratch delicate wheel finishes or transfer brake dust back onto clean tires.
  • Work in the shade whenever possible. Direct sunlight causes products to dry too quickly, leading to streaking and reduced cleaning effectiveness.
  • Use multiple passes for heavily oxidized tires. There’s no shortcut here — patience and repetition are what separate mediocre results from truly restored rubber.

Common Mistakes That Undermine Your Results

Even with good products, these mistakes will hold you back:

❌ Mistake✅ What to Do Instead
Letting cleaner dry on the tireWork in shade; mist with water if needed
Using harsh household chemicalsUse a dedicated rubber-safe tire cleaner
Relying on spray-only (no scrubbing)Always agitate with a stiff brush
Skipping the rinseRinse completely to remove all residue
Applying dressing to a dirty tireAlways deep clean before dressing

Should You Use a Tire Dressing After Cleaning?

Absolutely — and here’s why it matters beyond just aesthetics.

A quality tire dressing does two important jobs: it restores the deep black appearance of the rubber, and more importantly, it provides UV protection that slows down the oxidation process responsible for browning and dry rot. Think of it as sunscreen for your tires.

Water-Based vs. Solvent-Based Tire Dressing

Water-based dressings deliver a natural, satin finish that looks OEM-clean without the greasy “wet tire” look. They’re longer-lasting and less likely to sling onto your paint while driving.

Solvent-based dressings provide a higher-gloss, showroom shine but tend to fade faster and can accelerate browning if applied too frequently without a proper cleaning base.

Recommended Tire Dressings

(Affiliate placeholders — update with your links)

ProductFinishBest ForPRODUCT Link
[BEST LONG-LASTING DRESSING –
Chemical Guys Tire Kicker Extra Glossy Tire Shine]
Extra GlossyDaily drivers, long-term protection[Check Price]
[BEST MATTE FINISH DRESSING –
3D GLW Series Ceramic Matte Tire Shine]
MatteOEM / sleeper builds[Check Price]
[BEST BUDGET DRESSING –
Meguiar’s Endurance Tire Gel]
GlossQuick weekend detailing[Check Price]

👉 Apply tire dressing with a foam applicator pad for the most even, controlled coverage and to avoid product flinging onto your wheel wells or paint.


How Often Should You Deep Clean Your Tires?

There’s no single universal answer — it depends on how you use your vehicle and where you live.

Vehicle Type / ConditionRecommended Frequency
Daily driver, mixed conditionsEvery 2–4 weeks
Weekend or show carEvery 4–6 weeks or before events
Winter driving (salt, slush)After every major weather event
Dusty or dry climatesEvery 2–3 weeks

For day-to-day maintenance between deep cleans, a quick spray-and-rinse can help slow down the buildup of road grime. But nothing replaces periodic deep cleaning with a dedicated cleaner and stiff brush.


DIY vs. Professional Tire Cleaning: Is It Worth Doing Yourself?

FactorDIY at HomeProfessional Detailing
Cost$15–$40 in supplies$50–$150+ per detail
Time30–60 minutesDrop-off and wait
QualityExcellent with right productsProfessional-grade results
ConvenienceOn your scheduleRequires appointment
Long-term valueOngoing investmentOne-time service

Bottom line: DIY tire cleaning delivers professional-quality results at a fraction of the cost — especially once you have the right tools on hand. Professional detailing is worth considering for seasonal deep cleaning or heavily neglected tires that need specialized decontamination treatments.


Frequently Asked Questions

How do you remove brown stains from tires?
Brown staining is caused by antiozonant oxidation (tire blooming). Apply a dedicated tire cleaner, let it dwell for 30–60 seconds, and scrub vigorously with a stiff-bristle brush. Multiple passes may be needed for heavily oxidized rubber.

Can I use dish soap to clean tires?
It’s not recommended. While dish soap will remove surface dirt, it also strips the protective compounds embedded in the rubber, which accelerates drying, cracking, and long-term dry rot. Use a dedicated tire cleaner instead.

What is the best homemade tire cleaner?
A mixture of warm water, a few drops of castile soap, and a tablespoon of baking soda makes a reasonable DIY solution for light cleaning. For white vinegar alternatives, dilute with equal parts water. However, these won’t match the effectiveness of a dedicated tire cleaner for removing oxidation and brake dust.

Why do my tires turn brown after cleaning?
This is tire blooming — antiozonants rising to the rubber surface and oxidizing. It’s a natural process built into the tire’s manufacturing. The best defense is regular deep cleaning combined with a UV-protective tire dressing that slows down the oxidation cycle.

Do I need a pressure washer to clean tires?
No — a standard garden hose works fine for most situations. A pressure washer simply speeds up the pre-rinse and final rinse stages and is especially helpful for removing heavy mud or road tar. The scrubbing stage is where the real cleaning happens regardless of water pressure.

Is it safe to use bleach on car tires?
No. Bleach is far too harsh for rubber and will degrade the sidewall compounds, leading to premature cracking and dry rot. Stick to products specifically formulated for tire rubber.


Final Thoughts: Clean Tires Are a Game-Changer

Learning how to deep clean your tires at home is one of the simplest, highest-impact car care skills you can develop. The process takes under an hour, costs a fraction of a professional detail, and the visual improvement is immediate and dramatic.

The key takeaways: use a dedicated tire cleaner, always scrub with a stiff brush, work in the shade, and finish with a UV-protective tire dressing to lock in that deep black finish and slow down future oxidation.

Make it a habit every 2 to 4 weeks, and your tires will look professionally detailed year-round.


Ready to get started?

👉 [Check out our recommended tire cleaner – HOLLEY TIRE DEGREASER & DRESSING]
👉 [Grab the best tire brush for deep cleaning – STIFF BRISTLE TIRE BRUSH]
👉 [Protect your results with a long-lasting tire dressing – CHEMICAL GUYS TIRE KICKER]


Have questions about tire cleaning or detailing? Drop them in the comments below — we’d love to help.

Hand Waxing vs Machine Waxing: Which Method Is Best for Your Car?

Introduction

Here’s a detailing truth most car enthusiasts learn the hard way: your waxing method matters just as much as the wax itself. You can buy the most expensive carnauba wax on the market, but if you apply it incorrectly—whether by hand or machine—you’ll end up with streaks, swirl marks, and disappointing results.

Car waxing serves three critical purposes: protecting your paint from UV damage and environmental contaminants, creating that eye-catching showroom shine, and extending the longevity of your vehicle’s clear coat. But the age-old debate continues to divide detailing enthusiasts: should you wax your car by hand or use a machine?

In this comprehensive guide, we’ll break down the real-world differences between hand waxing and machine waxing. You’ll learn which method produces better results, which is more cost-effective, and—most importantly—which approach is right for your specific situation, skill level, and vehicle type.


What Is Car Waxing?

Before diving into the hand versus machine debate, let’s establish what car waxing actually does and why it’s an essential part of automotive care.

Car waxing is the process of applying a protective layer over your vehicle’s paint or clear coat. This barrier shields your car from UV rays, road salt, bird droppings, tree sap, and other environmental hazards that cause oxidation and paint deterioration.

Types of Car Wax

Not all waxes are created equal. Understanding the three main categories helps you choose the right product for your application method:

Carnauba Wax: Derived from Brazilian palm trees, carnauba wax delivers the deepest, warmest glow—especially on dark-colored vehicles. It’s prized for its natural formulation and stunning wet-look finish, though it typically lasts 4-8 weeks.

Synthetic Sealants: These polymer-based products bond chemically with your paint, offering superior durability (3-6 months) and excellent water beading. They’re ideal for those who want long-term paint protection without frequent reapplication.

Hybrid Waxes: Combining natural carnauba with synthetic polymers, hybrid waxes aim to deliver both exceptional shine and extended durability, making them popular among detailing enthusiasts who want the best of both worlds.

Benefits of Waxing Your Car

  • UV Protection: Prevents sun damage that causes paint fading and oxidation
  • Water Beading: Creates hydrophobic properties that repel water and contaminants
  • Enhanced Gloss: Amplifies paint depth and clarity for that showroom finish
  • Easier Cleaning: Waxed surfaces resist dirt adhesion, making future washes simpler

Where Waxing Fits in the Detailing Process

Waxing is the final protective step in proper car detailing. The complete workflow looks like this:

  1. Wash and dry
  2. Decontaminate (clay bar treatment)
  3. Polish (if needed for paint correction)
  4. Wax or seal
  5. Maintain

Skipping preparation steps—especially washing and decontamination—leads to poor wax adhesion and potentially scratches your paint.


What Is Hand Waxing?

Hand waxing is the traditional, manual method of applying car wax using foam or microfiber applicator pads and buffing with microfiber towels.

How Hand Waxing Works

The process is straightforward:

  1. Apply a small amount of wax to a foam applicator pad
  2. Spread the wax over a 2×2 foot section using circular or straight overlapping motions
  3. Allow the wax to cure (typically 1-5 minutes, or until it hazes)
  4. Buff off the residue with a clean microfiber towel using light pressure

Pros of Hand Waxing

Greater Control in Tight Areas: Hand application excels in complex areas like around emblems, trim pieces, door handles, and body lines where machines can’t easily reach.

Lower Risk of Paint Damage: With no moving parts or motors, hand waxing virtually eliminates the risk of heat buildup, over-polishing, or creating swirl marks—assuming you use proper technique.

No Special Equipment Required: You only need basic supplies: wax, applicator pads, and microfiber towels. Total startup cost: under $30.

Ideal for Beginners: The learning curve is minimal. If you can wash your car, you can hand wax it.

Cons of Hand Waxing

Time-Consuming: Expect to spend 2-4 hours on a mid-size sedan, depending on your thoroughness and the wax’s cure time.

Physically Demanding: Repeatedly buffing wax by hand requires significant arm strength and stamina, especially on larger vehicles like SUVs or trucks.

Potential for Uneven Application: Without the consistent motion of a machine, it’s easy to apply wax too thick in some areas or miss spots entirely, leading to streaking.

Best Situations for Hand Waxing

Hand waxing shines in these scenarios:

  • Small vehicles or spot treatments (coupes, sedans)
  • Classic cars or vehicles with delicate single-stage paint
  • Beginners learning detailing basics without investment in equipment
  • Detail work around complex body lines and trim

Recommended Tools for Hand Waxing

[Premium Foam Applicator Pads]
Soft, non-abrasive pads prevent scratching while evenly distributing wax.

[High-Quality Microfiber Towels (Pack)]
Look for at least 400 GSM (grams per square meter) for maximum absorbency and scratch-free buffing.

[Premium Carnauba Paste Wax]
A high-quality carnauba wax designed specifically for hand application delivers superior results.


What Is Machine Waxing?

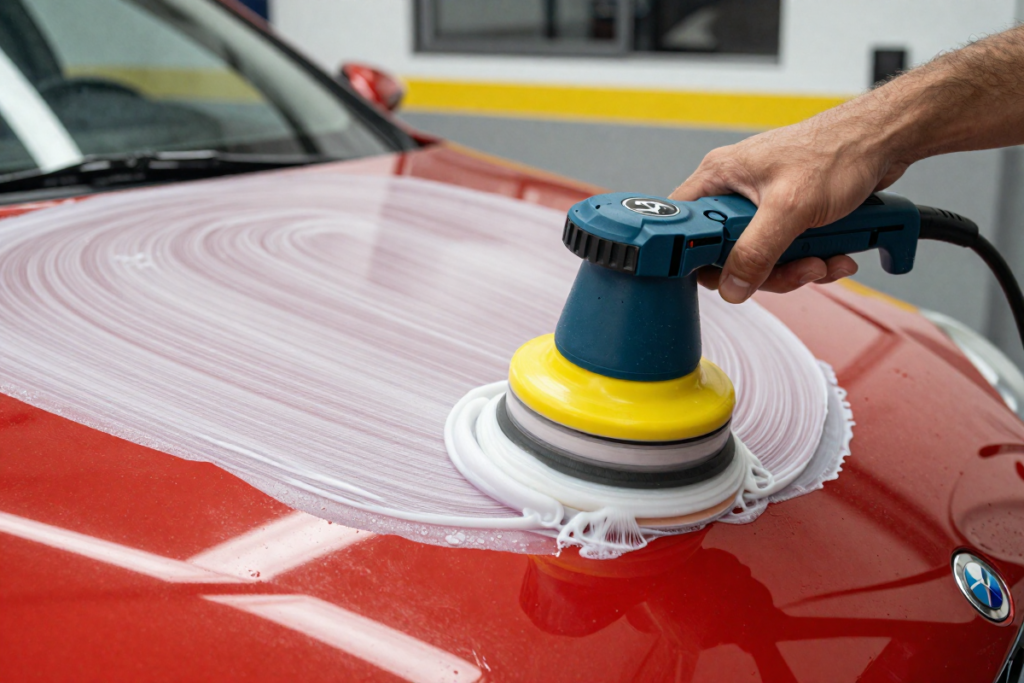
Machine waxing uses dual-action polishers or rotary buffers to apply and distribute wax evenly across your vehicle’s surface.

How Machine Waxing Works

Instead of manual elbow grease, a polishing machine does the work:

  1. Apply wax directly to a foam finishing pad attached to the polisher
  2. Spread the product across a section at low speed
  3. Work the wax into the paint using overlapping passes at medium speed
  4. Wipe away residue with a microfiber towel

The machine’s oscillating or rotating motion ensures even distribution and consistent pressure.

Types of Machines

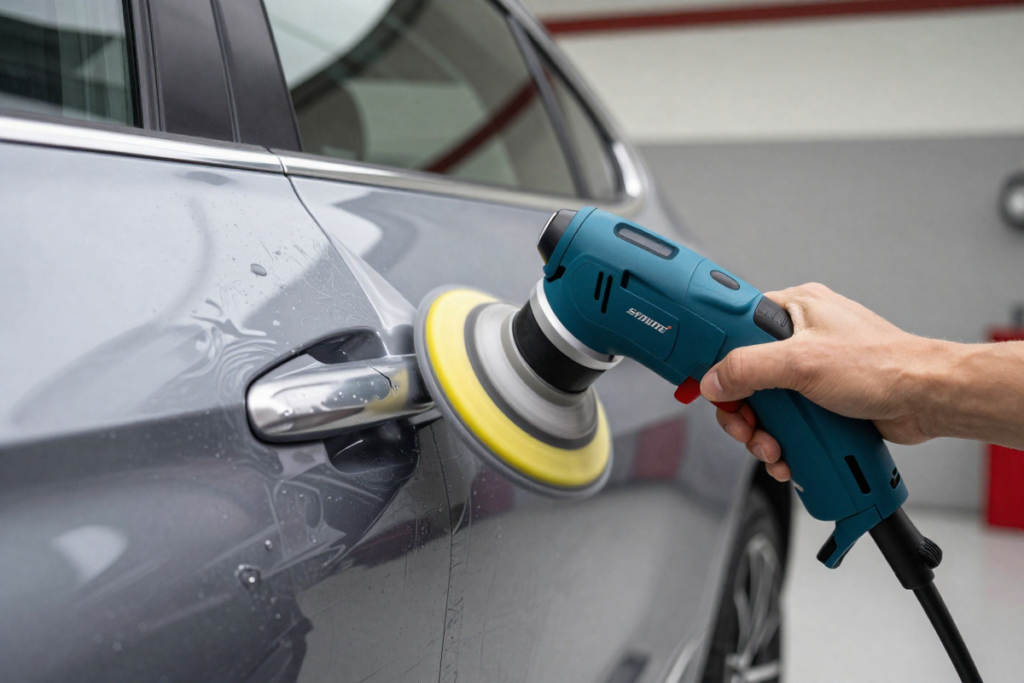
Dual-Action (DA) Polishers: Also called random orbital polishers, DA machines oscillate and rotate simultaneously. They’re beginner-friendly, produce minimal heat, and are extremely safe on clear coat finishes. Recommended for most car owners.

Rotary Buffers: Professional-grade tools that spin in one direction at high speeds. They’re powerful and efficient but require experience to avoid burning through paint or creating holograms. Best left to professionals or advanced users.

Pros of Machine Waxing

Faster Application: Machine waxing cuts application time by 50-70%. What takes 3 hours by hand might only take 45-90 minutes with a DA polisher.

More Uniform Coverage: Consistent machine motion eliminates streaking and ensures even product distribution across the entire panel.

Better for Large Surfaces: Hoods, roofs, and truck beds are covered quickly and efficiently without the physical fatigue of hand buffing.

Less Physical Effort: The machine does the work—you simply guide it. This makes frequent detailing sustainable long-term.

Cons of Machine Waxing

Higher Upfront Cost: A quality dual-action polisher costs $100-$300, plus pads and accessories. Budget $150-$400 for a complete setup.

Learning Curve: While DA polishers are user-friendly, there’s still technique to learn: proper speed settings, pressure application, and pad selection.

Risk of Paint Damage if Misused: Running a polisher too fast, using excessive pressure, or choosing the wrong pad can create swirl marks or heat damage.

Best Situations for Machine Waxing

Machine waxing is ideal for:

  • Large vehicles (SUVs, trucks, vans)
  • Frequent detailers who wax monthly or quarterly
  • Enthusiasts seeking professional-level results at home
  • Those who value time efficiency

Recommended Tools for Machine Waxing

[Dual-Action Polisher Kit]
Look for variable speed control (typically 2000-6000 OPM) and a 5-6 inch backing plate.

[Foam Finishing Pads Set]
Soft finishing pads (not cutting or polishing pads) are essential for waxing without marring.

[Machine-Friendly Liquid Wax]
Liquid or spray waxes distribute more evenly than paste when using a machine.


Hand Waxing vs Machine Waxing: Side-by-Side Comparison

FeatureHand WaxingMachine Waxing
Ease of UseBeginner-friendly, minimal setupModerate learning curve, requires practice
Time Required2-4 hours (mid-size car)45-90 minutes (mid-size car)
Cost$20-$50 (startup)$150-$400 (complete setup)
Finish QualityGood with proper techniqueExcellent, more consistent coverage
Risk LevelVery low (nearly damage-proof)Moderate if misused (safe with DA)
Physical EffortHigh (arm fatigue common)Low (machine does the work)
Best ForSmall cars, tight areas, beginnersLarge vehicles, frequent use, efficiency

Quick Summary Takeaway

  • Winner for Beginners: Hand waxing
  • Winner for Speed: Machine waxing
  • Winner for Cost: Hand waxing
  • Winner for Consistency: Machine waxing
  • Winner for Safety: Hand waxing (tie with DA polisher)
  • Winner for Large Vehicles: Machine waxing

Which Method Produces Better Results?

Let’s address the elephant in the room: is machine waxing better than hand waxing in terms of final appearance?

Shine and Gloss Comparison

Both methods can achieve stunning results when executed properly. The quality of the wax matters more than the application method for pure shine. That said, machine application tends to produce slightly deeper gloss due to:

  • More uniform wax distribution
  • Better product penetration into paint pores
  • Consistent buffing pressure across the entire surface

Real-world difference: In side-by-side comparisons, most people can’t distinguish between properly hand-waxed and machine-waxed panels unless they’re detailing professionals.

Durability of Protection

Wax longevity depends primarily on the product formula (carnauba vs synthetic), not the application method. However, machine waxing may offer marginally better durability because:

  • The polisher works the wax deeper into microscopic paint imperfections
  • More consistent coverage eliminates thin spots that wear faster

Typical durability: 4-8 weeks for carnauba (both methods), 3-6 months for synthetic sealants (both methods).

Consistency of Application

This is where machine waxing clearly wins. The oscillating motion of a DA polisher ensures:

  • No streaking or uneven haze
  • Consistent product thickness across all panels
  • Fewer missed spots or over-applied areas

Hand waxing requires meticulous attention to achieve the same uniformity—doable, but demanding.

Real-World Expectations vs Marketing Claims

Some manufacturers claim machine application “activates” their wax or produces superior bonding. This is mostly marketing. The truth:

  • Quality matters more than method
  • Proper paint prep (washing, claying) has more impact than application technique
  • Both methods produce excellent results in experienced hands

Cost Breakdown: Hand vs Machine Waxing

Initial Investment

Hand Waxing Costs:

  • Quality paste wax: $15-$35
  • Foam applicator pads (4-pack): $8-$15
  • Microfiber towels (6-pack): $15-$25
  • Total: $38-$75

Machine Waxing Setup Costs:

  • Dual-action polisher: $100-$300
  • Foam finishing pads (set of 4): $25-$50
  • Liquid wax suitable for machine use: $20-$40
  • Microfiber towels: $15-$25
  • Total: $160-$415

Long-Term Value

While machine waxing has higher upfront costs, consider the time savings:

  • If you wax 4 times per year, machine waxing saves approximately 8-12 hours annually
  • Over a 5-year period, that’s 40-60 hours saved
  • If your time is worth $20/hour, that’s $800-$1,200 in value

Cost per detail over time (assuming quarterly waxing):

  • Hand waxing: ~$10 per session (consumables)
  • Machine waxing: ~$15 per session initially (amortizing equipment), dropping to ~$10 after year 2

Budget Recommendations

Best Option Under $50: Hand waxing with quality paste wax
[Car Wax & Applicator Set]

Best Option for Serious Hobbyists: Entry-level DA polisher bundle
[DA Polisher Starter Kit]


Time and Effort Comparison

Average Time for Each Method

Hand Waxing:

  • Compact car: 1.5-2.5 hours
  • Mid-size sedan: 2-3.5 hours
  • Large SUV/truck: 3-5 hours

Machine Waxing:

  • Compact car: 30-45 minutes
  • Mid-size sedan: 45-90 minutes
  • Large SUV/truck: 90-120 minutes

Time variations depend on wax cure time, panel complexity, and your experience level.

Effort Required (Fatigue Factor)

Hand Waxing: Expect arm, shoulder, and upper back fatigue, especially during buffing. Large vehicles can be genuinely exhausting.

Machine Waxing: The polisher does the work—you simply guide it. Minimal physical strain, though holding the machine overhead (roof panels) can tire your arms.

Efficiency Tips for Both Approaches

For Hand Waxing:

  • Work in 2×2 foot sections
  • Use thin coats (less is more)
  • Wax in the shade to prevent premature curing
  • Switch hands periodically to prevent fatigue

For Machine Waxing:

  • Keep the pad primed with product (3-4 small dots per section)
  • Use speed setting 3-4 for waxing (lower than polishing)
  • Overlap passes by 50%
  • Wipe panels immediately after machine work

Common Mistakes to Avoid

Hand Waxing Mistakes

Applying Too Much Wax: The old adage is true—less is more. Thick wax layers are harder to buff and don’t provide extra protection. Use a thin, even coat.

Not Working in Small Sections: Attempting to wax entire panels at once leads to dried, difficult-to-remove residue. Stick to 2×2 foot areas.

Poor Buffing Technique: Using dirty towels, excessive pressure, or circular motions can create swirl marks. Use clean microfiber towels, light pressure, and straight-line motions.

Machine Waxing Mistakes

Using the Wrong Pad: Cutting or polishing pads are too abrasive for waxing. Always use soft finishing pads (typically black, white, or blue depending on brand).

Applying Too Much Pressure: Let the machine do the work. Excessive pressure slows the oscillation, creates heat, and can damage paint.

Running the Machine Too Fast: Waxing should be done at lower speeds (setting 3-4 out of 6) compared to polishing. High speeds fling product off the pad.

Skipping Paint Prep: Waxing over contaminated paint locks in dirt, brake dust, and iron particles. Always wash and clay bar first.


Pro Tips for Better Waxing Results

Regardless of your chosen method, these professional techniques elevate your results:

Always Wash and Decontaminate First

Waxing over dirty or contaminated paint is the #1 mistake. Follow this sequence:

  1. Thorough wash with pH-neutral car shampoo
  2. Clay bar treatment to remove embedded contaminants
  3. Dry completely
  4. Wax

Use the “Thin Coat” Rule

A single thin layer of wax provides the same protection as thick coats—with easier application and removal. Think “barely there.”

Work in the Shade

Direct sunlight causes wax to cure too quickly, making it difficult to buff and increasing the risk of streaking. Work in a garage or shaded area.

Use High-Quality Microfiber Towels

Not all microfiber is equal. Look for:

  • 400+ GSM (thickness)
  • Plush weave (not waffle or terry)
  • Clean towels (wash separately without fabric softener)

[AFFILIATE LINK PLACEHOLDER: Professional-Grade Microfiber Towel Set]

Layering Wax: Myth vs Reality

Myth: Multiple wax coats provide exponentially better protection.
Reality: Most benefits come from the first coat. A second coat may add 10-20% more durability, but three or more layers offer diminishing returns.

If you want extra protection, wait 12-24 hours between coats.


Hybrid Approach: Best of Both Worlds

Many professional detailers use a combination approach that leverages the strengths of both methods.

Using a Machine for Application, Hand for Finishing

The Process:

  1. Apply and work the wax with a DA polisher on large, flat panels (hood, roof, doors, trunk)
  2. Hand apply in tight areas (grilles, emblems, trim, mirrors)
  3. Final buff by hand for show-car perfection

When Combining Methods Makes Sense

This hybrid approach is ideal when:

  • You want efficiency on large panels but precision on details
  • You’re preparing for car shows or photos
  • You’re working with complex body lines (sports cars, luxury vehicles)

Recommended Workflow

  1. Wash and decontaminate entire vehicle
  2. Machine wax all flat, accessible panels
  3. Hand wax intricate areas
  4. Final inspection and hand buffing of entire car
  5. Total time: 60-90 minutes for mid-size sedan

Frequently Asked Questions

Is machine waxing better than hand waxing?

Neither method is inherently “better”—it depends on your priorities. Machine waxing is faster and more consistent, making it better for large vehicles and frequent detailing. Hand waxing offers more control in tight spaces and has zero learning curve, making it better for beginners or classic cars. Both produce excellent results when done properly.

Can beginners use a polisher safely?

Yes, dual-action polishers are safe for beginners. Unlike rotary buffers, DA polishers won’t burn paint even if you make mistakes. Start at low speeds, use finishing pads, and practice on less visible panels first. Avoid rotary buffers until you gain experience.

How often should you wax your car?

Carnauba wax: Every 4-8 weeks
Synthetic sealants: Every 3-6 months
General rule: When water stops beading or paint feels rough, it’s time to rewax.

Climate, garage parking, and wash frequency affect durability.

Does machine waxing remove scratches?

No. Wax fills and hides minor imperfections temporarily but doesn’t remove them. To actually remove scratches, you need polishing (paint correction) with abrasive compounds—a separate process done before waxing.

What’s the safest method for new car paint?

Both hand and machine (DA) waxing are safe for new cars. Modern clear coat finishes are durable. For added caution, hand wax for the first 3-6 months, then transition to a DA polisher as you gain confidence. Avoid rotary buffers on new paint unless you’re experienced.


Final Verdict: Which Method Is Best for You?

After comparing every angle—cost, time, results, and ease of use—here’s your decision framework:

Clear Recommendations Based on User Type

Beginners → Hand Waxing
Start with hand application to learn proper technique without equipment investment. Once you understand waxing fundamentals, consider upgrading to a DA polisher.

Enthusiasts → Machine Waxing
If you detail regularly and own a mid-size or larger vehicle, a dual-action polisher is worth every penny. The time savings and consistent results justify the upfront cost.

Professionals → Machine + Hybrid Approach
Combine machine efficiency on flat panels with hand precision on details. This delivers the fastest, most consistent professional-grade results.

Decision Checklist

Choose Hand Waxing if you:

  • ✓ Own a small vehicle (coupe, compact sedan)
  • ✓ Wax 1-2 times per year
  • ✓ Have a budget under $50
  • ✓ Are new to detailing
  • ✓ Own a classic car with delicate paint

Choose Machine Waxing if you:

  • ✓ Own a large vehicle (SUV, truck, van)
  • ✓ Detail quarterly or more often
  • ✓ Can invest $150-$300 in equipment
  • ✓ Value time efficiency
  • ✓ Want professional-grade results

Choose the Hybrid Approach if you:

  • ✓ Want the best of both worlds
  • ✓ Detail for car shows or photography
  • ✓ Have a vehicle with complex body lines
  • ✓ Already own a DA polisher

Take Action: Start Waxing Smarter Today

Now that you understand the real differences between hand waxing and machine waxing, it’s time to choose your approach and get started.

Continue Your Detailing Education

Ready to master the complete car care process? Check out these related guides:

What’s your preferred method—hand or machine waxing? Let me know in the comments!


Disclaimer: This article contains affiliate links. If you purchase through these links, we may earn a small commission at no additional cost to you. This helps us create more detailed, helpful content for car enthusiasts like you.