Have you ever slid into your car and noticed mysterious stains, lingering odors, or pet hair embedded in every surface? You’re not alone. Dirty car upholstery isn’t just an eyesore—it’s a health concern, a source of embarrassing smells, and a major hit to your vehicle’s resale value. Whether it’s spilled coffee from your morning commute, muddy paw prints from your furry friend, or mysterious stains you can’t quite identify, neglected upholstery creates an unpleasant driving environment.
The good news? Cleaning car seats and restoring your interior doesn’t require professional detailing skills or expensive equipment. This comprehensive guide will walk you through a simple, beginner-friendly system for cleaning cloth car seats, leather upholstery, and everything in between. We’ll cover the essential tools you need, step-by-step techniques, and how to tackle those stubborn stains that seem impossible to remove.
By the end of this guide, you’ll know exactly how to make your car seats look new again—without breaking the bank or spending hours on complicated processes.
Understanding Your Car Upholstery Type
Before you spray any cleaner or scrub any surface, identifying your upholstery type is crucial. Using the wrong cleaning method can cause permanent damage, fading, or cracking. Let’s break down the most common materials you’ll find in vehicle interiors.
Fabric Upholstery
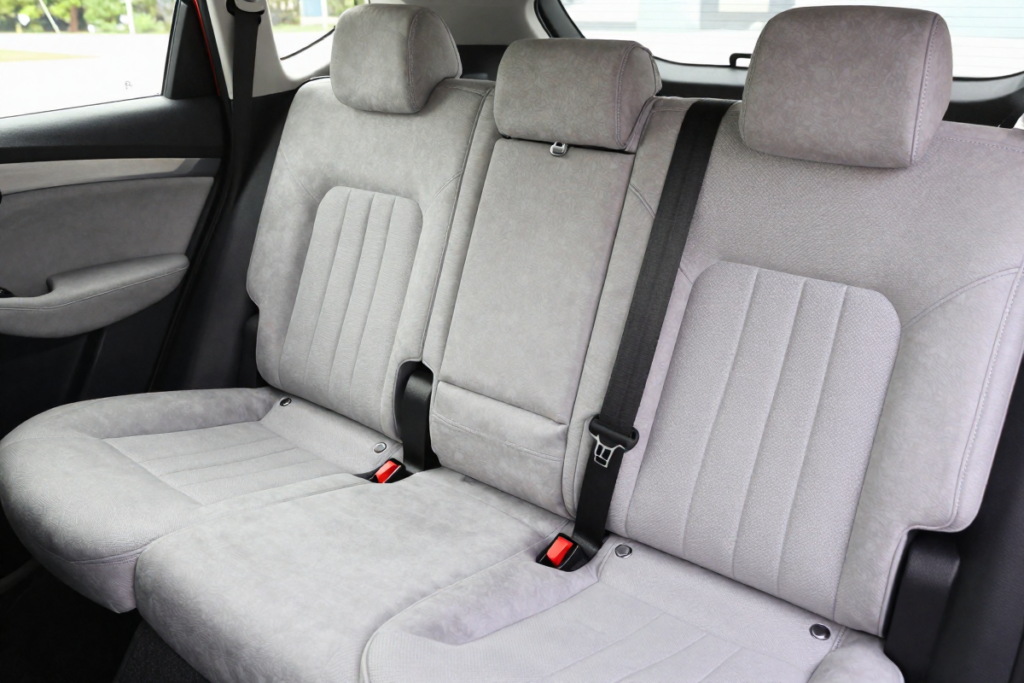
Fabric seats—often made from polyester, nylon, or cloth blends—are the most common in everyday vehicles. These materials are durable and comfortable but come with a significant drawback: they’re like sponges for stains, odors, and liquids. Coffee spills penetrate deep into the fibers, pet accidents leave lasting smells, and dirt gets ground into the weave over time.
The porous nature of fabric car seats means they require regular deep cleaning to prevent buildup. However, they’re also the most forgiving when it comes to DIY cleaning since they can handle more aggressive scrubbing and moisture compared to leather.
Leather Upholstery
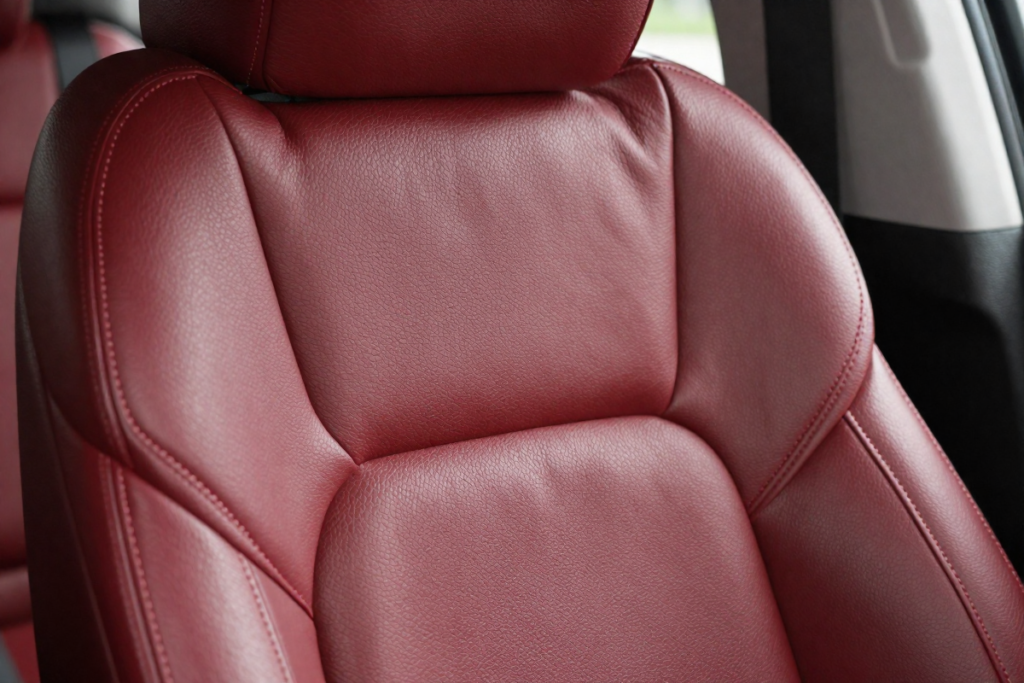
Leather seats add a touch of luxury to any vehicle, but they demand special care. Genuine leather is a natural material that can dry out, crack, and fade when exposed to harsh cleaners, excessive water, or direct sunlight. Unlike fabric, leather has a protective coating that can be stripped away by improper cleaning methods.
The key to cleaning leather car seats without damaging them is using pH-neutral cleaners specifically formulated for leather, followed by a quality conditioner to restore moisture and prevent cracking.
Vinyl & Synthetic Materials
Vinyl and synthetic leather (often called “leatherette” or “pleather”) are increasingly common in modern vehicles. These materials are easier to maintain than genuine leather and more stain-resistant than fabric. However, they still require proper care—harsh chemicals can cause the surface to crack or peel over time.
Vinyl responds well to gentle cleaning with mild soap and water, making it an ideal option for beginner detailers.
Why Identifying Material Matters
Understanding your upholstery type isn’t just about preventing damage—it’s about choosing the right cleaning products and techniques for effective results. A fabric cleaner that works wonders on cloth seats could strip the protective coating from leather. A leather conditioner on fabric seats won’t penetrate properly. Taking five minutes to identify your material saves you from costly mistakes and ensures the best outcome.
Essential Tools & Supplies You’ll Need
One of the biggest myths about car interior detailing is that you need expensive professional equipment. While specialized tools can make the job easier, most beginner-friendly car seat cleaning can be accomplished with basic supplies you might already own.
Basic Cleaning Tools
Vacuum Cleaner with Attachments
A quality vacuum is the foundation of any car cleaning project. Look for one with a crevice tool for getting into tight seams and an upholstery brush attachment for loosening embedded dirt. A wet-dry vacuum offers added versatility for extracting liquid from deep within fabric seats.
[Recommended handheld vacuum with car detailing attachments]
Microfiber Cloths
Never underestimate the power of quality microfiber towels. These soft, absorbent cloths won’t scratch surfaces and are perfect for blot drying, wiping down leather, and buffing surfaces to a clean finish. Keep at least 5-6 on hand—you’ll go through them faster than you think.
[Great option: Pack of microfiber cleaning towels]
Soft-Bristle Brush
A detailing brush with soft bristles helps agitate cleaning solution without damaging upholstery fibers. Avoid stiff brushes that can fray fabric or scratch leather surfaces.
[Get Here: Soft-bristle detailing brush set]
Cleaning Solutions
Upholstery Cleaner for Fabric Seats
Choose a dedicated fabric upholstery cleaner that’s safe for automotive use. These cleaners are formulated to lift stains without leaving soapy residue that attracts more dirt.
Best way to clean fabric car seats at home: Look for pH-neutral, foam-based cleaners that don’t require excessive water.
[Option 1: Budget fabric upholstery cleaner]
[Option 2: Mid-range upholstery cleaner]
[Option 3: Premium professional-grade upholstery shampoo]
Leather Cleaner & Conditioner
For leather seats, you’ll need a two-step system: a gentle cleaner to remove dirt and oils, followed by a conditioner to restore moisture and prevent cracking.
[Recommended Set: Leather cleaning and conditioning kit]
DIY vs Store-Bought Solutions
Many car owners swear by DIY solutions for car upholstery. A popular beginner recipe combines:
- 1 cup warm water
- 2 tablespoons dish soap
- 1 tablespoon white vinegar
- 1 tablespoon baking soda
While this cheap way to clean a car’s interior works for light maintenance, dedicated automotive cleaners offer better results for tough stains and won’t risk leaving residue or damaging protective coatings.
Optional (But Highly Effective) Tools
Steam Cleaner
A portable steam cleaner is a game-changer for deep cleaning car seats. The high-temperature steam sanitizes surfaces, loosens embedded dirt, and kills odor-causing bacteria—all without harsh chemicals.
Is steam cleaning safe for all car upholstery? Yes for fabric, but use caution with leather and avoid prolonged heat exposure that could dry out the material.
[RECOMMENDED PRODUCT: Portable handheld steam cleaner for automotive use]
Drill Brush Attachments
These spinning brush heads attach to a standard power drill and make scrubbing large surface areas much faster and less physically demanding.
[HELPFUL TOOL: Drill brush attachment kit for car detailing]
Portable Carpet Extractor
For serious stain removal and deep cleaning, a portable carpet extractor sprays cleaning solution and immediately extracts it along with dirt. This prevents over-saturation while providing professional-level results.
[RECOMMENDED PRODUCT: Compact portable extractor for auto detailing]
Step-by-Step Guide to Cleaning Car Upholstery
Now that you understand your upholstery type and have gathered your supplies, let’s dive into the easiest way to scrub car seats and restore your interior.
Step 1: Remove Trash & Declutter
Before any cleaning begins, remove all trash, personal items, floor mats, and loose objects from your vehicle. This gives you clear access to all surfaces and prevents you from missing dirt hiding under clutter. Take out car seats if you have young children—you’ll be amazed at what’s hidden underneath.
Pro tip: Use this opportunity to organize items you actually need in your car (emergency kit, registration documents) and remove everything else.
Step 2: Vacuum Thoroughly
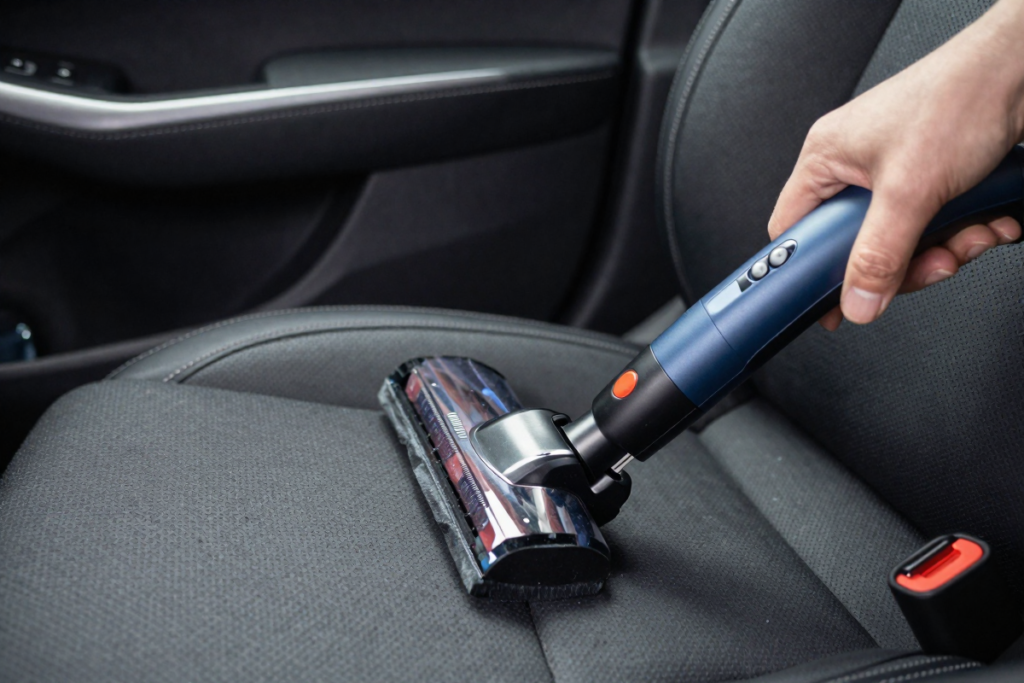
This is the most important step that beginners often rush or skip entirely. Vacuuming removes loose dirt, crumbs, pet hair, and debris that would otherwise turn into mud when you apply cleaning solution.
How to get dog hair out of car upholstery: Use a rubber pet hair removal brush or pumice stone to loosen embedded fur before vacuuming. Work in one direction, then vacuum immediately.
Focus on:
- Seat seams and stitching lines
- Crevices where the backrest meets the seat cushion
- Under and between seats
- Headrests and armrests
- Door panel fabric
Use your crevice tool for tight spaces and the upholstery attachment for flat surfaces. Make multiple passes—you’ll pick up more dirt than you expect on the second and third rounds.
Step 3: Pre-Treat Stains
Identify and pre-treat visible stains before applying general cleaner to the entire seat. Different stain types require different approaches:
Coffee stains: Blot with cold water, then apply upholstery cleaner
Grease and food stains: Sprinkle baking soda to absorb oil, let sit 15 minutes, vacuum, then clean
Pet stains and odors: Use an enzymatic cleaner to break down organic matter
Ink marks: Apply rubbing alcohol to a cloth and dab gently (test first!)
Mud and dirt: Let dry completely, brush off excess, then clean normally
Critical tip: Always test your cleaning solution on an inconspicuous area first—under the seat or on a hidden section. Wait 5-10 minutes to ensure there’s no discoloration or damage before proceeding.
Step 4: Apply Cleaning Solution
For Fabric Seats:
Spray your upholstery cleaner evenly across the surface, working in 2-foot sections. Don’t drench the material—light, even coverage is key. The foam in quality cleaners does the work, so you don’t need excessive liquid.
Best way to clean fabric car seats at home: Work from top to bottom so dirty runoff doesn’t contaminate already-cleaned areas.
For Leather Seats:
Apply leather cleaner to a microfiber cloth (not directly to the leather) and gently wipe the surface. Use a second clean, slightly damp cloth to remove the cleaner. Leather requires minimal moisture—the goal is to clean without saturating.
For Vinyl/Synthetic Materials:
Mix a small amount of gentle dish soap with warm water. Dampen a cloth with the solution and wipe down surfaces, then follow with a clean damp cloth to remove soap residue.
Step 5: Scrub Gently
Using your soft-bristle brush, agitate the cleaning solution into the upholstery using gentle circular motions. This helps the cleaner penetrate fibers and lift embedded dirt to the surface.
What is the easiest way to scrub car seats? Let the cleaning solution do most of the work—you’re just helping it along. Aggressive scrubbing can damage fibers and actually work dirt deeper into the material.
For fabric seats, focus on high-traffic areas like the seat bottom and backrest where body oils accumulate. For leather, use minimal pressure—a gentle wipe with a microfiber cloth is usually sufficient.
Step 6: Wipe & Extract Dirt

For fabric seats, use clean microfiber towels to blot and wipe away the loosened dirt and cleaning solution. You should see the dirt transfer to your towels—keep using fresh towels until they come away relatively clean.
If you have a portable extractor, now’s the time to use it. Make slow, overlapping passes to pull moisture and dirt from deep within the fabric. This prevents the over-saturation that leads to mold and mildew.
For leather and vinyl, a simple wipe-down with a clean, slightly damp microfiber cloth removes cleaner and dirt.
Step 7: Dry Properly
Proper drying prevents mold, mildew, and that musty smell that comes from damp upholstery.
How long does it take for car seats to dry after cleaning? Typically 2-4 hours for fabric seats with good airflow, less for leather and vinyl.
Best drying methods:
- Open all doors and windows to maximize airflow
- Park in direct sunlight (but not for leather—UV damage is real)
- Use fans to circulate air
- Run the car’s heater on high with windows cracked
- Use dry towels to blot away excess moisture
Never close up your car while upholstery is still damp. Moisture trapped in an enclosed space creates the perfect environment for mold and odor-causing bacteria.
How to Remove Common Stains (Quick Solutions Section)
Sometimes you need a targeted approach for specific stains. Here are proven solutions for the most common car upholstery challenges:
Coffee Stains
How to remove coffee stains from car upholstery: Blot immediately with a cold, damp cloth—never rub, as this spreads the stain. Mix equal parts white vinegar and water, spray lightly on the stain, and blot with a clean cloth. For set-in coffee stains, use a dedicated upholstery cleaner and let it sit for 5 minutes before blotting and rinsing.
Food & Grease Stains
Grease requires a different approach than water-based stains. Sprinkle baking soda or cornstarch liberally on the grease stain and let it sit for 30 minutes to absorb the oil. Vacuum thoroughly, then treat with a degreasing upholstery cleaner. Dish soap works in a pinch—it’s designed to cut grease.
Pet Stains & Odors
Getting tough stains out of my car’s upholstery caused by pets requires enzymatic cleaners that break down organic matter. Regular cleaners mask odors temporarily, but enzymatic cleaners eliminate the source.
Blot up as much liquid as possible, apply the enzymatic cleaner according to package directions (usually letting it sit for 10-15 minutes), then extract or blot thoroughly. You may need to repeat the process for old or severe stains.
[TRY THIS: Enzymatic pet stain and odor remover for cars]
Ink Marks
Ink is tricky and requires a delicate touch. Apply a small amount of rubbing alcohol to a cotton ball or cloth and gently dab—don’t rub—the ink stain. The alcohol dissolves the ink, transferring it to your cloth. Keep using fresh cotton balls until no more ink transfers. Follow with your regular upholstery cleaner to remove any alcohol residue.
Important: This works on fabric; test very carefully on leather and avoid on vinyl.
Mud & Dirt
Resist the urge to clean mud while it’s wet—you’ll just spread it and work it deeper into fibers. Let mud dry completely, then brush off as much as possible with a stiff brush. Vacuum thoroughly, then proceed with normal cleaning. The dried mud particles come away much more easily than wet mud.
Deep Cleaning vs Maintenance Cleaning
Understanding the difference between deep cleaning and regular maintenance helps you keep your car’s interior looking great without spending hours on detailing every week.
When to Do a Deep Clean
A full deep clean—including pre-treatment, scrubbing, extraction, and conditioning—should happen:
- Every 6 months for average use
- Every 3-4 months if you have pets or children
- Seasonally (spring and fall) to address winter salt/mud and summer dust
- Before selling or trading in your vehicle
- After any major spill or stain incident
Weekly/Monthly Upkeep Routine
Weekly (10 minutes):
- Quick vacuum of seats, floors, and crevices
- Wipe down surfaces with a microfiber cloth
- Remove any trash or clutter
Monthly (30 minutes):
- Thorough vacuuming, including under seats
- Spot-treat any new stains immediately
- Wipe down door panels, dashboard, and console
- Shake out and vacuum floor mats
Time-Saving Tips for Busy Car Owners
- Keep a small trash bag in your car to prevent accumulation
- Use seat covers if you regularly transport pets or children
- Address spills immediately—most stains are easy when fresh
- Keep a small pack of automotive wipes in your glove box for quick cleanups
- Do mini-sessions: clean just the front seats one weekend, back seats the next
Pro Tips for Best Results
After cleaning hundreds of car interiors, professional detailers have learned tricks that make a significant difference in results:
Avoiding Over-Wetting Upholstery
The biggest mistake beginners make is using too much water or cleaning solution. Over-saturation leads to:
- Extended drying times
- Mold and mildew growth
- Water stains and rings
- Damage to foam padding underneath
Safe cleaners for car interior fabric should be applied lightly and worked in with agitation rather than soaking the material.
Testing Products First
Never skip the patch test. Apply your cleaning solution to a hidden area (under the seat, behind a headrest) and wait 10 minutes. Check for:
- Discoloration or fading
- Changes in texture
- Damage to protective coatings
This 30-second test could save you from ruining your entire interior.
Cleaning in the Right Weather Conditions
Timing matters for car upholstery cleaning. Ideal conditions:
- Moderate temperature (60-75°F)
- Low humidity
- Good airflow
- Ability to leave doors/windows open for several hours
Avoid cleaning on humid or rainy days—moisture in the air dramatically extends drying time and increases mold risk.
Using Protectants After Cleaning

Once your upholstery is clean and completely dry, consider applying a protective treatment:
For fabric: Fabric protectant creates a barrier that makes future spills bead up on the surface rather than soaking in. This gives you time to blot spills before they become stains.
[RECOMMENDED: Fabric protectant spray for automotive upholstery]
For leather: Always follow cleaning with a quality leather conditioner. This replaces natural oils, prevents cracking, and provides UV protection.
[GREAT CHOICE: Premium leather conditioner with UV protection]
Common Mistakes to Avoid
Learn from others’ errors and sidestep these frequent car upholstery cleaning pitfalls:
Using Household Cleaners Incorrectly
Can I use laundry detergent to clean my car seats? Technically yes, but it must be highly diluted (1-2 tablespoons per gallon of water). The problem with household cleaners is they’re designed for fabrics that will be thoroughly rinsed—something you can’t do with car upholstery. Residual soap attracts dirt, making seats get dirty faster.
Similarly, avoid:
- Bleach (causes discoloration and fabric damage)
- Window cleaner with ammonia on leather (dries and cracks the material)
- Undiluted vinegar (too acidic for some materials)
Scrubbing Too Aggressively
Vigorous scrubbing doesn’t equal better cleaning. It damages fibers, frays fabric, and can wear through protective coatings on leather. Let chemical cleaners do the heavy lifting with gentle agitation assistance from you.
Skipping Vacuuming First
Applying wet cleaner to dirt-covered seats creates mud that grinds deeper into fibers. Always vacuum first—it’s the foundation of effective cleaning.
Ignoring the Drying Process
Closing your car before upholstery is completely dry is asking for trouble. Trapped moisture leads to:
- Musty, mildew smell that’s difficult to eliminate
- Mold growth that can cause health issues
- Permanent water stains and rings
- Degradation of seat padding
How do I get rid of deep-set odors in my car seats? Often, persistent smells come from moisture trapped in padding. Thorough drying prevents this issue.
How Often Should You Clean Car Upholstery?
The right cleaning frequency depends on several factors specific to your situation.
Based on Usage
Daily commuter without pets or kids: Deep clean every 6 months, quick vacuum weekly, spot-clean as needed
Family vehicle with children: Deep clean every 3-4 months, vacuum weekly, wipe spills immediately
Pet owners: Deep clean every 2-3 months, vacuum 2-3 times weekly, use seat covers for protection
Ride-share or delivery drivers: Deep clean monthly, quick clean after each shift, protect high-touch areas
Seasonal Recommendations
Certain times of year are harder on car interiors:
Spring: Address winter salt, mud, and moisture accumulation
Summer: Remove dust, pollen, and sunscreen residue
Fall: Prepare for wet weather and falling leaves
Winter: Quick cleanings more frequently due to snow and road salt
Signs It’s Time to Clean
Don’t wait for a schedule—your car will tell you when it needs attention:
- Visible stains or discoloration
- Musty or unpleasant odors
- Sticky or grimy feeling on surfaces
- Dirt visible in seams and crevices
- Decreased air quality (sneezing, allergies)
Benefits of Regular Upholstery Cleaning

Consistent car interior maintenance provides returns that go far beyond aesthetics.
Improved Air Quality
Your car’s cabin is a small, enclosed space. Dirty upholstery harbors:
- Dust mites and allergens
- Bacteria and mold spores
- VOCs (volatile organic compounds) from stains
- Pet dander and pollen
Regular cleaning removes these contaminants, making every drive healthier—especially important for those with allergies or respiratory issues.
Better Driving Experience
There’s something psychologically satisfying about sliding into a clean, fresh-smelling car. Clean upholstery contributes to:
- Reduced stress during commutes
- Pride in vehicle ownership
- Comfort for passengers
- Professional appearance for work vehicles
Increased Resale Value
When it comes time to sell or trade your vehicle, interior condition significantly impacts value. Clean, well-maintained upholstery signals that the vehicle was cared for overall. Conversely, stained, smelly seats reduce offers by hundreds or even thousands of dollars.
How to make my car seats look new again isn’t just about pride of ownership—it’s a smart financial decision that protects your investment.
Odor Elimination
Removing cigarette smell from car seats, pet odors, and other persistent smells requires more than air fresheners. Deep cleaning eliminates odor sources rather than masking them. Combined with proper ventilation and deodorizing treatments, you can completely restore fresh air to your vehicle.
DIY vs Professional Cleaning
At some point, you might wonder whether to tackle the job yourself or hire a professional detailing service. Let’s examine both options honestly.
DIY Pros & Cons
Advantages:
- Significant cost savings (DIY costs $20-50 vs. $100-300 professional)
- Clean on your schedule
- Learn valuable maintenance skills
- Control over products used (important for sensitivities)
- Satisfaction of completing the project yourself
Disadvantages:
- Time investment (2-4 hours for thorough job)
- Physical effort required
- Initial tool/product purchase costs
- Learning curve and potential for mistakes
- Limited equipment compared to professionals
Professional Service Pros & Cons
Advantages:
- Professional-grade equipment (hot water extractors, commercial steamers)
- Expertise in handling difficult stains and delicate materials
- Faster completion (professionals work efficiently)
- Often includes additional services (fabric protection, deodorizing)
- Great for severe neglect or damage
Disadvantages:
- Expensive ($150-400 for full interior detail)
- Must schedule appointment and drop off vehicle
- Variable quality depending on service provider
- May use harsh chemicals you’d prefer to avoid
Cost Comparison
DIY First-Time Setup:
- Quality vacuum with attachments: $50-100
- Upholstery cleaner: $10-25
- Microfiber towels: $10-20
- Detailing brushes: $10-15
- Total: $80-160 (reusable for many cleanings)
DIY Ongoing Costs:
- Replacement cleaner: $10-25 every 3-6 months
- New microfiber towels as needed: $10-20 annually
Professional Detailing:
- Basic interior cleaning: $100-150
- Complete interior detail: $200-300
- Premium detail with protection: $300-500
When to Choose Each Option
Choose DIY when:
- You have time and physical ability
- Stains are light to moderate
- You want to save money
- You enjoy hands-on maintenance
- You need to clean regularly
Choose professional service when:
- Dealing with severe stains or damage
- You lack time or physical ability
- Preparing vehicle for sale (professional results show better)
- Initial cleaning of a heavily neglected interior
- You own specialty materials (Alcantara, suede) requiring expert care
Best approach: Learn DIY methods for regular maintenance, use professionals for annual deep cleaning or major issues.
Frequently Asked Questions (FAQ)

Can I use laundry detergent to clean my car seats?
Yes, but it must be highly diluted to prevent soapy residue—use only 1-2 tablespoons per gallon of warm water. The challenge with laundry detergent is that it’s designed for fabrics that receive thorough rinsing, which isn’t possible with car upholstery. Residual soap attracts dirt, making your seats get dirty faster. For best results, use pH-neutral automotive upholstery cleaners instead.
How long does it take for car seats to dry after cleaning?
Typically 2-4 hours depending on airflow, humidity, and sunlight. Fabric seats take longer than leather or vinyl. Speed up drying by opening all doors and windows, parking in direct sunlight (avoid for leather), using fans, or running your car’s heater with windows slightly cracked. Never close up your vehicle while upholstery is still damp—this creates the perfect environment for mold and mildew.
What is the best DIY solution for car upholstery?
A simple beginner-friendly mix combines 1 cup warm water, 2 tablespoons dish soap, 1 tablespoon white vinegar, and 1 tablespoon baking soda. Spray lightly on fabric seats, agitate with a soft brush, and blot with clean microfiber towels. While this works for light maintenance and fresh stains, dedicated automotive cleaners provide better results for tough stains and won’t risk leaving residue.
How do I get rid of deep-set odors in my car seats?
Deep-set odors typically come from bacteria or organic matter embedded in upholstery. Use an enzymatic cleaner that breaks down odor-causing compounds at the source rather than masking smells. Apply the enzymatic treatment, let it sit according to package directions (usually 10-15 minutes), then extract or blot thoroughly. For persistent odors, a baking soda treatment works well: sprinkle liberally on dry upholstery, let sit overnight, then vacuum thoroughly.
Is steam cleaning safe for all car upholstery?
Generally yes for fabric upholstery, but use caution with leather and delicate materials like Alcantara. Steam cleaning effectively sanitizes and deep cleans fabric seats without harsh chemicals. For leather, brief, gentle steam application is acceptable, but avoid prolonged heat exposure that can dry out the material—always follow immediately with leather conditioner. Never steam clean headliners or delicate trim pieces that might separate or warp from moisture and heat.
How often should I deep clean my car’s interior?
For average use without pets or children, deep clean every 6 months. If you have pets or kids, increase frequency to every 3-4 months. Daily commuters in dusty climates might need quarterly cleanings. Between deep cleans, maintain with weekly vacuuming and immediate spot treatment of spills. The key is consistency—regular light maintenance prevents the need for intensive restoration work.
Conclusion

Cleaning your car’s upholstery doesn’t require professional skills or expensive equipment—just the right approach, basic tools, and a little patience. By following this step-by-step guide to car interior shampooing and maintenance, you can transform dingy, stained seats into a fresh, inviting space that makes every drive more enjoyable.
Remember the fundamentals: identify your upholstery type, vacuum thoroughly before applying any liquids, use appropriate cleaning solutions, work in sections, and allow proper drying time. Whether you’re dealing with everyday dirt or tackling tough stains like coffee spills and pet accidents, the techniques we’ve covered will help you achieve professional-looking results at home.
The secret to maintaining a pristine car interior isn’t marathon cleaning sessions—it’s consistency. A quick weekly vacuum and immediate attention to spills prevents small issues from becoming major problems. Combine regular maintenance with seasonal deep cleaning, and your upholstery will look great for years to come.
Ready to get started? Gather your supplies, set aside a sunny afternoon, and give your car’s interior the attention it deserves. The satisfaction of sliding into freshly cleaned seats—knowing you did it yourself—is well worth the effort.
Want to make the job even easier? Check out our recommended tools and cleaning products below to achieve the best results with less time and effort.
Disclaimer: This article contains affiliate links. If you purchase an item through the link I will earn a small commission at no extra cost to you.
[START WITH THIS: Complete car upholstery cleaning starter kit]