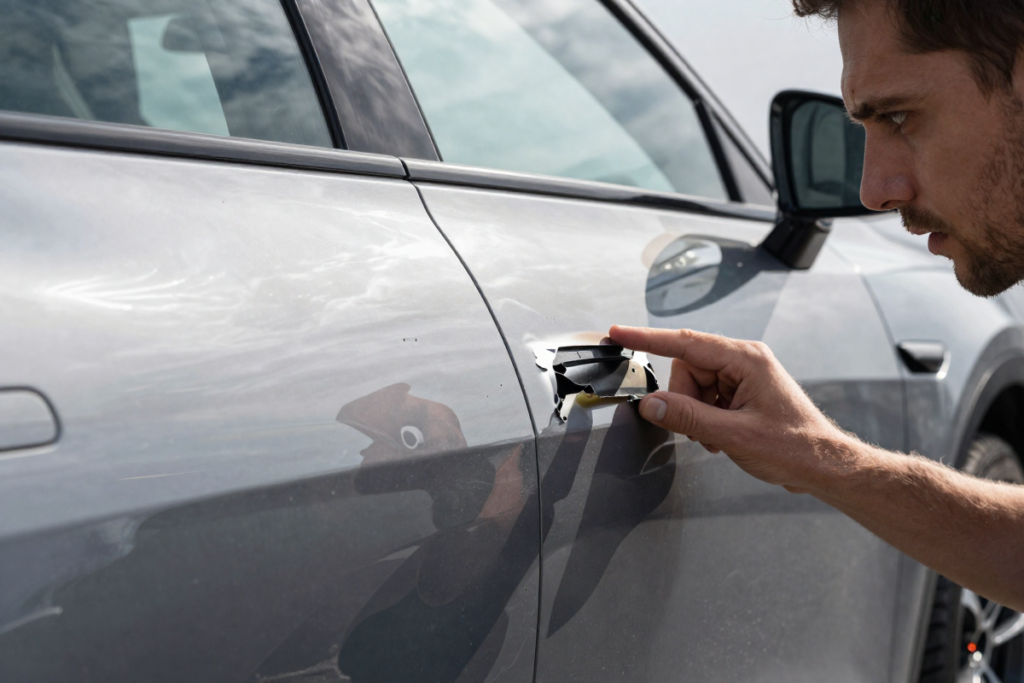
You’re walking to your car, and something catches your eye. A small chip in the paint — and underneath it, a flash of bare silver metal staring back at you. It’s one of those moments where your stomach drops a little, and your first instinct is to wonder how serious this actually is.
Here’s the honest answer: it depends — but it’s never something you should ignore.
Exposed metal on a car is more than a cosmetic issue. Once that protective barrier is gone, your car’s body is vulnerable to rust, corrosion, and long-term structural damage that can quietly snowball into a much bigger (and more expensive) problem. The good news? In most cases, you can fix it yourself at home for under $100 — and even if you can’t, knowing your options puts you firmly in control.
In this guide, we’ll walk you through everything: what’s actually happening under that chip, how fast rust can form, temporary fixes to buy yourself time, a complete DIY repair walkthrough, and when it makes more sense to call in a professional.
Is Exposed Metal on a Car Actually Serious?
What Happens When Car Paint Chips Down to Bare Metal
To understand why a paint chip that reaches metal is a bigger deal than a surface scratch, it helps to know what your car’s paint job actually consists of. From the outside in, your car has four distinct layers:
- Clear coat — The glossy, transparent topcoat that protects everything beneath it
- Color coat (base coat) — The actual color of your car
- Primer — A bonding layer that helps paint adhere and adds a first line of corrosion protection
- Bare metal — The steel or aluminum body panel itself
When a chip only reaches the clear coat or color coat, it’s cosmetic. When it punches all the way through to the metal — which is what you’re seeing when you spot that silvery gray patch — the metal is now completely unprotected and directly exposed to moisture, oxygen, and road contaminants.
That combination is exactly what triggers oxidation, the chemical process behind rust.
How Fast Will Rust Start on Exposed Car Metal?
This is the question most people want answered right away, and the timeline varies based on your environment:
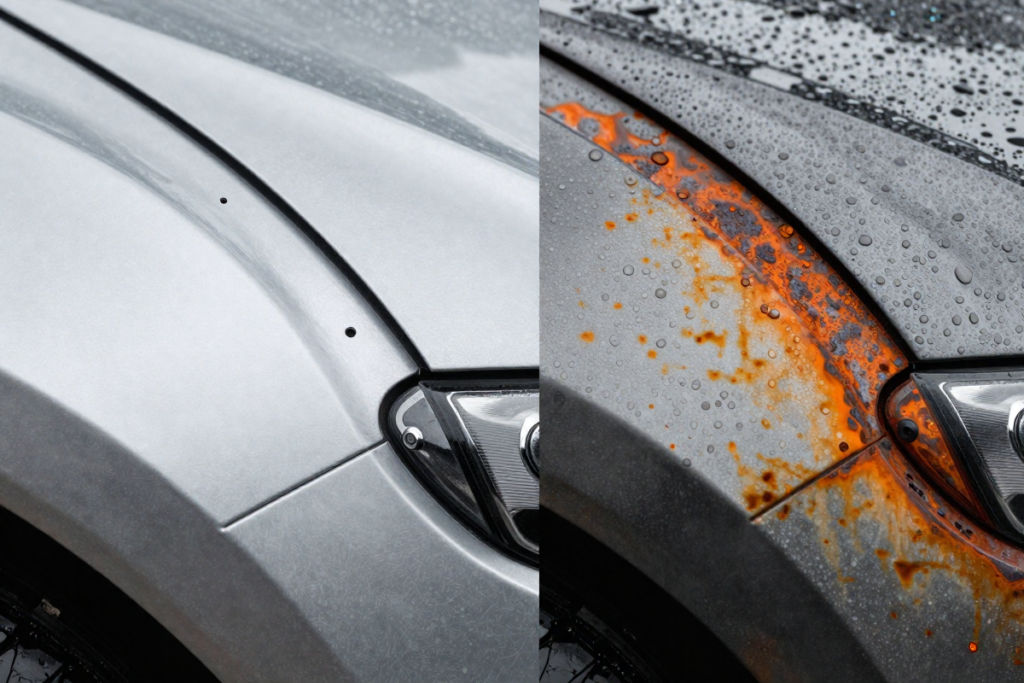
- Humid or coastal climates: Surface rust can begin forming in as little as 4–7 days of exposure
- Moderate climates: You may have 2–4 weeks before visible rust appears
- Dry, arid climates: Rust may take several weeks to months, but it will still develop
Accelerating factors include:
- Road salt (especially in winter climates — a major corrosion trigger)
- Rain and standing water
- High humidity
- Temperature fluctuations that cause condensation
A Quick Note: Exposed bare metal on a car can begin rusting in as few as 4–7 days in humid conditions. In dry climates, you may have a few weeks — but rust will eventually form regardless of where you live.
When Is a Paint Chip an Emergency vs. a Minor Issue?
Not all paint chips are created equal. Here’s how to assess what you’re dealing with:
Minor — can be handled with a DIY fix:
- Chip is smaller than a pencil eraser
- Edges are clean, no lifting paint around it
- Metal looks clean and silver (no orange or brown tinting yet)
More Urgent — needs prompt attention:
- Chip larger than a dime
- Deep gouge with rough or jagged edges
- Orange or reddish tinting visible — early rust has already begun
- Paint lifting or bubbling around the chip (rust spreading under the surface)
If you’re seeing bubbling paint around a chip — even one you thought was minor — that’s a red flag. Rust can travel under the paint without being visible on the surface, silently eating away at the panel beneath.
What to Do Immediately After Spotting Bare Metal
Step 1: Clean the Area
Before doing anything else, gently clean the chipped area with a mild soap and water, then follow up with an isopropyl alcohol wipe or automotive-grade degreaser. You want to remove road grime, wax, and any contaminants that could trap moisture against the metal or interfere with any treatment you apply.
Avoid using abrasive cloths or scrubbing aggressively — you don’t want to scratch the surrounding paint or spread any early rust particles.
Step 2: Apply a Temporary Protective Layer
If you can’t do a full repair right away, protecting the exposed metal from moisture is your top priority. A few temporary options:
- Clear nail polish: Dab a thin layer directly over the chip. It’s not pretty, but it creates a temporary moisture barrier that buys you time — usually a few days to a week.
- Automotive wax: Apply wax over and around the chip to repel water
- Painter’s tape or automotive masking tape: In a pinch, covering the chip keeps rain and road spray off the bare metal
These are band-aids, not solutions. Think of them as a way to protect your car while you gather supplies for a proper repair.
Avoid These Common Mistakes
- Don’t leave it exposed and assume it’ll be fine. It won’t. Rust can begin in days.
- Don’t use regular house paint, craft paint, or spray paint from a hardware store. These don’t bond properly to automotive surfaces and can actually trap moisture, making things worse.
- Don’t aggressively sand before you know what you’re doing. Improper sanding can enlarge the damage area and remove surrounding clear coat.
DIY Fix: How to Repair a Paint Chip That Exposes Metal
Most small-to-medium paint chips that have reached bare metal are completely fixable at home with the right materials and a bit of patience. Here’s everything you need to know.
Tools and Materials You’ll Need
- Color-matched touch-up paint (OEM paint code — found on your door jamb sticker) 👉 [OEM Touch-Up Paint Kit]
- Automotive primer (specifically formulated for bare metal) 👉 [Automotive Rust-Inhibiting Primer]
- Clear coat (spray or brush-on) 👉 [Automotive Clear Coat]
- Sandpaper — 400, 800, and 2000 grit for various stages 👉 [Automotive Sandpaper Kit]
- Micro touch-up brush or paint pen
- Isopropyl alcohol or automotive degreaser
- Automotive masking tape
- Microfiber cloths 👉 [Microfiber Detailing Cloths]
- Optional: Rubbing compound for final blending
Finding your OEM paint code: Check your driver’s side door jamb or the sticker inside your glove box. The paint code is usually a 3–6 character alphanumeric code. Most touch-up paint retailers (and your dealership) can match it exactly.
Need Help? Try this: OEM Touch-Up Paint Finder Tool
Step-by-Step Repair Process
Step 1: Clean and Degrease
Wipe the chip and surrounding area with isopropyl alcohol on a clean microfiber cloth. Let it dry completely. Any contamination left on the surface will prevent proper paint adhesion.
Step 2: Light Sanding to Prep the Surface
Using 400-grit sandpaper, very lightly scuff the edges of the chip to smooth out any jagged paint edges. If there’s any early surface rust (a light orange discoloration), sand it off completely — you need clean, bare metal before applying primer.
Feather the edges gently so there isn’t a sharp cliff between the chip and the surrounding paint. Wipe clean again with alcohol after sanding.
Step 3: Apply Automotive Primer — This Step Is Critical
Do not skip primer when bare metal is exposed. Primer serves two key purposes: it chemically bonds to the bare metal surface and provides a corrosion-inhibiting layer that prevents rust from forming under your repair.
Apply a very thin layer of primer to just the chipped area. Allow it to dry according to the product instructions (typically 20–30 minutes minimum). Apply a second thin coat if needed. The goal is an even, flat surface — not a thick buildup.
👉 [Rust-Oleum Automotive Primer (Self-Etching)]
Step 4: Apply Your Color-Matched Touch-Up Paint
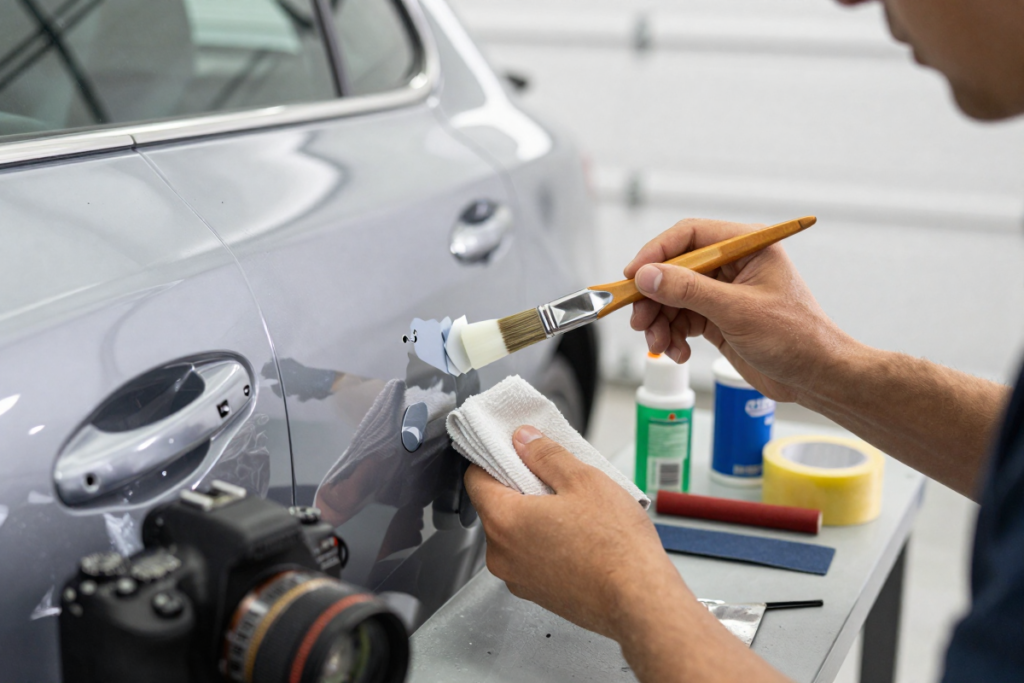
Using a micro brush or touch-up paint pen, apply your color coat in thin, careful layers. This is where patience pays off. Resist the urge to glob it on — thin layers dry more evenly and blend better with the surrounding paint.
Allow each layer to dry for 10–15 minutes before applying the next. You may need 2–4 layers to build up to the level of the surrounding paint surface.
Step 5: Apply Clear Coat
Once your color coat has dried fully (give it at least an hour — longer in humid conditions), apply a clear coat layer to seal and protect the repair. Clear coat restores the gloss and creates the protective topcoat that your car’s factory finish relies on.
Apply in thin layers just as you did with the color coat. Let it cure fully before moving to the next step.
👉 [Spray Clear Coat / Brush-On Clear Coat]
Step 6: Optional — Polish and Blend
After the clear coat has cured for 24–48 hours, you can use a fine rubbing compound on a microfiber cloth to gently blend the repaired area into the surrounding paint. This smooths out any slight texture differences and restores a more uniform shine.
Finish with a coat of car wax over the repair to seal everything and add an extra layer of protection.
How Long Does the Repair Take?
| Stage | Time Required |
|---|---|
| Prep and cleaning | 15–20 minutes |
| Primer application + drying | 45–60 minutes |
| Color coat application + drying | 1–2 hours |
| Clear coat application + drying | 1–2 hours |
| Full cure before washing | 24–48 hours |
Plan to avoid car washes and heavy rain for at least 48 hours after completing the repair.
When You Should Skip the DIY and Go to a Body Shop
DIY repair is excellent for small, contained chips. But there are situations where professional repair is the smarter call:
- The damaged area is larger than a quarter — larger areas require professional blending to avoid obvious mismatches
- You can see rust that has spread beyond the chip itself
- There are multiple chips or scratches across an entire panel
- You drive a leased vehicle — improper DIY repairs can create liability issues at return
- You own a luxury or collector vehicle where paint match precision matters significantly
- The chip is paired with a dent that needs bodywork before paint
Cost Comparison: DIY vs. Professional Repair
| Repair Method | Estimated Cost |
|---|---|
| DIY touch-up kit | $20–$100 |
| Mobile paint repair service | $100–$300 |
| Body shop spot repair | $150–$400 |
| Full panel respray | $400–$1,000+ |
Best Products for Fixing Paint Chips on Exposed Metal
Best Touch-Up Paint Kits
Color-matched touch-up paint is the cornerstone of any paint chip repair. Look for kits that include both the base coat and clear coat in one package.
👉 [Dr. ColorChip Paint Repair Kit] — One of the most popular options for DIYers; includes color-matched paint and blending solution. Great for rock chips and small dings.
👉 [Dupli-Color Touch-Up Paint] — Widely available, broad OEM color selection, good adhesion on properly primed surfaces.
Best Rust-Prevention Primers for Bare Metal
When bare metal is exposed, the primer you choose is arguably the most important product in your kit.
👉 [Rust-Oleum Automotive Primer Spray] — Excellent corrosion resistance, bonds well to bare metal, dries fast.
👉 [Zinc Phosphate Self-Etching Primer] — The professional’s choice for bare metal rust prevention. Creates a chemical bond with the metal surface.
Best Clear Coats for Touch-Up Repairs
👉 [SprayMax 2X Glamour High Gloss] — Durable, UV-resistant, blends well with factory clear coat.
👉 [Dupli-Color Clear Coat Brush-On] — Ideal for very small chips where a spray can offers too much overspray.
Best All-in-One Repair Kits (Great for Beginners)
👉 [Langka Paint Chip Repair Kit] — All-in-one solution that includes prep, color, and blending tools. Highly rated for beginner-friendly results.
Can You Just Leave It Alone?
Technically? Yes. Practically? It’s a gamble you’re likely to lose.
Here’s the real risk breakdown of ignoring exposed metal:
- Weeks 1–2: No visible change, but oxidation has already begun at the microscopic level
- Month 1–2: Surface rust appears; repair is still straightforward
- Month 3–6: Rust spreads under surrounding paint; bubbling begins; repair cost increases dramatically
- 6+ months: Rust may penetrate deeper into the panel, potentially requiring panel replacement ($400–$1,500+)
There’s one scenario where temporarily leaving it alone is acceptable: if you plan to repair it within a week or two and you’ve applied a proper temporary protective layer (primer, clear nail polish, or wax) to keep moisture out in the meantime.
Hidden rust is the biggest concern. What looks like a small surface chip can be concealing rust spreading laterally under your paint, invisible until it causes the surrounding paint to bubble or peel. By then, what could have been a $30 DIY fix has turned into a $500 body shop job.
How to Prevent Paint Chips in the Future
Once you’ve repaired your chip — or even before — it’s worth investing in prevention. Paint chip repair is manageable once. It gets expensive and frustrating as a recurring issue.
Smarter Driving Habits
- Increase your following distance on highways and gravel roads — rock chips are almost entirely caused by road debris kicked up by vehicles ahead of you
- Slow down on unpaved or chip-sealed roads — speed dramatically increases the impact force of debris
- Avoid driving directly behind large trucks carrying gravel, sand, or construction materials
Protective Solutions Worth Investing In
Paint Protection Film (PPF): A thick, transparent urethane film that absorbs rock chip impacts without damage. Often self-healing for light scratches. Best applied to high-impact areas (hood, front bumper, mirrors). 👉 [3M Paint Protection Film / Clear Bra Kit]
Ceramic Coating: Creates a hardened, hydrophobic layer over your paint. Won’t stop deep chips, but adds significant scratch resistance and makes your paint far easier to keep clean. 👉 [Ceramic Coating Kit]
Mud Flaps: Simple and underrated. Properly installed mud flaps on all four wheels dramatically reduce the amount of debris your own tires kick up onto your paint.
Regular Maintenance That Protects Your Paint
- Wash your car regularly — road salt, bird droppings, and industrial fallout are chemically corrosive to paint
- Wax every 3–6 months — a good coat of carnauba or synthetic wax adds a sacrificial layer of protection
- Inspect your paint periodically — catching a new chip early means a $10 fix instead of a $300 one
Frequently Asked Questions
Will a paint chip spread on its own?
Not the chip itself — but the rust that begins in the exposed area can spread laterally under surrounding paint. Over months, this leads to bubbling and peeling paint well beyond the original chip location.
Can rust form under the clear coat?
Yes, and this is one of the sneakier problems. If moisture gets between the paint layers — through a chip or a micro-crack — rust can form and spread under the surface without being immediately visible. The first sign is usually bubbling or lifting paint.
Is touch-up paint noticeable?
On small chips, a quality color-matched touch-up applied in thin layers is often barely visible from a normal viewing distance. It will rarely be a perfect match from up close, but it’s a significant improvement over visible bare metal.
Can I fix a paint chip without sanding?
For very small chips, light prep with an alcohol wipe may be sufficient. However, if there’s any rough edge, rust, or texture variation, light sanding is strongly recommended for proper paint adhesion and a cleaner result.
How much does a body shop charge to fix a paint chip to bare metal?
For a small spot repair on a single panel, expect to pay between $150 and $400 at a reputable body shop. Larger areas, multiple panels, or repairs requiring color blending across an entire panel can reach $500–$1,000+.
The Bottom Line: Don’t Wait on This One

A paint chip that exposes bare metal is one of those car problems that feels minor right up until it isn’t. The cost and effort to fix it while it’s small is a fraction of what you’ll spend if rust gets a foothold and spreads.
Here’s your action plan:
- Right now → Clean the area and apply a temporary protective layer
- This week → Order your color-matched touch-up kit and primer
- This weekend → Complete the DIY repair using the step-by-step guide above
- Going forward → Consider PPF or ceramic coating on high-impact areas to prevent future chips
The supplies you need will run you $20–$100, and the repair itself takes an afternoon. That’s a very reasonable investment to protect your car’s value, prevent rust damage, and keep your paint looking its best.
👉 [Recommended Professional Scratch Repair Kit for Beginners]
Looking for more car care and detailing guides? [Car Deep Cleaning Checklist: Everything You Need for a Spotless Finish] | [Hand Waxing vs Machine Waxing: Which Method Is Best for Your Car?] | [Step-by-Step Guide: Restoring Faded Plastic Bumper Trim on Any Car]
Disclaimer: This article contains affiliate links. If you purchase an item through the link I will earn a small commission at no extra cost to you.