
Introduction
If you’ve ever taken a step back to admire your car only to notice the once-glossy black plastic bumper trim has faded to an unsightly gray, you’re not alone. Faded plastic trim instantly ages your vehicle’s appearance, making even a well-maintained car look worn and neglected.
This discoloration isn’t just cosmetic disappointment—it’s the result of UV exposure and oxidation breaking down the plastic’s molecular structure. Environmental contaminants like road salt, pollution, and harsh chemicals accelerate this degradation, while poor maintenance habits allow the damage to compound over time.
The good news? You can restore your faded plastic bumper trim to like-new condition in under an hour, and you don’t need professional detailing experience to do it.
This comprehensive guide is designed for everyone from DIY beginners tackling their first car care project to experienced enthusiasts looking for the most effective restoration methods. We’ll cover everything from temporary quick fixes to long-lasting solutions that can keep your trim looking fresh for years.
Whether you’re preparing your vehicle for resale, restoring an older car’s curb appeal, or simply maintaining your pride and joy, this step-by-step guide will walk you through the entire process—from understanding what causes the problem to choosing the right products and applying professional-grade techniques.
What Causes Plastic Trim to Fade?
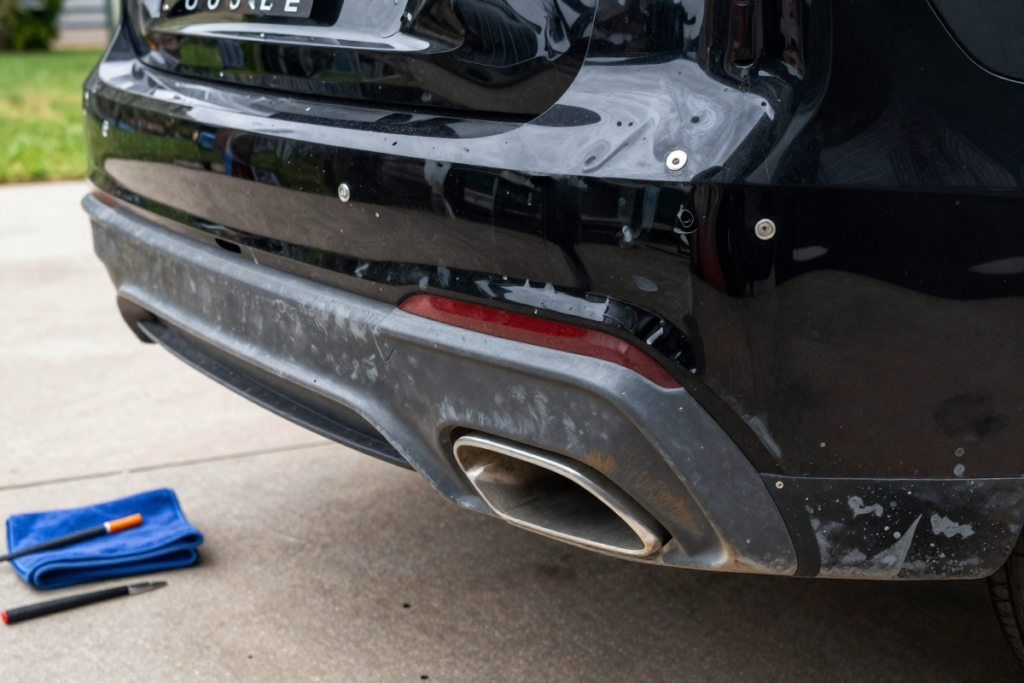
Understanding why your black plastic bumper trim turns white and grey is the first step toward choosing the most effective restoration method. Several factors contribute to this common automotive issue:
UV Exposure and Oxidation
The primary culprit behind faded plastic trim is ultraviolet (UV) radiation from sunlight. UV rays penetrate the plastic’s surface, breaking down the chemical bonds in the polymer structure. This process, called oxidation, causes the plastic to lose its original color and develop a chalky, whitish appearance.
Most automotive bumper trim is made from polypropylene or thermoplastic olefin (TPO)—materials chosen for their durability and impact resistance. However, these plastics contain oils and pigments that gradually migrate to the surface and evaporate under constant sun exposure, leaving behind a degraded, faded surface.
Environmental Contaminants
Your car’s exterior plastic trim faces constant assault from:
- Road salt (especially in winter climates)
- Industrial pollution and acid rain
- Harsh cleaning chemicals and automatic car washes
- Dirt, dust, and road grime that abrases the surface
These contaminants accelerate the oxidation process and can cause uneven fading patterns, particularly on lower bumper sections exposed to road splash.
Poor Maintenance Habits
Many car owners unknowingly contribute to trim degradation by:
- Using silicone-based tire shine products on trim (which provide temporary results but accelerate long-term fading)
- Neglecting to apply UV protectant after washing
- Parking in direct sunlight without protection
- Using abrasive cleaners that strip protective coatings
Coated vs. Uncoated Plastic Trim
Understanding your trim type matters for restoration success:
- Factory-coated trim has a protective clear coat or paint layer that, once compromised, exposes bare plastic underneath
- Uncoated (textured) trim shows oxidation more readily but responds better to most restoration methods
- Pre-colored plastic has pigment mixed throughout the material and is generally more forgiving to restore
Knowing which type you’re working with will help you select the appropriate restoration technique and set realistic expectations for results.
Tools & Materials You’ll Need
Choosing the right products and tools makes the difference between a restoration that lasts weeks versus one that lasts years. Here’s everything you’ll need, organized by budget tier:
Basic DIY Kit (Budget-Friendly)
Cleaning Supplies:
- All-purpose automotive cleaner or dedicated trim cleaner
- Microfiber towels (at least 3-4 for cleaning, applying, and buffing)
- Soft-bristle detailing brush
- Spray bottle with water for rinsing
- Isopropyl alcohol (70% or higher) for final degreasing
Estimated Cost: $15-25
Restoration Products
Trim Restorer Options (choose one):
| Product Tier | Example Products | Durability | Price Range |
|---|---|---|---|
| Budget | Meguiar’s Ultimate Black, Mothers Back-to-Black | 2-6 weeks | $8-12 |
| Mid-Range | Solution Finish Trim Restorer, CarGuys Plastic Restorer | 3-6 months | $15-25 |
| Premium | Cerakote Trim Coat, Chemical Guys VRP | 1-2+ years | $20-40 |
Application Tools:
- Foam applicator pads or microfiber applicators
- Masking tape (to protect painted surfaces)
- Plastic polish or compound for severely oxidized trim
Advanced Method Tools
Heat Gun Method:
- Variable-temperature heat gun (1000-1500°F range)
- Heat-resistant gloves
- Extension cord
Dyeing/Coating Method:
- Plastic trim dye (like Forever Black or SEM Trim Black)
- Degreaser and surface prep cleaner
- Spray application equipment or aerosol cans
- Fine-grit sandpaper (600-800 grit) if needed
Protection Products
Long-term success requires sealing your restoration work:
- Ceramic coating for plastic trim (most durable option)
- UV protectant spray (reapply every 2-3 months)
- Trim sealant (middle-ground option)
Complete Professional Kit: $60-120
Preparation: Cleaning the Trim Properly
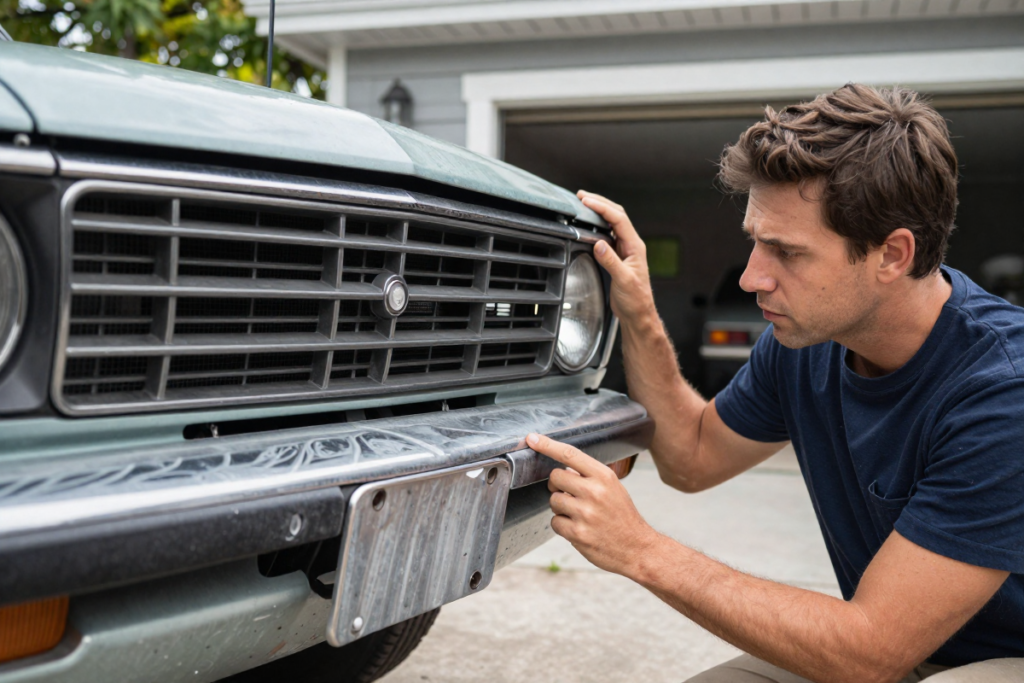
Why proper preparation is critical: No restoration product—regardless of price—will perform well on dirty, contaminated plastic. Proper cleaning ensures maximum product absorption and adhesion, directly impacting how long your results last.
Step-by-Step Cleaning Process
Step 1: Initial Rinse
- Park your car in a shaded area (never work in direct sunlight)
- Rinse the trim thoroughly with water to remove loose dirt and debris
- This prevents scratching the plastic during scrubbing
Step 2: Apply Cleaning Solution
- Spray your chosen cleaner liberally on all trim surfaces
- Let it dwell for 30-60 seconds to break down contaminants
- For heavily soiled trim, apply a second coat
Step 3: Agitate with Brush
- Using your soft-bristle brush, scrub the trim in circular motions
- Pay special attention to textured areas where grime hides
- Work in small sections (one panel at a time)
- You should see dirty residue lifting from the surface
Step 4: Rinse Thoroughly
- Rinse each section completely before moving to the next
- Ensure no soap residue remains (it will interfere with restoration products)
- Use a clean microfiber towel to dry the trim
Step 5: Final Degreasing
- Dampen a clean microfiber towel with isopropyl alcohol
- Wipe down all trim surfaces to remove any remaining oils, wax, or silicone
- Allow to air dry for 5 minutes
Pro Tip: The Silicone Problem
Avoid silicone-based dressings before restoration! Products like tire shine contain silicone that creates a slippery coating. If you’ve recently used these products, you’ll need to thoroughly degrease with isopropyl alcohol or a dedicated silicone remover. Restoration products cannot penetrate or bond to silicone-contaminated surfaces, resulting in blotchy, short-lived results.
Test for silicone contamination: Spray water on the cleaned trim. If water beads up instead of spreading evenly, silicone is still present—clean again.
Method 1: Using a Plastic Trim Restorer (Most Recommended)
For most DIYers, chemical trim restorers offer the best balance of ease, effectiveness, and durability. This method works by penetrating the oxidized plastic surface and depositing oils, polymers, or pigments that restore the original dark color.
Step-by-Step Instructions
Step 1: Prepare Your Work Area
- Ensure trim is completely clean and dry (see preparation section)
- Protect adjacent painted surfaces with masking tape if desired
- Have multiple clean microfiber towels ready
Step 2: Apply Product to Applicator
- Shake the restorer bottle well before use
- Apply a moderate amount to your foam applicator pad
- Start with less product—you can always add more
Step 3: Work Into Trim Evenly
- Using moderate pressure, work the product into the plastic in overlapping straight lines
- For textured trim, use circular motions to ensure penetration
- Cover all faded areas systematically, panel by panel
- You should see immediate color transformation as you work
Step 4: Allow Absorption Time
- Let the product sit for the manufacturer’s recommended time (typically 5-15 minutes)
- During this period, the active ingredients penetrate the plastic’s porous surface
- Avoid touching or disturbing the treated areas
Step 5: Buff Off Excess
- Using a clean, dry microfiber towel, gently buff away any excess product
- Use light pressure—you’re removing surface excess, not the absorbed treatment
- For best results, allow the product to cure for 1-2 hours before exposing to water
Step 6: Apply Second Coat (Optional)
- For severely faded trim, a second application after the first has cured often produces superior results
- Some premium products specifically recommend two thin coats
Results Timeline
- Immediate: Color restoration visible within seconds of application
- 24 hours: Full cure and maximum color depth achieved
- Durability: 2 weeks to 12+ months depending on product quality and protection
Pros of Chemical Restorers
✅ Beginner-friendly – requires no special skills or equipment
✅ Immediate visual improvement – see results as you apply
✅ No risk of damage – unlike heat guns, improper application won’t harm plastic
✅ Works on textured and smooth surfaces
✅ Reversible – can be removed or reapplied as needed
Cons of Chemical Restorers
❌ Requires reapplication – temporary solution without additional protection
❌ Quality varies significantly – budget products may last only 2-3 weeks
❌ Can attract dust if over-applied
❌ Some products leave greasy residue that transfers to clothing
Recommended Products for Different Needs
Best for Beginners:
Meguiar’s Ultimate Black Plastic Restorer – affordable, forgiving, widely available
Best Value:
Solution Finish Trim Restorer – excellent durability-to-price ratio, 3-6 month results
Best Long-Term:
Cerakote Trim Coat – ceramic-based formula offering 1-2+ years of protection
Best for Quick Touch-Ups:
CarGuys Plastic Restorer – spray-and-wipe application, good for regular maintenance
Method 2: Heat Gun Restoration (Advanced Technique)
The heat gun method has gained popularity thanks to dramatic before-and-after results shared online. This technique works by reheating oils within the plastic that have migrated to the surface, causing them to redistribute and temporarily restore the original dark color.
How It Works: The Science
Automotive plastics like polypropylene contain plasticizers and oils that provide flexibility and color. UV exposure causes these compounds to migrate to the surface where they evaporate. Carefully applied heat temporarily reverses this process by:
- Liquefying remaining subsurface oils
- Drawing them back to the surface
- Re-saturating the oxidized outer layer
Important: This provides a cosmetic restoration but doesn’t replace lost material—protection is essential afterward.
Step-by-Step Heat Gun Process
Step 1: Safety Preparation
- Work in a well-ventilated area
- Wear heat-resistant gloves
- Clear flammable materials from your work zone
- Keep a fire extinguisher nearby (serious precaution for serious heat)
Step 2: Heat Gun Settings
- Set temperature to LOW (around 500-700°F to start)
- Use the lowest effective setting—you can always increase
- Attach a concentrator nozzle if available for focused heat
Step 3: Maintain Proper Distance
- Hold heat gun 4-6 inches from plastic surface
- Too close = melting and permanent damage
- Too far = insufficient heat for restoration
Step 4: Even Application
- Keep the heat gun moving constantly in slow, sweeping motions
- Never hold it stationary on one spot
- Work in 6-12 inch sections at a time
- You’ll see the plastic darken as oils resurface—this is your visual cue
Step 5: Monitor the Surface
- Watch for color change (gray to black)
- If you see glossing, rippling, or surface distortion, immediately pull back
- The plastic should darken without changing texture
Step 6: Allow Cooling
- Let each section cool for 30-60 seconds before touching
- The restoration effect continues slightly as it cools
- Don’t rush to the next section—patience prevents mistakes
Step 7: Inspect and Touch Up
- Check for missed spots or uneven results
- Make additional passes only after complete cooling
- Light, repeated passes are safer than one aggressive application
Pros of Heat Gun Method
✅ Dramatic, immediate results – the transformation is often stunning
✅ No chemicals required – works with the plastic’s existing oils
✅ Cost-effective if you already own a heat gun
✅ Works on severely faded trim that chemicals alone can’t fix
✅ Satisfying DIY experience with visible real-time results
Cons of Heat Gun Method
❌ Risk of permanent damage – melted or warped plastic cannot be fixed
❌ Not permanent – results last only 2-4 weeks without sealant
❌ Requires skill and practice – best to test on inconspicuous areas first
❌ Uneven results possible – inconsistent heat application creates blotchy appearance
❌ Doesn’t work on all plastic types – some modern TPO blends don’t respond well
❌ Time-intensive – much slower than chemical restorers for whole-vehicle applications
Safety Warnings
⚠️ Never heat plastic on hot days or in direct sun – ambient heat adds to heat gun temperature
⚠️ Avoid heating near fuel filler doors or vents – potential fire hazard
⚠️ Don’t heat painted surfaces – you’ll damage the clear coat
⚠️ Be extremely careful with thin plastic sections – they melt faster
⚠️ Will a heat gun damage plastic bumper trim during restoration? Yes, if used incorrectly. Always start with low heat and maintain constant motion.
Best Heat Gun for Trim Restoration
Wagner HT1000 Heat Gun – dual temperature settings (750°F/1000°F), affordable, widely available
Method 3: Dyeing or Re-Coating Trim (Long-Term Fix)
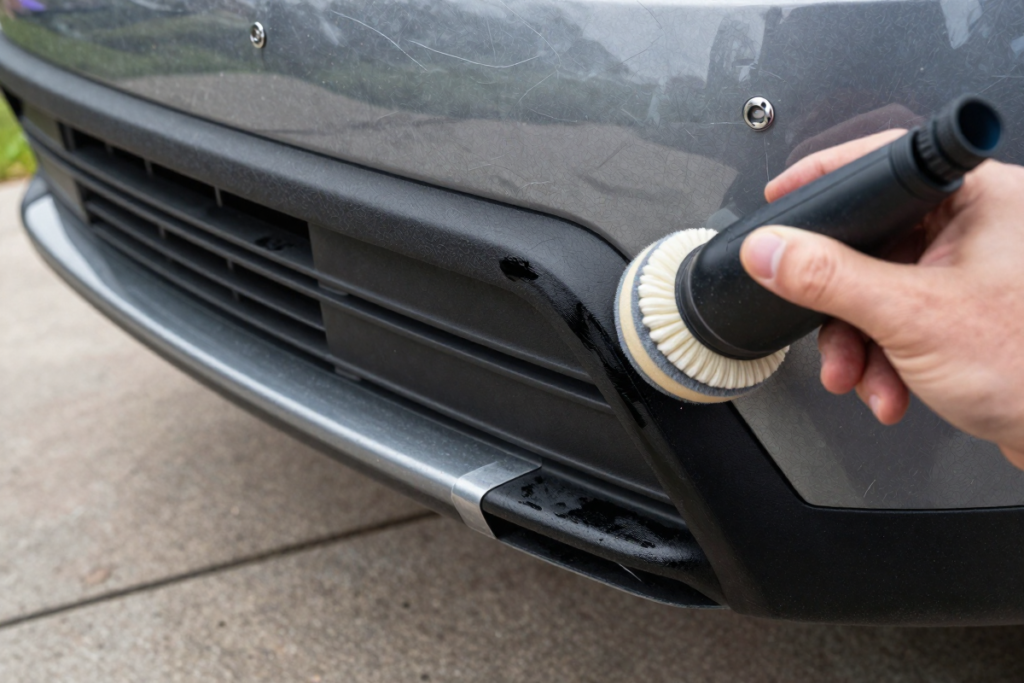
When chemical restorers and heat guns aren’t enough—or you want a truly permanent solution—plastic trim dye or coating is your answer. This method essentially repaints the plastic with a specialized, flexible coating designed specifically for automotive exterior use.
When to Use This Method
This approach is ideal for:
- Severely faded or completely gray trim that’s beyond simple restoration
- Older vehicles where you want multi-year results
- Show cars or resale preparation requiring perfect appearance
- Trim that’s been repeatedly restored and no longer responds to other methods
- Situations where you want paint vs dye for plastic trim as a permanent solution
Understanding Your Options
Trim Dyes:
- Penetrate the plastic surface
- Create a semi-permanent color change
- More flexible and less prone to chipping
- Examples: Forever Black, Back to Black Trim Dye
Trim Coatings/Paints:
- Sit on top of the plastic as a protective layer
- More durable than dyes against abrasion
- Ceramic-based options offer extreme longevity
- Examples: SEM Trim Black, Cerakote Trim Coat
Process Overview
Step 1: Deep Clean and Degrease
- Clean as described in the preparation section
- Use plastic cleaner/prep spray specifically designed for adhesion
- Remove all wax, silicone, oils, and contaminants
- This step is absolutely critical—coating adhesion depends on it
Step 2: Light Surface Scuffing (if needed)
- For extremely smooth or glossy plastic, lightly scuff with 600-800 grit sandpaper
- This creates a mechanical bond for better adhesion
- Sand gently in one direction, don’t create deep scratches
- Wipe with tack cloth to remove sanding dust
- Skip this step for textured trim
Step 3: Masking and Protection
- Thoroughly mask all painted surfaces, glass, and rubber seals
- Use quality automotive masking tape and plastic sheeting
- Be generous—overspray travels farther than you think
- Cover wheels and wheel wells if spraying lower bumpers
Step 4: Apply First Coat
- Shake aerosol can for 2 full minutes (or prepare spray gun per instructions)
- Hold can/gun 6-8 inches from surface
- Apply thin, even coats with 50% overlap
- Multiple thin coats always beat one heavy coat
- Keep the can/gun moving—don’t dwell in one spot
Step 5: Allow Flash Time
- Let first coat dry per manufacturer specs (typically 5-15 minutes)
- Surface should be dry to touch but not fully cured
- This allows chemical bonding between coats
Step 6: Additional Coats
- Apply 2-4 total coats depending on coverage needed
- Severely faded trim may require more coats for complete opacity
- Each coat should improve uniformity and depth of color
Step 7: Cure Properly
- Allow full cure time before touching (usually 1 hour)
- Avoid water exposure for 24-48 hours for full hardness
- Some products cure faster with heat—check instructions
- Park in garage or covered area during cure period
Pros of Dyeing/Coating
✅ Longest-lasting solution – can provide 1-3+ years of results
✅ Completely uniform appearance – covers all imperfections
✅ High-quality finish resembles factory-fresh trim
✅ Chemical and UV resistant – especially ceramic-based coatings
✅ Cost-effective over time – no repeated product purchases
Cons of Dyeing/Coating
❌ Most time-intensive method – requires extensive prep and cure time
❌ Higher upfront cost – products and materials are more expensive
❌ Requires more skill – poor application shows immediately
❌ Difficult to remove if you’re unhappy with results
❌ Masking is tedious but essential for professional appearance
Recommended Products
Best Aerosol Dye:
Forever Black Bumper & Trim Dye – penetrating formula, flexible finish
Best Ceramic Coating:
Cerakote Trim Coat Kit – professional-grade durability, 2+ year results
Best Professional Spray:
SEM Trim Black (aerosol or spray gun) – OEM-quality refinishing product
Best Surface Prep:
SEM 38353 Plastic Prep Spray – ensures maximum coating adhesion
Sealing & Protecting the Restored Trim
Regardless of which restoration method you choose, proper sealing is the difference between results that last weeks versus years. UV protection prevents the oxidation process from immediately restarting, dramatically extending your work.
Why Protection Matters
Think of restoration as surgery and protection as medication. You’ve healed the damaged plastic, but without ongoing UV defense, the same environmental factors will quickly degrade it again. Protection products:
- Block harmful UV radiation from penetrating the plastic
- Repel water, dirt, and contaminants
- Prevent oils from evaporating out of the plastic
- Create a sacrificial barrier that wears away instead of the trim
Protection Product Types Explained
Trim Dressings:
- What they are: Lightweight oils or polymers that sit on the surface
- Protection level: Low to moderate (2-4 weeks)
- Appearance: Glossy to satin finish
- Best for: Regular maintenance touch-ups between major restorations
- Application: Spray or wipe-on, quick and easy
- Example: Chemical Guys VRP
Trim Sealants:
- What they are: Polymer-based products that bond to plastic
- Protection level: Moderate to good (2-6 months)
- Appearance: Natural matte to semi-gloss
- Best for: Most DIY applications and regular drivers
- Application: Requires clean surface, light buffing
- Example: Wolfgang Exterior Trim Sealant
Ceramic Coatings for Plastic:
- What they are: Silicon dioxide (SiO2) or silicon carbide (SiC) nanocoatings
- Protection level: Excellent (1-2+ years)
- Appearance: Deep, natural finish matching factory trim
- Best for: Long-term protection, show cars, enthusiasts
- Application: More complex, requires proper prep and curing
- Example: Gtechniq C4 Permanent Trim Restorer
Comparison Table
| Product Type | Durability | UV Protection | Ease of Application | Price | Best Use Case |
|---|---|---|---|---|---|
| Dressings | 2-4 weeks | Moderate | Very Easy | $ | Quick touch-ups |
| Sealants | 2-6 months | Good | Easy | $$ | Regular maintenance |
| Ceramic Coatings | 1-2+ years | Excellent | Moderate | $$$ | Maximum longevity |
Step-by-Step Protection Process
Step 1: Timing is Everything
- Apply protection after your restoration method has fully cured
- For chemical restorers: wait 2-4 hours
- For heat gun method: wait 30 minutes for cooling
- For dyes/coatings: wait 24-48 hours for complete cure
Step 2: Final Surface Check
- Ensure restored trim is clean and free of dust
- If any contaminants settled during cure time, wipe gently with clean microfiber
- Verify no excess restoration product remains on the surface
Step 3: Apply Protective Layer
- Follow your chosen product’s specific instructions
- For spray products: 6-8 inch distance, even coverage
- For wipe-on products: use applicator pad, work in small sections
- Apply thin, uniform coats—excess doesn’t add protection
Step 4: Allow Curing Time
- Dressings: 10-15 minutes before buffing
- Sealants: 30-60 minutes before exposure
- Ceramic coatings: 1-12 hours depending on formulation
- Keep vehicle dry during cure period
Step 5: Buff to Desired Finish
- Some products require buffing for even appearance
- Use clean microfiber towel with light pressure
- Remove any high spots or streaks
- Achieve uniform sheen across all trim pieces
Maintenance Schedule
To maintain your restored trim:
Weekly:
- Rinse trim during regular car washing
- Avoid direct pressure washer spray on trim
- Pat dry with microfiber
Monthly:
- Inspect for any fading or protection breakdown
- Touch up small areas as needed
- Remove any accumulated wax from painted surfaces onto trim
Every 2-3 Months:
- Reapply dressing or sealant-type protection
- Clean trim thoroughly before reapplication
- Check for any damage needing full restoration
Annually:
- Deep clean and assess overall trim condition
- Consider full restoration cycle if significant fading returns
- Reapply ceramic coating if that’s your chosen protection method
Common Mistakes to Avoid
Learning from others’ errors saves time, money, and frustration. Here are the most frequent mistakes that undermine trim restoration results:
1. Skipping or Rushing the Cleaning/Prep Stage
The Mistake: Applying restorer or protection to dirty, contaminated trim
Why It Fails: Products can’t penetrate or bond to surfaces coated with dirt, wax, or silicone
The Result: Blotchy, streaky appearance and dramatically reduced durability
The Fix: Always deep clean and degrease. The 20 minutes invested in prep determines whether your work lasts 2 weeks or 2 years.
2. Using Tire Shine Instead of Trim Restorer
The Mistake: Grabbing tire shine for bumper trim because “it’s all black plastic”
Why It Fails: Tire shine is formulated for rubber, contains heavy silicones, and sits on the surface rather than restoring
The Result: Slippery, greasy trim that attracts dirt and fades within days
The Fix: Use products specifically designed for automotive plastic trim restoration—the chemical formulations are completely different.
3. Applying Too Much Product
The Mistake: “More is better” mentality with chemical restorers
Why It Fails: Excess product can’t absorb, creates sticky residue, and attracts dirt
The Result: Streaky appearance, dust accumulation, potential transfer to clothing
The Fix: Start with less than you think you need. Multiple thin applications beat one heavy coat every time.
4. Not Sealing After Restoration
The Mistake: Stopping after the restoration step without UV protection
Why It Fails: Restored trim immediately begins oxidizing again without protection
The Result: Fading returns within 2-4 weeks even with quality restorers
The Fix: Always finish with appropriate sealant or ceramic coating—it’s not optional for lasting results.
5. Overheating Plastic with Heat Gun
The Mistake: Using high temperature or holding the heat gun too close/stationary
Why It Fails: Plastic reaches melting point, warps, or develops permanent glossy spots
The Result: Irreversible damage requiring expensive trim replacement
The Fix: Start with low heat (500-700°F), maintain 4-6 inches distance, keep constantly moving.
6. Working in Direct Sunlight
The Mistake: Performing restoration in hot sun or on sun-baked trim
Why It Fails: Products cure too quickly, don’t penetrate properly, or evaporate before bonding
The Result: Poor absorption, uneven finish, reduced effectiveness
The Fix: Always work in shade or garage. If trim is hot to touch, cool it with water spray and dry before starting.
7. Expecting One Method to Fix All Fading
The Mistake: Using the same approach on lightly faded and severely oxidized trim
Why It Fails: Different damage levels require different restoration intensity
The Result: Disappointing results, wasted products
The Fix: Assess each vehicle individually. Mild fading might need only restorer + sealant, while severe cases may require heat gun or dyeing.
8. Neglecting Textured Trim Details
The Mistake: Only wiping restorer across textured bumper surfaces
Why It Fails: Product doesn’t reach into recessed texture valleys
The Result: Light gray remaining in texture while raised surfaces darken
The Fix: Use circular scrubbing motions with applicator pad to work product into all texture depths.
9. Not Testing Products First
The Mistake: Applying new product to entire vehicle without testing
Why It Fails: Different products work better on different plastics; some create unwanted gloss levels
The Result: Potentially unhappy with finish on entire car
The Fix: Test on small, inconspicuous area first—lower rear bumper corner is ideal.
10. Ignoring Manufacturer Cure Times
The Mistake: Driving through rain or washing car before product fully cures
Why It Fails: Uncured products wash away or bond incompletely
The Result: Streaky, failed restoration requiring complete redo
The Fix: Read instructions! Respect listed cure times before water exposure.
How Long Does Trim Restoration Last?
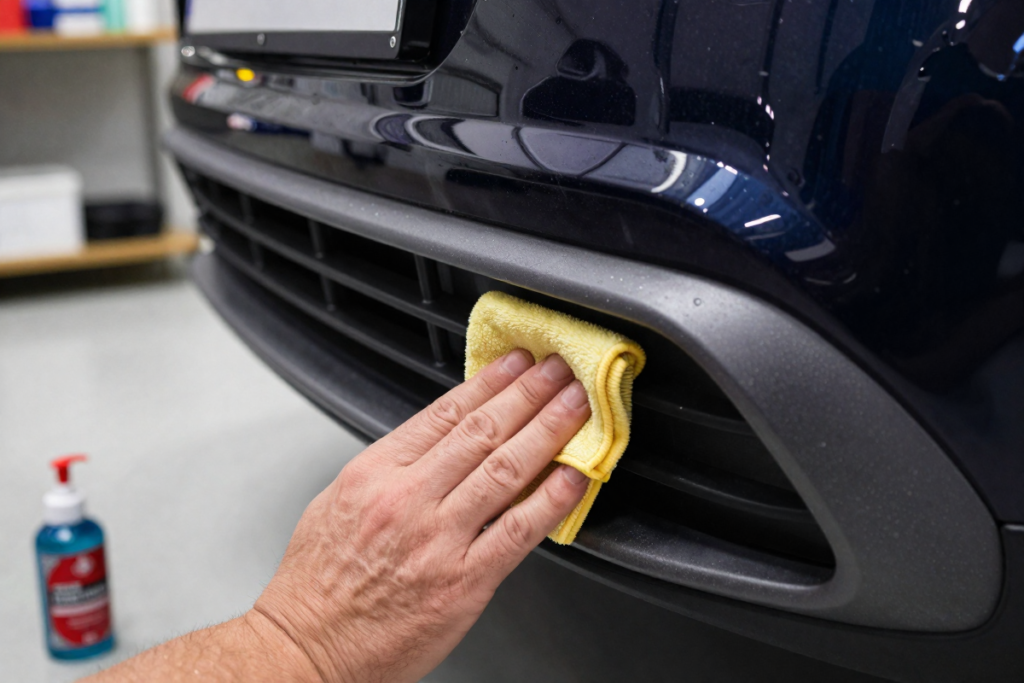
One of the most common questions: “How long does plastic bumper trim restoration last?” The answer depends entirely on your chosen method, product quality, environmental factors, and maintenance routine.
Longevity Breakdown by Method
Basic Chemical Restorers (Budget Products)
- Expected Duration: 2-6 weeks
- Products: Meguiar’s Ultimate Black, Mothers Back-to-Black (standard formula)
- Factors: Washes away gradually, UV exposure shortens lifespan
- Best For: Those planning frequent reapplication as part of regular maintenance
Premium Chemical Restorers
- Expected Duration: 3-12 months
- Products: Solution Finish, CarGuys, Torque Detail
- Factors: Better UV inhibitors and bonding agents
- Best For: Quarterly maintenance schedule
Heat Gun Restoration (Unsealed)
- Expected Duration: 2-4 weeks
- Why So Short: You’ve only redistributed existing oils, not added protection
- Critical Note: MUST be sealed with protectant for acceptable longevity
- Best For: Combined approach—heat gun for restoration, then seal with ceramic coating
Heat Gun + Ceramic Coating
- Expected Duration: 12-18 months
- The Combination Advantage: Heat gun maximizes color restoration, ceramic provides UV barrier
- Best For: Maximum results for minimum ongoing maintenance
Trim Dyes
- Expected Duration: 6-18 months
- Products: Forever Black, professional-grade dyes
- Factors: Penetrating formulas resist washing but still oxidize over time
- Best For: Those wanting semi-permanent solution without coating
Ceramic Coatings
- Expected Duration: 1-2+ years
- Products: Cerakote Trim Coat, Gtechniq C4, CarPro DLUX
- Factors: True nanocoating creates physical UV barrier
- Best For: Enthusiasts, show cars, anyone wanting maximum longevity
Professional Coating + Maintenance
- Expected Duration: 2-3+ years
- The Gold Standard: Professional-grade ceramic application with quarterly maintenance
- Best For: High-end vehicles, those maximizing resale value
Comparison Chart: Method Longevity
| Restoration Method | Without Protection | With UV Sealant | With Ceramic Coating |
|---|---|---|---|
| Basic Restorer | 2-4 weeks | 6-12 weeks | N/A (redundant) |
| Premium Restorer | 6-12 weeks | 3-6 months | 6-12 months |
| Heat Gun | 2-3 weeks | 2-4 months | 12-18 months |
| Trim Dye | 6-12 months | 12-18 months | 18-24+ months |
| Ceramic Coating | N/A (is the protection) | N/A | 12-24+ months |
Factors Affecting Longevity
Climate Impact:
- Intense Sun Regions (Southwest US, Florida): Reduce expected lifespan by 25-40%
- Moderate Climates: Expect average stated durations
- Garage-Kept Vehicles: Extend lifespan by 50-100%
Washing Habits:
- Frequent automatic car washes: Reduce longevity significantly (harsh chemicals and brushes)
- Hand washing with pH-neutral soap: Minimal impact
- Touchless washes: Moderate impact
- Pressure washing trim directly: Accelerates product removal
Driving Conditions:
- Highway miles: More bug impacts and road debris
- Off-road/dirt roads: Abrasive dust accelerates wear
- City driving: Less environmental exposure
- Winter road salt: Highly corrosive, dramatically shortens protection lifespan
Product Quality Truth:
You absolutely get what you pay for in trim restoration products. A $40 ceramic coating that lasts 2 years costs less per month than a $10 restorer requiring monthly reapplication:
- Budget product: $10 × 12 months = $120/year
- Premium ceramic: $40 ÷ 24 months = $1.67/month
Maintenance Tips for Long-Lasting Results
Extending your restoration beyond initial expectations requires strategic ongoing care. These maintenance practices help you protect plastic trim from fading again:
Weekly Washing Routine
Do:
- Rinse trim first to remove abrasive dirt
- Use pH-neutral car wash soap
- Gently hand-wash trim with soft microfiber wash mitt
- Rinse thoroughly to prevent soap residue buildup
- Pat dry with dedicated trim towel
Don’t:
- Blast trim directly with high-pressure washer
- Use household cleaners or dish soap (too harsh)
- Scrub aggressively with brushes
- Let wash soap dry on the surface
Protection Reapplication Schedule
Every 2-3 Months (or After 8-10 Washes):
- Inspect trim for signs of fading or protection breakdown
- Clean thoroughly with trim cleaner
- Reapply your chosen protectant (dressing, sealant, or ceramic booster)
- This preventive maintenance stops oxidation before it becomes visible
Seasonal Deep Maintenance:
- Spring: Deep clean to remove winter salt and grime; assess for damage
- Summer: Check UV protection integrity; reapply as needed
- Fall: Prepare for winter with fresh protective layer
- Winter: Monthly inspection for salt damage; rinse frequently
Product Selection for Maintenance
Avoid These Harmful Products:
- All-purpose cleaners containing solvents
- Bleach-based tire cleaners
- Petroleum-based products not formulated for automotive plastic
- Household oils (olive oil, cooking spray, WD-40) – despite internet myths, these cause more harm than good
Use Trim-Safe Products:
- Dedicated plastic trim cleaners
- pH-neutral automotive soap
- Isopropyl alcohol for spot degreasing
- Products specifically labeled for automotive exterior plastic
UV Protection Strategies
Parking Habits:
- Garage parking is the single most effective protection strategy
- Covered parking dramatically extends restoration lifespan
- Shade parking helps but doesn’t block all UV
- Car covers work if used consistently, but can trap moisture
- Avoid consistent direct sun exposure whenever possible
Additional UV Barriers:
- Apply UV protectant spray every 2-3 months
- Consider window tinting to reduce interior UV (also protects interior plastic)
- For rarely driven show cars, apply heavier protective coatings
Touch-Up Strategy
Don’t wait for complete failure! The moment you notice slight fading beginning:
- Clean the affected area thoroughly
- Apply a maintenance coat of your original restorer
- Seal immediately with protectant
- Address early = minimal product needed
Waiting until trim is severely faded again requires complete restoration restart.
Winter-Specific Maintenance
Road Salt is Trim’s Enemy:
- Rinse undercarriage and lower trim weekly during salt season
- Consider applying extra protective layer before winter
- Use touchless car washes more frequently
- Hand-rinse wheel wells where salt accumulates
Cold Weather Application Notes:
- Most restoration products require 50°F+ for proper bonding
- Warm garage application is essential in winter
- Allow extra cure time in cold conditions
Post-Restoration Care Timeline
First 24 Hours:
- No water exposure
- No touching or leaning against trim
- Park in protected area
- Allow complete cure
First Week:
- Gentle washing only if necessary
- No automated car washes
- No waxing near trim (prevent contamination)
First Month:
- Monitor for any issues or uneven areas
- Touch up as needed
- Begin regular maintenance schedule
Before & After Results: What to Expect
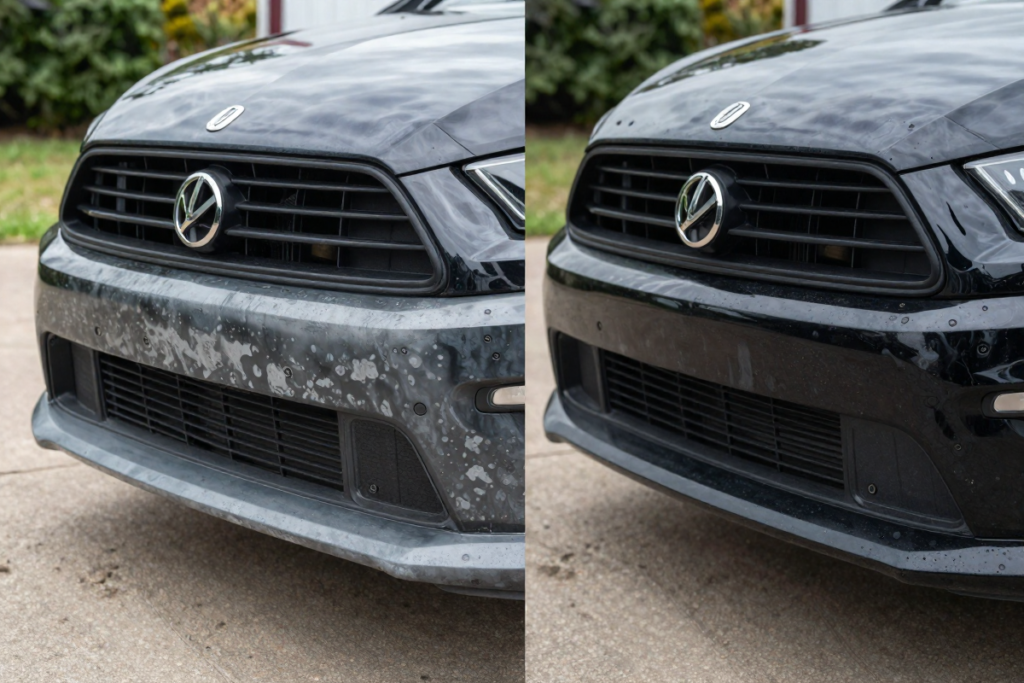
Understanding realistic expectations helps you gauge success and choose the appropriate method for your situation.
Typical Transformation Levels
Lightly Faded Trim (Minor Oxidation):
- Starting Condition: Slightly grayed, chalky feel when touched
- Best Method: Premium chemical restorer + sealant
- Expected Result: 90-95% restoration to original appearance
- Timeframe: 30 minutes total
- Longevity: 6-12 months with protection
Moderately Faded Trim (Noticeable Discoloration):
- Starting Condition: Obviously gray/white, especially on horizontal surfaces
- Best Method: Heat gun restoration OR premium restorer + ceramic coating
- Expected Result: 85-90% restoration
- Timeframe: 1-2 hours
- Longevity: 12-18 months with ceramic coating
Severely Faded Trim (Complete Oxidation):
- Starting Condition: Uniform light gray or white, textured surface nearly smooth from degradation
- Best Method: Trim dye or ceramic coating system
- Expected Result: 80-85% restoration (some deep texture loss may be permanent)
- Timeframe: 2-4 hours with proper prep
- Longevity: 18-24+ months
Setting Realistic Expectations
You CAN Achieve:
- Dramatic color restoration from gray to rich black
- Smooth, uniform finish across all trim pieces
- Results that look factory-fresh from 5+ feet away
- Long-lasting protection with proper maintenance
- Significant improvement in overall vehicle appearance
You CANNOT Achieve:
- Restoration of physically damaged plastic (cracks, chips, deep gouges)
- Permanent results without ongoing UV protection
- Identical results to brand-new trim on 15+ year old severely degraded plastic
- Texture restoration on plastic where surface has been worn completely smooth
Documentation Tips
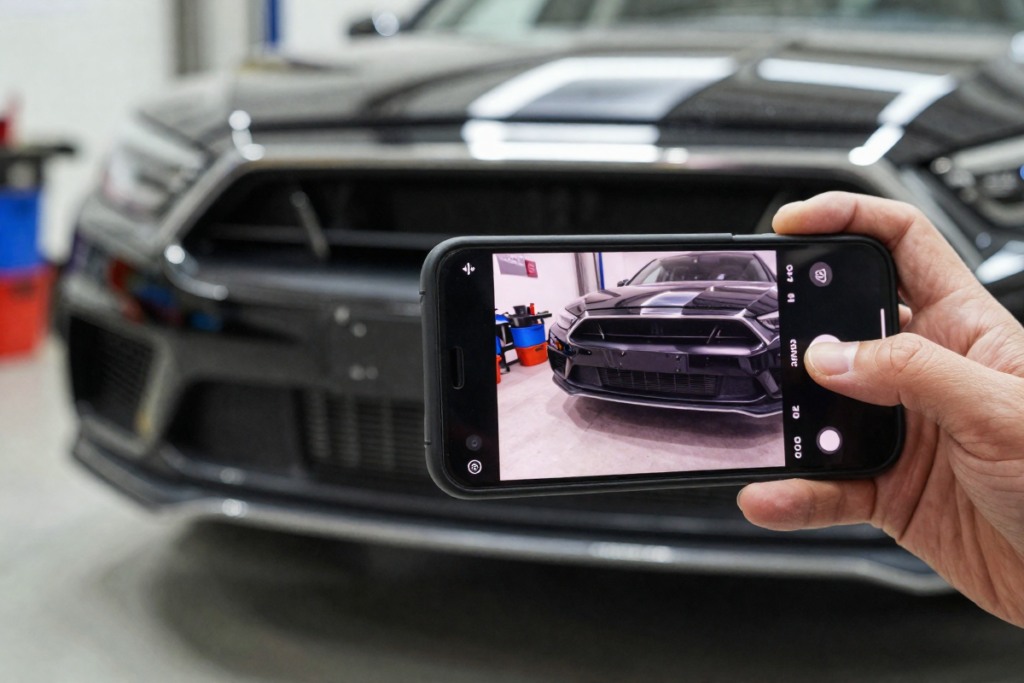
Before You Start:
- Take clear photos in consistent lighting
- Shoot from multiple angles (straight-on, 45-degree, close-ups)
- Include reference points (full car view showing all trim)
- Note time of day (for consistent comparison lighting)
After Restoration:
- Photograph in same location and lighting
- Same angles as before shots
- Close-ups showing texture and color depth
- Full vehicle view to appreciate overall impact
Why Document:
- Track which products/methods work best for your vehicle
- Motivating to see dramatic improvement
- Helpful for scheduling future maintenance
- Great for sharing results or seeking advice in detailing communities
Real-World Results by Vehicle Age
Vehicles 0-3 Years Old:
- Minimal restoration needed, mostly preventive protection
- Expect 95-100% restoration with any quality method
- Focus on prevention to avoid future fading
Vehicles 4-7 Years Old:
- Moderate restoration typically required
- 90-95% restoration achievable with premium products
- Combination methods often unnecessary
Vehicles 8-15 Years Old:
- Significant restoration needed
- 80-90% restoration with advanced methods
- May require dye or coating for best results
- Heat gun method often most dramatic
Vehicles 15+ Years Old:
- Severe degradation common
- 70-85% restoration realistic
- Coating or dye often mandatory for acceptable results
- Some permanent texture/surface loss may be irreversible
- Even 80% restoration creates dramatic before/after
Frequently Asked Questions (FAQ)
Can you permanently restore faded plastic trim?
While no restoration is truly permanent, modern ceramic coatings can provide 2+ years of like-new appearance with minimal maintenance. The key is combining thorough restoration with high-quality UV protection. For the longest-lasting results, use a trim dye or heat gun method followed by ceramic coating, then maintain with quarterly protectant reapplication.
Is a heat gun safe for car trim?
Yes, when used correctly. Start with low heat (500-700°F), maintain 4-6 inches distance, and keep the heat gun constantly moving. Never hold it stationary, and watch for color change as your guide. The plastic should darken without glossing or rippling. Improper use can cause permanent melting or warping, so practice on inconspicuous areas first.
What’s the best product for black plastic restoration?
For ease and budget: Meguiar’s Ultimate Black
For best value: Solution Finish Trim Restorer
For maximum longevity: Cerakote Trim Coat
For DIY enthusiasts: Heat gun + Gtechniq C4 ceramic coating
The “best” depends on your priorities: convenience, cost, durability, or results quality.
How often should I restore my trim?
- With basic restorers: Every 4-8 weeks
- With premium restorers: Every 3-6 months
- With ceramic coating: Annual touch-up only
- With professional coating + maintenance: Every 18-24 months
Frequency also depends on climate, parking situation, and washing habits. Garage-kept vehicles in moderate climates need less frequent restoration.
Can household products restore plastic trim?
Short answer: Avoid them. While internet myths suggest peanut butter, olive oil, or WD-40 can restore trim, these create temporary cosmetic improvement while accelerating long-term degradation. They:
- Provide no UV protection
- Attract dirt and contaminants
- Can damage plastic molecular structure
- Wash away within days
- Complicate future proper restoration
Automotive-specific products cost only slightly more and actually work.
Does UV exposure permanently damage plastic bumper trim?
UV damage is cumulative and progressive but not necessarily permanent. Early-stage oxidation can be reversed with chemical restorers or heat guns. Severe, long-term UV exposure causes permanent structural changes, texture loss, and brittleness that no restoration can fully reverse—only cosmetically improve. This is why preventive UV protection is so important.
Why does my black plastic trim look faded even though the car is garaged?
Several possibilities:
- Previous owner didn’t garage the vehicle during critical early years
- Ambient UV exposure during driving
- Improper cleaning products stripped protective coatings
- Lower quality plastic from factory
- Chemical contamination from car washes or detailing products
Even garaged vehicles experience UV exposure during driving and need periodic restoration/protection.
Is it better to paint or restore faded bumper trim?
Restore if:
- Trim has only surface-level oxidation
- You want to maintain original texture
- Quick, budget-friendly solution needed
- Trim is moderately faded
Paint/Dye if:
- Trim is severely faded or cracked
- You want 2+ years of durability
- Perfect, uniform appearance is priority
- Trim texture is already damaged
For most situations, restoration + ceramic coating provides the best balance of cost, time, and results.
What causes the white chalky appearance on plastic bumper trim?
The white/chalky coating is oxidized plastic molecules that have migrated to the surface and degraded. UV radiation breaks molecular bonds, causing plasticizers and pigments to separate and accumulate on the surface as white residue. This is the same process that turns old plastic lawn furniture white.
How do I restore textured plastic bumper trim without losing the texture?
Use circular application motions with chemical restorers to work product into texture valleys. Avoid sanding or abrasive compounds. Heat gun method works excellently on textured trim without affecting texture pattern. For severely faded textured trim, multiple thin coats of dye allow texture to remain visible while providing complete color coverage.
Final Verdict: Best Method for Most People
After examining all restoration approaches, here’s the recommended strategy for 90% of DIYers seeking maximum results with reasonable effort:
The Optimal Combination Approach
Step 1: Restore Color (Choose based on fading severity)
- Light-Moderate fading: Premium chemical restorer like Solution Finish
- Moderate-Severe fading: Heat gun method for deep restoration
Step 2: Protect Investment
- Apply ceramic coating like Cerakote Trim Coat or Gtechniq C4
- This seals the restoration and provides 1-2 years of UV protection
Step 3: Maintain Quarterly
- Reapply ceramic booster spray or light sealant every 3 months
- Quick 10-minute process prevents oxidation from restarting
Why This Works Best
✅ Addresses both restoration AND protection (where most people fail)
✅ Provides 12-18+ months of results (excellent ROI on time/money)
✅ Beginner-friendly with professional results
✅ No expensive equipment required (heat gun is optional)
✅ Suitable for all vehicle ages and trim conditions
Quick Method Comparison
| Method | Cost | Time | Skill Level | Durability | Best For |
|---|---|---|---|---|---|
| Basic Restorer Only | $ | 20 min | Beginner | 2-6 weeks | Quick fixes |
| Premium Restorer + Sealant | $$ | 45 min | Beginner | 3-6 months | Budget-conscious |
| Heat Gun + Ceramic | $$$ | 2 hrs | Intermediate | 12-18 mo | Enthusiasts |
| Trim Dye/Coating | $$$ | 3 hrs | Intermediate | 18-24 mo | Show cars |
| Recommended Combo | $$ | 1 hr | Beginner | 12-18 mo | Most people |
The Complete Recommended Kit
For maximum results at reasonable cost, purchase:
- Cleaning: 303 Automotive All-Purpose Cleaner
- Restoration: Solution Finish Trim Restorer
- Protection: Cerakote Trim Coat
- Maintenance: CarPro Reload Spray Sealant
- Application: Microfiber Applicator Pack
Total Investment: $60-80
Results Duration: 12-18 months
Cost Per Month: $3.33-6.66
Compare this to professional detailing trim restoration at $150-300, and the DIY approach becomes obviously appealing.
Get Started Today
You now have everything needed to transform your faded, gray plastic bumper trim back to deep, rich black—and keep it that way for years.
Your Next Steps
1. Assess Your Trim Condition
- Examine your vehicle in good lighting
- Identify fading severity (light, moderate, or severe)
- Choose appropriate restoration method
2. Gather Your Supplies
- Order recommended products using the links throughout this guide
- Ensure you have microfiber towels and applicators
- Set aside 1-2 hours in your schedule
3. Follow the Process
- Proper cleaning and prep (no shortcuts!)
- Apply your chosen restoration method
- Seal with appropriate protection
- Document your before/after results
4. Establish Maintenance Routine
- Calendar reminder for quarterly protectant reapplication
- Include trim inspection in regular washing routine
- Enjoy your refreshed vehicle appearance
Recommended Product Bundles
Budget Starter Kit ($30-40):
- All-purpose cleaner [AFFILIATE PRODUCT PLACEHOLDER]
- Meguiar’s Ultimate Black [AFFILIATE PRODUCT PLACEHOLDER]
- UV protectant spray [AFFILIATE PRODUCT PLACEHOLDER]
- Microfiber towels [AFFILIATE PRODUCT PLACEHOLDER]
Professional Results Kit ($60-80):
- Dedicated trim cleaner [AFFILIATE PRODUCT PLACEHOLDER]
- Solution Finish Restorer [AFFILIATE PRODUCT PLACEHOLDER]
- Cerakote Trim Coat [AFFILIATE PRODUCT PLACEHOLDER]
- Quality applicators and towels [AFFILIATE PRODUCT PLACEHOLDER]
Advanced Enthusiast Kit ($100-140):
Related Guides You’ll Find Helpful
Continue Your DIY Detailing Journey:
- Can You Fix Car Paint Chips Yourself? DIY Guide to Touch-Ups
- How to Properly Wax Your Car for Maximum Shine
- Car Deep Cleaning Checklist: Everything You Need for a Spotless Finish
- Best Way to Clean Car Upholstery: Stains, Spills, and Everything Else
- How to Clean Wheels on Car: Get That Showroom-Ready Look
Final Thought: Faded plastic bumper trim ages your car more dramatically than almost any other single factor. The transformation from oxidized gray to rich black takes less time than detailing your interior but creates an equal visual impact. Whether you’re preparing for resale, restoring an older vehicle, or simply maintaining your pride and joy, restored trim completely refreshes your vehicle’s appearance.
The methods in this guide work on any car—from economy sedans to luxury SUVs, from 3-year-old daily drivers to 20-year-old project cars. Start with proper cleaning, choose the restoration method matching your needs, seal your work with UV protection, and maintain quarterly. The difference is immediate, dramatic, and completely achievable.
Your car’s transformation is one afternoon away. Get started today.
Disclaimer: This article contains affiliate links. If you purchase an item through the link I will earn a small commission at no extra cost to you.